Form templates need various fields defined and created on the blank (not filled-in) original form. These fields define the type of image operations and text recognition that is performed against your filled-in forms during forms processing.
What are Form Fields
A field is a single rectangular region on a form image used by forms processing engines to extract data.
A field contains the field image area and all associated attributes and properties to define a single rectangular region and specific form processing recognition or enhancement on that region. The field information is associated with a specific form and is therefore stored in the Form Definition File (.frd).
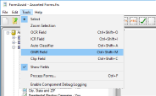
There are five different field types to choose from in the top toolbar of FormAssist:
| OCR Tool |
This button displays the blue ABC icon. See OCR Fields for details on creating these field types. |
| Auto Classifier Tool |
This button Displays the blue and orange A/A icon. See Auto Classifier Fields for details on creating these field types. |
| ICR Tool |
This button displays the orange abc icon. See ICR Fields for details on creating these field types. |
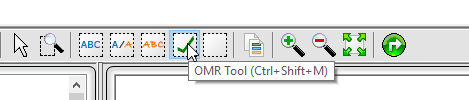
| OMR Tool |
This button displays the check mark icon. See OMR Fields for details on creating these field types. |
| Clip Tool |
The button contains a blank icon. See Clip Fields for details on creating these field types. |

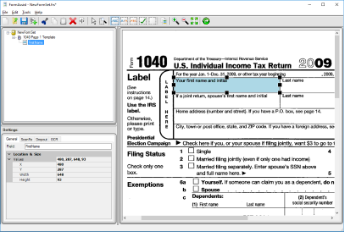
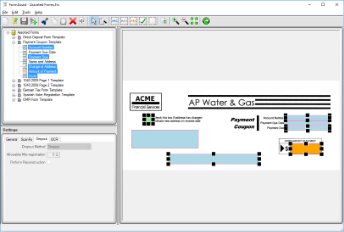
FormAssist with a field selected on a form and the field properties displayed in the Properties View
The image above displays an example field highlighted (First Name and Initial) on both the Tree and Image Views.
- The Tree View displays the name and icon.
- The Image View outlines the field area currently selected.
- The Properties View displays the adjustable properties for the field type selected.
- All field types have General, Dropout and ScanFix Xpress property tabs. ICR, OCR, and OMR have type specific property tabs.
Steps to Define, Create, and Modify Fields
-
Create a template as described in the Create a Form Template topic.
-
To create a specific field type, choose a tool from the Tools menu.
You can also click on the field button in the toolbar or press the corresponding shortcut keys:
-
Define a field by selecting the corner of the field in the Image View on the form image with your mouse and drag to the diagonal corner.
The defined field will highlight in blue so it's obvious what area is defined on the form. This field can be modified at any time which will modify the area values displayed in the Properties View. Likewise the field area values may be modified in the Properties View which will modify the highlighted field area in the Image View.
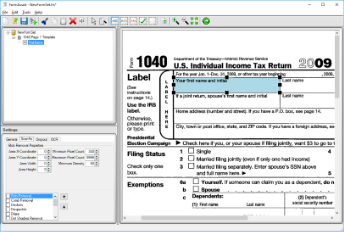
A field name is added in the Tree View. This name can be modified at this location or in the Properties View Field text box as shown below:
The example below is defining an OCR field for the first name area on the original form. All field types are defined this same way.
-
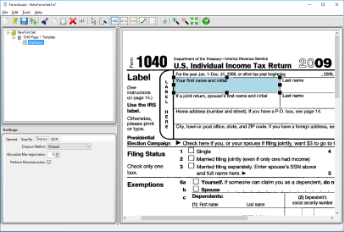
Modify the ScanFix Xpress Properties
Adjust the settings for ScanFix Xpress image operations by selecting the ScanFix Xpress tab in the Properties View, as shown below. For best results, clean up the field area image using the ScanFix Xpress image operations as applicable. See the Image Enhancement and Dropout topics for more detailed information on image clean up. See the ScanFix Xpress Properties topic for details on each setting.
-
Modify the Dropout Properties
Adjust the settings for the Dropout image operations by selecting the Dropout tab in the Properties View, as shown below.
See the Dropout Properties topic for information on Dropout and details on its property values and how to set them for best results.
-
Set field type specific settings in the Properties View.
See each specific topic for a given field type:
-
Modify the position and size of the field
You can adjust the field size and location by choosing the select tool. Once this tool is selected, you can choose a field from the Tree View or from the Image View. After selecting a field, adjustment thumbs become visible that will allow you to resize the image in any direction. Just move the mouse over the thumb (the mouse cursor will switch to arrows), left-click and drag. Release the mouse button when you are satisfied with the new size of the field. To move the field, move the mouse over the field until the cursor changes to a box with a + sign. Left-click and drag to reposition the field.
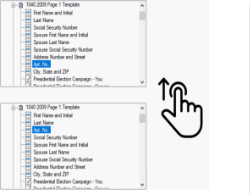
- Working with multiple fields
FormAssist allows selection of multiple fields in a form template for group operations. Multiple fields can be selected for copying and pasting from one template to another, or for deleting them from a template. To select multiple fields in a template, hold the SHIFT button to click and select a range of fields, or the CTRL button to select multiple non-contiguous fields one by one.
- Change the order of fields
The order of fields in the template as seen in the tree view also dictates the order in which results are returned after processing of a filled form. The order of fields within a template can be changed using drag and drop. To change the order of a field, select the form field, hold the left mouse button, and drag the field to the new position. Release left mouse button and save the form with the updated order.
-
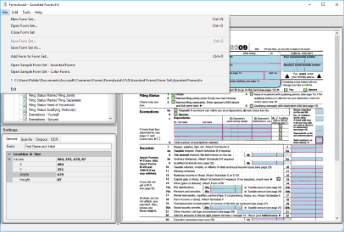
Select Save Form Set As... or Save Form Set...
Once your field or fields are defined and all your property settings have been set, make sure and save your form set if you haven't done so already. You can continue to modify, create and delete templates, fields and properties at any time.
In this example, the form set was saved as Sample Form Set.frs, as displayed in the title bar of the window.
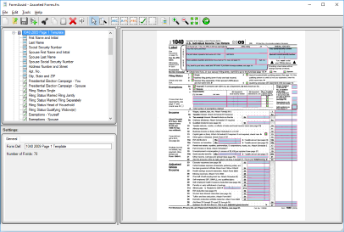
The image above displays an example of some of the field types defined and created on the template, 1040 Page 1 Template, within the Form Set, Assorted Forms.
See Also