PrizmDoc for Java Annotations Support
PrizmDoc® for Java for IBM FileNet P8 offers two formats for saving annotations data. The first is referred to as “Snowbound” annotations. Snowbound annotations are a proprietary annotations data format that support all annotations features available in PrizmDoc® for Java.
The second annotations format is “FileNet” annotations. FileNet annotations utilize an annotations data format that matches the IBM specification for annotations, allowing the standard IBM viewer to be able to display annotations created in PrizmDoc® for Java.
Annotation Format Configuration
The PrizmDoc® for Java for ICN comes configured for FileNet annotations. This value can be changed by opening the web.xml file located in the virtualviewer\WEB-INF folder and changing the “annotationOutputFormat” parameter to a value of “snowbound”. For FileNet annotations, the value should be set to “FileNet”.
        <init-param>
            <param-name>annotationOutputFormat</param-name>
            <param-value>FileNet</param-value>
        </init-param>
FileNet Configuration for PrizmDoc® for Java Annotations
The PrizmDoc® for Java utilizes its own custom class within P8 for the storage of Annotation data. The class, SnowboundAnnotation, is a subclass of the Annotation class. In addition, PrizmDoc® for Java utilizes a custom property, SnowboundAnnoLayerName, to store the name of the Annotation Layer that an Annotation is saved on.
There are two ways to configure P8 for PrizmDoc® for Java Annotations. The first option is to allow the P8 Content Handler to complete the configuration. The second is to configure it manually.
Automated Configuration of Annotations Class and Custom Property
To allow the P8 Content Handler to complete the configuration of all custom Annotations objects in P8, configure the Virtual Viewer to utilize an Administrator account that has the permissions required to create a subclass of the Annotation class and to create a custom property and then open an image in PrizmDoc® for Java, add an Annotation to the image and save it. The PrizmDoc® for Java will determine that the Annotations configuration needs to be completed and will perform all required tasks.
To configure PrizmDoc® for Java with an Administrator account, follow the instructions in the section of this document titled “Configuring PrizmDoc® for Java Web Application”. You can find those instructions here for a WebSphere deployment and here for a Distributed deployment.
Manual Configuration of Annotations Class and Custom Property
To manually configure P8 to utilize PrizmDoc® for Java Annotations, complete the following tasks:
Create SnowboundAnnotation Class
- Browse to the IBM Administrative Console for Content Platform Engine (ACCE)
- Log in with an ID that has permissions to create a subclass of the Annotations class and a custom property
-
Select the Object Store that contains the Document Class(es) that will be utilizing PrizmDoc® for Java Annotations
-
Expand the Treeview to Data Design -> Classes -> Other Classes
-
Locate and expand the Annotation class and confirm that there is not a SnowboundAnnotation class already created.
-
If SnowboundAnnotation does not exist, continue with the manual configuration.
-
If SnowboundAnnotation does exist, do not continue following these instructions. To troubleshoot issues with saving Annotations in PrizmDoc® for Java, please go to the Troubleshooting section of this document and view the section titled “Cannot Save PrizmDoc® for Java Annotations”.
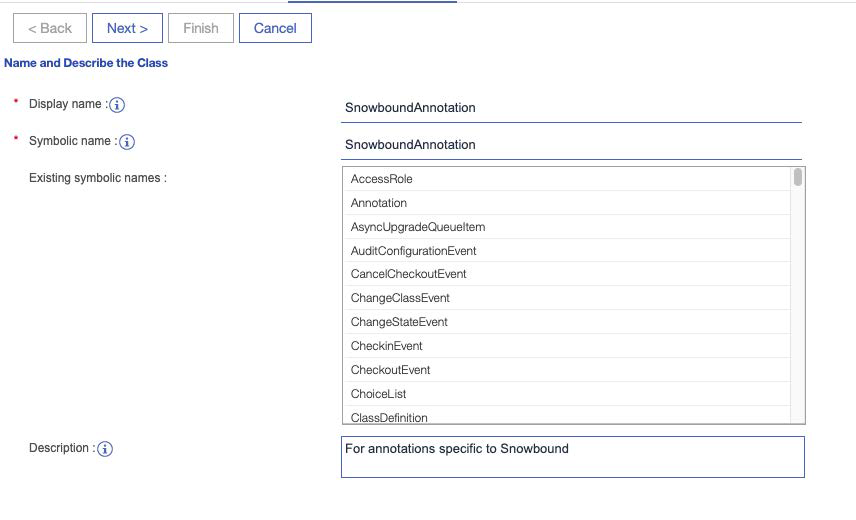
- Select the Annotation Class and then right click and choose New Class

-
Enter a Display name value of SnowboundAnnotation
-
Tab out of the Display name field and confirm that the Symbolic name is populated with SnowboundAnnotation. Do not change this value.
-
The Description is also updated with the value SnowboundAnnotation. This can be left as-is or updated as desired. To match what the P8 Content Handler inputs, you can enter For annotations specific to Snowbound.

-
Click Next
-
A Summary screen will be displayed. Click Finish.
-
Open the new Class by selecting it in the Treeview at Data Design -> Classes -> Other Classes -> Annotation -> SnowboundAnnotation
-
Review the Default Instance Security and ensure that all users that will need the ability to create and edit Annotations are accounted for and granted the proper Permissions. At a minimum, SnowboundAnnotation Default Instance Security should match what is configured for the Annotation class.
-
Note – In order for PrizmDoc® for Java to have the ability to create and update Annotations, the ID used in the P8ContentHandler.properties file (configuration details for WebSphere deployment here and Distributed deployment here) must also have the following permissions on the Object Store:
-
Connect to store
-
Create new objects
-
Modify existing objects
-
Create SnowboundAnnoLayerName Custom Property
-
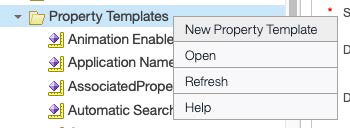
Continuing in ACCE, expand Data Design->Property Templates
-
Right Click on Property Templates and select New Property Template
-
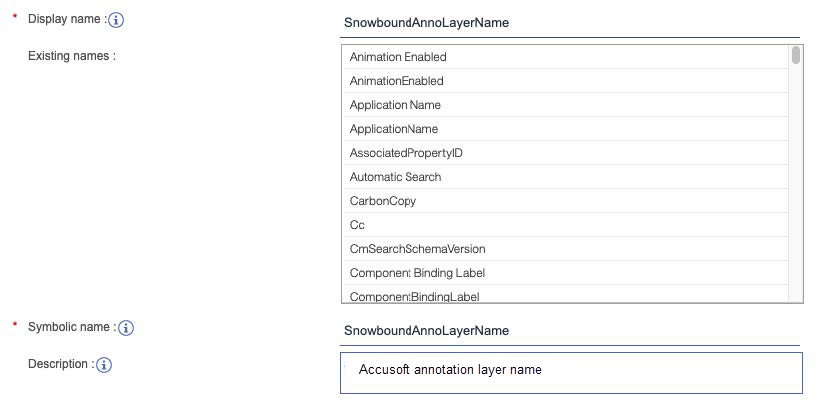
Enter a Display name value of SnowboundAnnoLayerName
-
Tab out of the Display name field and confirm that the Symbolic name field was populated with a value of SnowboundAnnoLayerName
-
The Description is also updated with the value SnowboundAnnoLayerName. This can be left as-is or updated as desired. To match what the P8 Content Handler inputs, you can enter Snowbound annotation layer name.
-
Click Next
-
Select String as the Data type and click Next
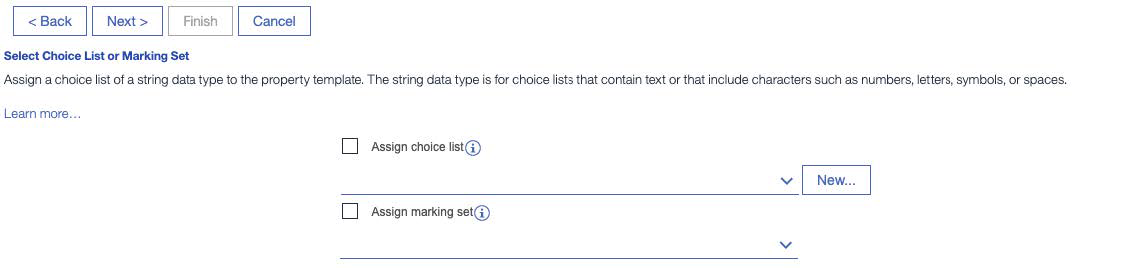
- Leave the Assign choice list and Assign marking set check boxes Unchecked and click Next
- Leave Single or multi-value set to Single and click Next
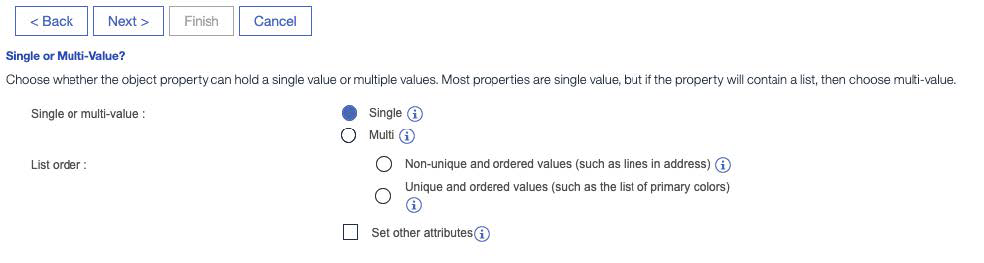
-
Review the settings on the Summary screen and, if all are correct, click Finish
-
Assign SnowboundAnnoLayerName to SnowboundAnnotation Class
-
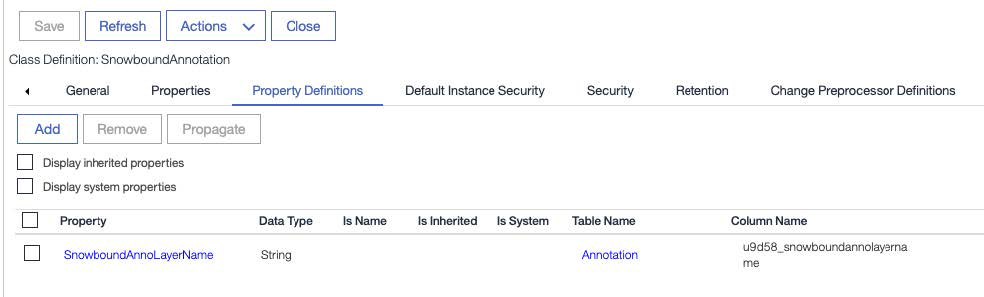
Open the SnowboundAnnotation Class in ACCE by expanding Data Design -> Classes -> Other Classes -> Annotation and double clicking on SnowboundAnnotation
-
Select the Property Definitions tab and click Add
-
Locate the SnowboundAnnoLayerName Property, select it and click OK
-
Click Save
Have questions, corrections, or concerns about this topic? Please let us know!