
ImageGear .NET - Updated
ART Mark Annotations
ImageGear ART helps developers to add redlining and annotation capabilities to any application built with ImageGear. If you have an application that can read, display, and print images, with the ImageGear.ART Namespace enabled, you can add marking capabilities, such as lines, arrows, highlighting, and sticky notes to document images, and use them as though you were working on printed sheets of paper.
The fundamental "unit" of annotation is called an "ART Mark", or "mark" for short (the original name of ImageGear ART was the "Annotation and Redlining Toolkit"). When the end-user uses your application to annotate an image, (s)he is creating marks. Each mark is defined by some geometry ((x,y) position on the image, height and width, etc.), and (for some marks) textual information (a text string, a date, etc.). While the rest of ImageGear typically works with raster (pixel-based) images, ImageGear ART marks are vector objects a they can be moved, resized, and deleted.
While the marks are vector objects, they typically are intended to be related to some part of the raster image. For example, one of the marks is a digital version of a "PostIt" note (called an "Attach A Note" mark):
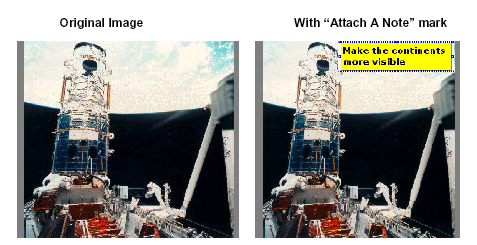
If the user scrolls or zooms the image, it's critical that the mark scrolls or zooms with the image a so that it always appears over the same part of the image. ImageGear ART works in conjunction with ImGearPageDisplay Class to make sure that this happens.
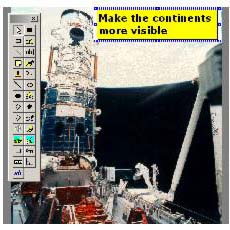
For WinForms applications, ImageGear ART provides ART Forms (GUI) tool that the end-user works with to create and edit the marks. Enabling the ART Forms tool makes adding annotation/redlining capabilities to your application easier. See ImageGear.ART.Forms Namespace.
For WPF applications, ImageGear ART provides the WPF Annotator tool that the end-user works with to create and edit the marks. Enabling the Annotator tool makes adding annotation/redlining capabilities to your application easier. See ImageGear.ART.Windows.Controls Namespace.
Once the end-user has created marks for a given image, they need to be saved. ART marks can be saved in the following ways:
The various marks that can be created with ImageGear ART are described in the following table. Please refer to the ImageGear.ART Namespace for complete descriptions of the ImageGear ART namespace methods.
| ART 3.0/ART 2.0 Mark | Example |
| Text |  |
| Line |  |
| Freehand Polyline |  |
| Rectangle |  |
| Ellipse |  |
| Polygon |  |
| Polyline |  |
| Polyline Ruler | 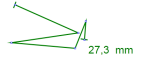 |
| Audio (a WAV file on disk is read, and the sound played when the user clicks in the mark) |  |
| Image (your application provided the image used - the one shown here is the one used in the sample program) |  |
| Ruler (when a mark is created or editied using the UI, the label’s numeric value is adjusted according to the image resolution and the chosen measurement unit) | 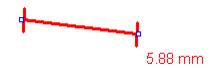 |
| Protractor | 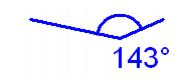 |
| Encryption (visually looks like a filled rectangle). When user clicks on the rectangle, an event is raised allowing to request a password. If password matches the one in the mark, then application can make the mark transparent, which displays the image) |  |
| Button (when user clicks on the button, an event is raised allowing to take action) |  |
| Hotspot (when end-user clicks in shaded area, an event is raised to which your application can respond) |  |
| Rich Text | 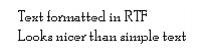 |
| ART 2.0 Mark | Example |
| Arrow | |
| Filled Rectangle |  |
| Hollow Rectangle |  |
| Filled Ellipse |  |
| Hollow Ellipse |  |
| Filled Polygon |  |
| Hollow Polygon |  |
| Redaction (looks just like a filled rectangle, but cannot be moved after the marks are written to a file) |  |
| Highlighter Rectangle |  |
| Typed Text |  |
| Text Stamp (automatically set to date and/ore time the mark was created) |  |
| Attach-A-Note |  |
| Text From File (a text file on disk is read, and the text displayed in the mark) |  |
| Pin-Up Text (when user clicks on the pushpin, an event is raised allowing the application to display additional text). |  |
| Embedded Image (your application provides the image used a the one shown here is the one used in the sample program) |  |
| Image Reference (an image file on disk is read, and the image in the file is displayed for the mark a the one shown here is just a sample) |  |
This section provides information about the following: