
PrizmDoc Viewer v13.7 - Updated
Get Started!
Welcome to PrizmDoc Viewer - let's get started!
This topic walks you through the steps you need to get PrizmDoc Viewer installed, configured, and running. You will also be able to integrate a basic viewer into your web app.
It's important to understand the basic structure of PrizmDoc Viewer when it's embedded in your web app. PrizmDoc Viewer contains 3 essential pieces:
Example:
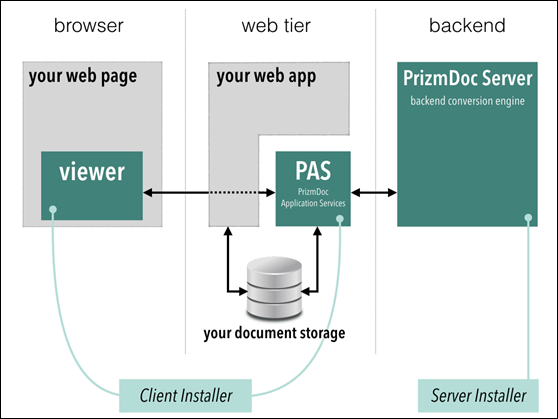
Key for diagram above:
Select this option if you want to host your back-end server with Accusoft:
Select this option if you want to host your back-end server on premise:
In this step, you will install PrizmDoc Server to set up the back-end:
This step covers installing the Viewer Assets and PAS. After you complete the installation, you need to verify that the Viewer is connected to the back-end.
http://localhost:18000/PrizmDoc_HTML5_Viewer_NET_WEBFORMS/
The following sections help you create a Viewing Session, embed the Viewer, and integrate your web application with PAS:
This section will help you implement our top features quickly based on your role:
The following additional resources are available: