To send print images, you can select the Print option from two locations:
- The Main Toolbar:
 or,
or,
- By right-clicking on the image which displays the Right-Click menu:
- Select Print... and the Print dialog box displays.
 |
The Print dialog box may look different depending on your operating system.
|
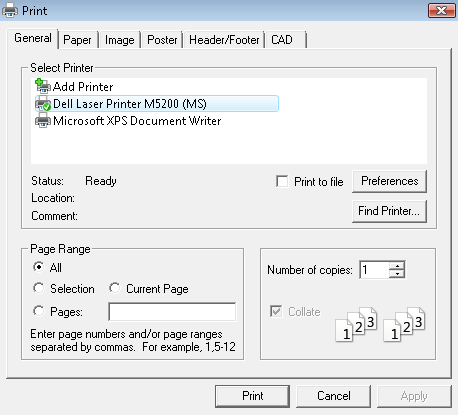
- The default tab displayed is the General tab.
- In the Select Printer group box, select a printer that is already installed or click Find Printer... to add a new printer that you want to print to.
- Select the Print to file check box to send the printer commands to a file.
|
Selecting this check box is not the same as saving an image to a file. This option only saves printer commands to a file, not a raster image. |
-
Click Preferences to select page layout, orientation, paper/output, and document options.
|
The Preferences option is only available with certain printers. If you do not see a Preferences button, then your printer does not support selecting additional preferences. |
-
In the Page Range group box, choose to print all pages, a selection, the current page, or one or more ranges of pages.
- In the Number of copies box, select the number of copies you want to print.
|
The Collate check box is selected as the default. The options to print multiple copies and collate are supported even if the printer driver does not natively support these features.
|
-
To make additional selections, click on any of the tabs at the top of the Print dialog box. The following tabs are explained in detail:
-
Once you have made all of your selections, click Print.
Notes & Tips
- Saving Settings - If you make selections in the General tab of the Print dialog box, the settings only remain for that specific print session. To make additional selections before starting the print session, select Preferences. When you have completed making your selections, click Print.
- Print to file check box - Selecting the Print to file check box is not the same as saving an image to a file. This option only saves printer commands to a file, not a raster image.
- Preferences - The Preferences option is only available with certain printers. If you do not see a Preferences button, then your printer does not support selecting additional preferences.
- Print Selection – To print a selection, do the following:
- Before opening the Print dialog, first make a selection on the currently displayed image page using the selection tool.
- With the selection still displayed, open the Print dialog.
- Select the Selection radio button in the Page Range group box to print the selection.
See Also