
PrizmDoc v13.0 - Updated
Overview
This section provides an overview of the Viewer so you can learn about using the functionality quickly and easily.
The PrizmDoc Viewer is a web application that lets you view, search, and annotate a large number of document types, including Microsoft Office, Adobe PDF, and more. The Viewer is designed to work on any device with a web browser, including desktop and laptop PCs, tablets and smartphones, and will work using a keyboard and mouse or touch input, all without installing a dedicated app.
Here is an example of how the Viewer looks:
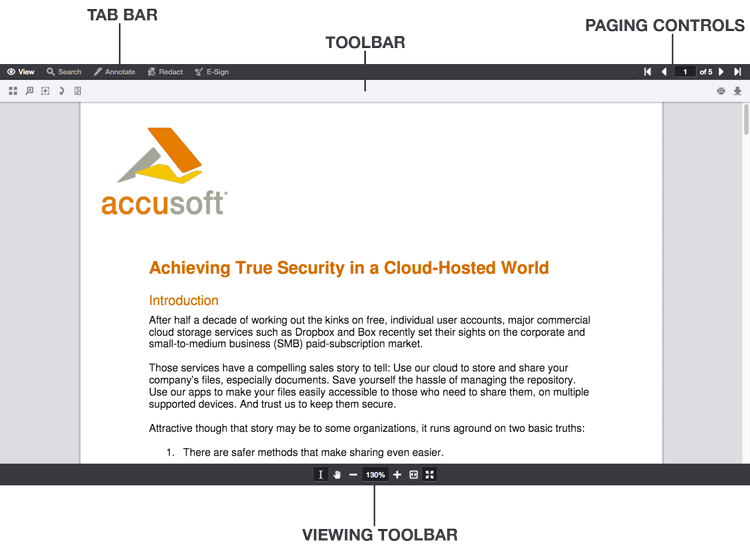
Once a document is loaded in the Viewer, you have the standard features for reading a document, as well as some more advanced features. You can scroll freely through the document, navigate between pages using paging controls, select text, and zoom in and out using a variety of tools, so that you can examine the document in greater detail.

The Viewer’s paging controls let you move between pages. Clicking the buttons on the left and right will take you to the first and last page, respectively. The other two buttons will take you back and forth one page at a time. If you want to jump to a specific page, enter the page number into the center input field, and press Enter.
To zoom in or out, press the plus and minus buttons at the bottom of the Viewer. If you need to zoom at a larger increment, press the zoom percentage to see a list of zoom levels:
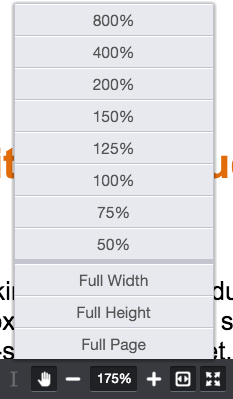
Choose from the list of percentages, or choose Full Width (zoom to the page width), Full Height (zoom to the full page height), and Full Page (make the entire page fit in the Viewer).
For very precise zooming, the Viewer has Magnifier and Rectangle Zoom tools:

The Magnifier tool acts like a magnifying glass on a paper document. Selecting this tool, and pressing within the document will magnify that portion of it to see more detail. The Rectangle Zoom tool enables you to press and drag a rectangle around a portion of the document you want to zoom in on. This lets you choose the exact portion of the document you want to focus on.
The Pan tool lets you move the view in a different direction, which is very helpful when you’re zoomed in and can’t see your whole document. The Pan tool is located at the bottom of the viewer next to the zoom controls:

With the Pan tool active, press and drag the cursor in any direction to pan around the document area.
To see an overview of your document, you can open the Thumbnails panel in the View tab to see small versions of every page in the document:

Once this panel is open, you can scroll through all of the pages, and press a thumbnail to immediately jump to that page. There’s a slider at the top of the panel that will increase or decrease the size of the thumbnails if you would like to see more or less detail in the thumbnails:

In addition to being able to view documents, you are also able to draw annotations, redact content, add e-signatures, download, and print documents all without altering the original.
The Text Selection tool allows you to select text and perform common operations on your selection via the Immediate Action Menu (IAM).

Once selected, press and drag the cursor to select text on a page. When you’re finished, release the cursor. If you’re using a mouse, a small rectangle with a menu icon appears:

Hover over this small rectangle, and you will see a list of common actions to perform with this text like Copy, Highlight, Redact, and more:
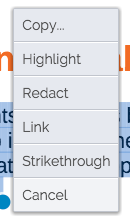
On touch devices, when you release the cursor the IAM will appear at the bottom automatically:
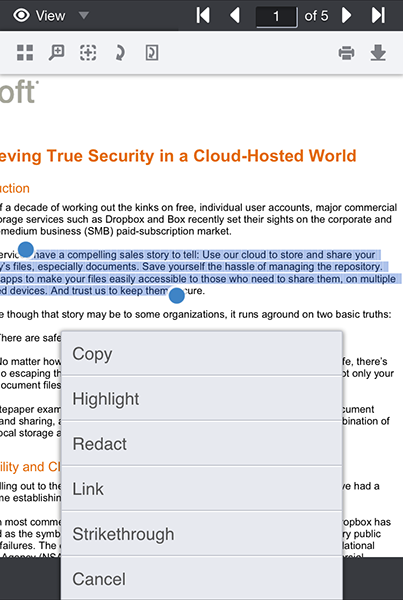
You can choose one of the actions, or press Cancel at the bottom to dismiss the menu.
You will also notice blue text selection handles around the text. If you would like to modify your selection, these handles can be dragged separately to change the selected text.
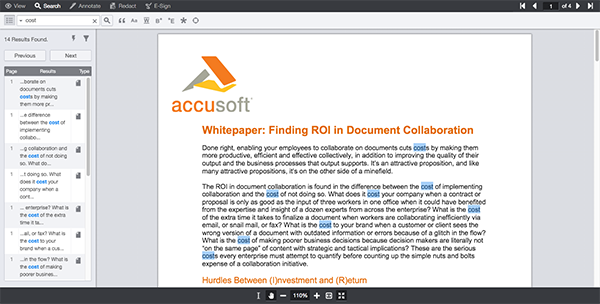
The Viewer contains a powerful search feature that will let you find words, phrases, and common bits of content like email addresses and postal codes. Opening the Search tab will display a search input box and search operators like match whole word, match case, and proximity search:

Enter a search term into the input box, and press the Search button or press Enter. The search results panel will open, displaying the search results. The search term(s) will also be highlighted on the document itself:
For more detailed information on searching, refer to the topic: Working with PrizmDoc > Viewer End-User Guides > Viewer Guide > Search Tab.
The Viewer allows you to mark up documents using three different categories of annotations: drawing, text, and image. Opening the Annotate tab will show you all various annotation types you can use:

Using these tools, you can add a variety of shapes, highlight text, create links to websites, add images, and more. To add an annotation, press the button for the mark you would like to add. Depending on which tool you’ve chosen, you might press and drag to add a shape anywhere on the document and of the size you need, or you might select a block of text to add a strikethrough.
Once you have added an annotation, a context menu will appear letting you change different settings for that mark:

Depending on the mark type, you can change things like color, border thickness, opacity, and layer order, or remove it from the document.
For those working with sensitive content, the Viewer's ability to redact content is a powerful feature. More than simply hiding content visually, once a document with redactions is exported or "burned," the redacted content is securely removed from the resulting document. Opening the Redact tab gives you access to three different ways to create redactions:

You may draw redactions of any size you need, create redactions from selected text, or add redactions to an entire page or range of pages, depending on your needs. Like annotations, redactions have a context menu that gives you access to settings like fill color, border color, and the chance to add text giving the reason why content has been redacted.
The Viewer's E-Sign tab allows you to sign, initial, and date documents electronically for convenient signing of important documents, removing the need to print, sign, scan, or fax paper copies:

You can draw your signature or initials for use in a document, or type it and choose a stylized font for your signature and initials. All signatures can be saved for use later, and reused among many documents, allowing for fast and easy e-signing. Once created, you can add a signature to the document, and size it and place it anywhere a signature is required. You can also quickly add today’s date with the Date tool:

After annotations, redactions or e-signatures (collectively known as "marks") have been added to a document in the Viewer, it’s possible to add, reply, and view comments associated with them.
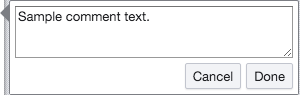
To add comments to marks, select the object (whether it be an annotation, redaction, or e-signature) to show the context menu. Pressing the comment button on the context menu will open the add comment dialog. Type into the input field, and press Done to add your comment (or cancel if you no longer want to add a comment):
To see the comments you or others have added to a document, press the comments button in the toolbar:

Depending on your screen size or your application’s configuration, you will see all comments displayed in full, or in "skinny" mode, where comments are indicated by an icon and are shown only when the indicator is pressed:

To hide the comments, press the comments button in the toolbar again.
Documents can be printed from the Viewer with standard printing options like page size and orientation, as well as options for including annotations, redactions and comments. To start the printing process, press the Print button in the toolbar:

Standard printing options like page size and which pages to print are shown first. If you would like to see additional options, press the More options button:
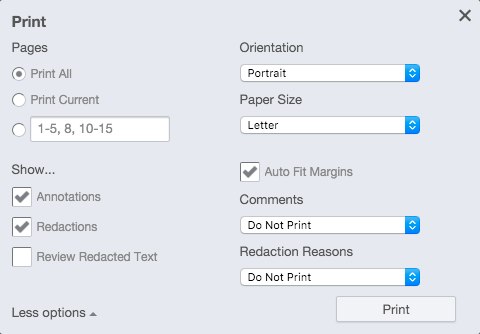
Select any of the options you need, and press the Print button. The Viewer will prepare the document for printing and launch your web browser’s print window to finish the process.
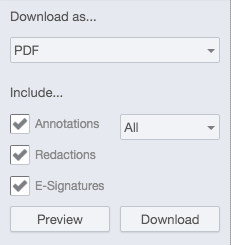
To download documents, you can press the Download button in the toolbar to open the download panel:

In the download panel, you can choose which document format you want to download, which marks you would like to include (if any), and the chance to preview what the downloaded document will look like:
Once you have chosen the download options that meet your needs, press the Download button to start the download process. When the new file is ready to download, you will see a Save button. Pressing this button will let you save the new file to your device.
For more details on how to use the Viewer, refer to the section: Viewer Guide.