![]()
Introduction
PrizmDoc® allows you to add powerful document viewing and document conversion functionality to your web applications.
IMPORTANT: New License Required for v14.0. If you are an existing customer, you will need to get a new license to use v14.0. To obtain a v14.0 license, contact info@accusoft.com.
Document Viewing for the Browser
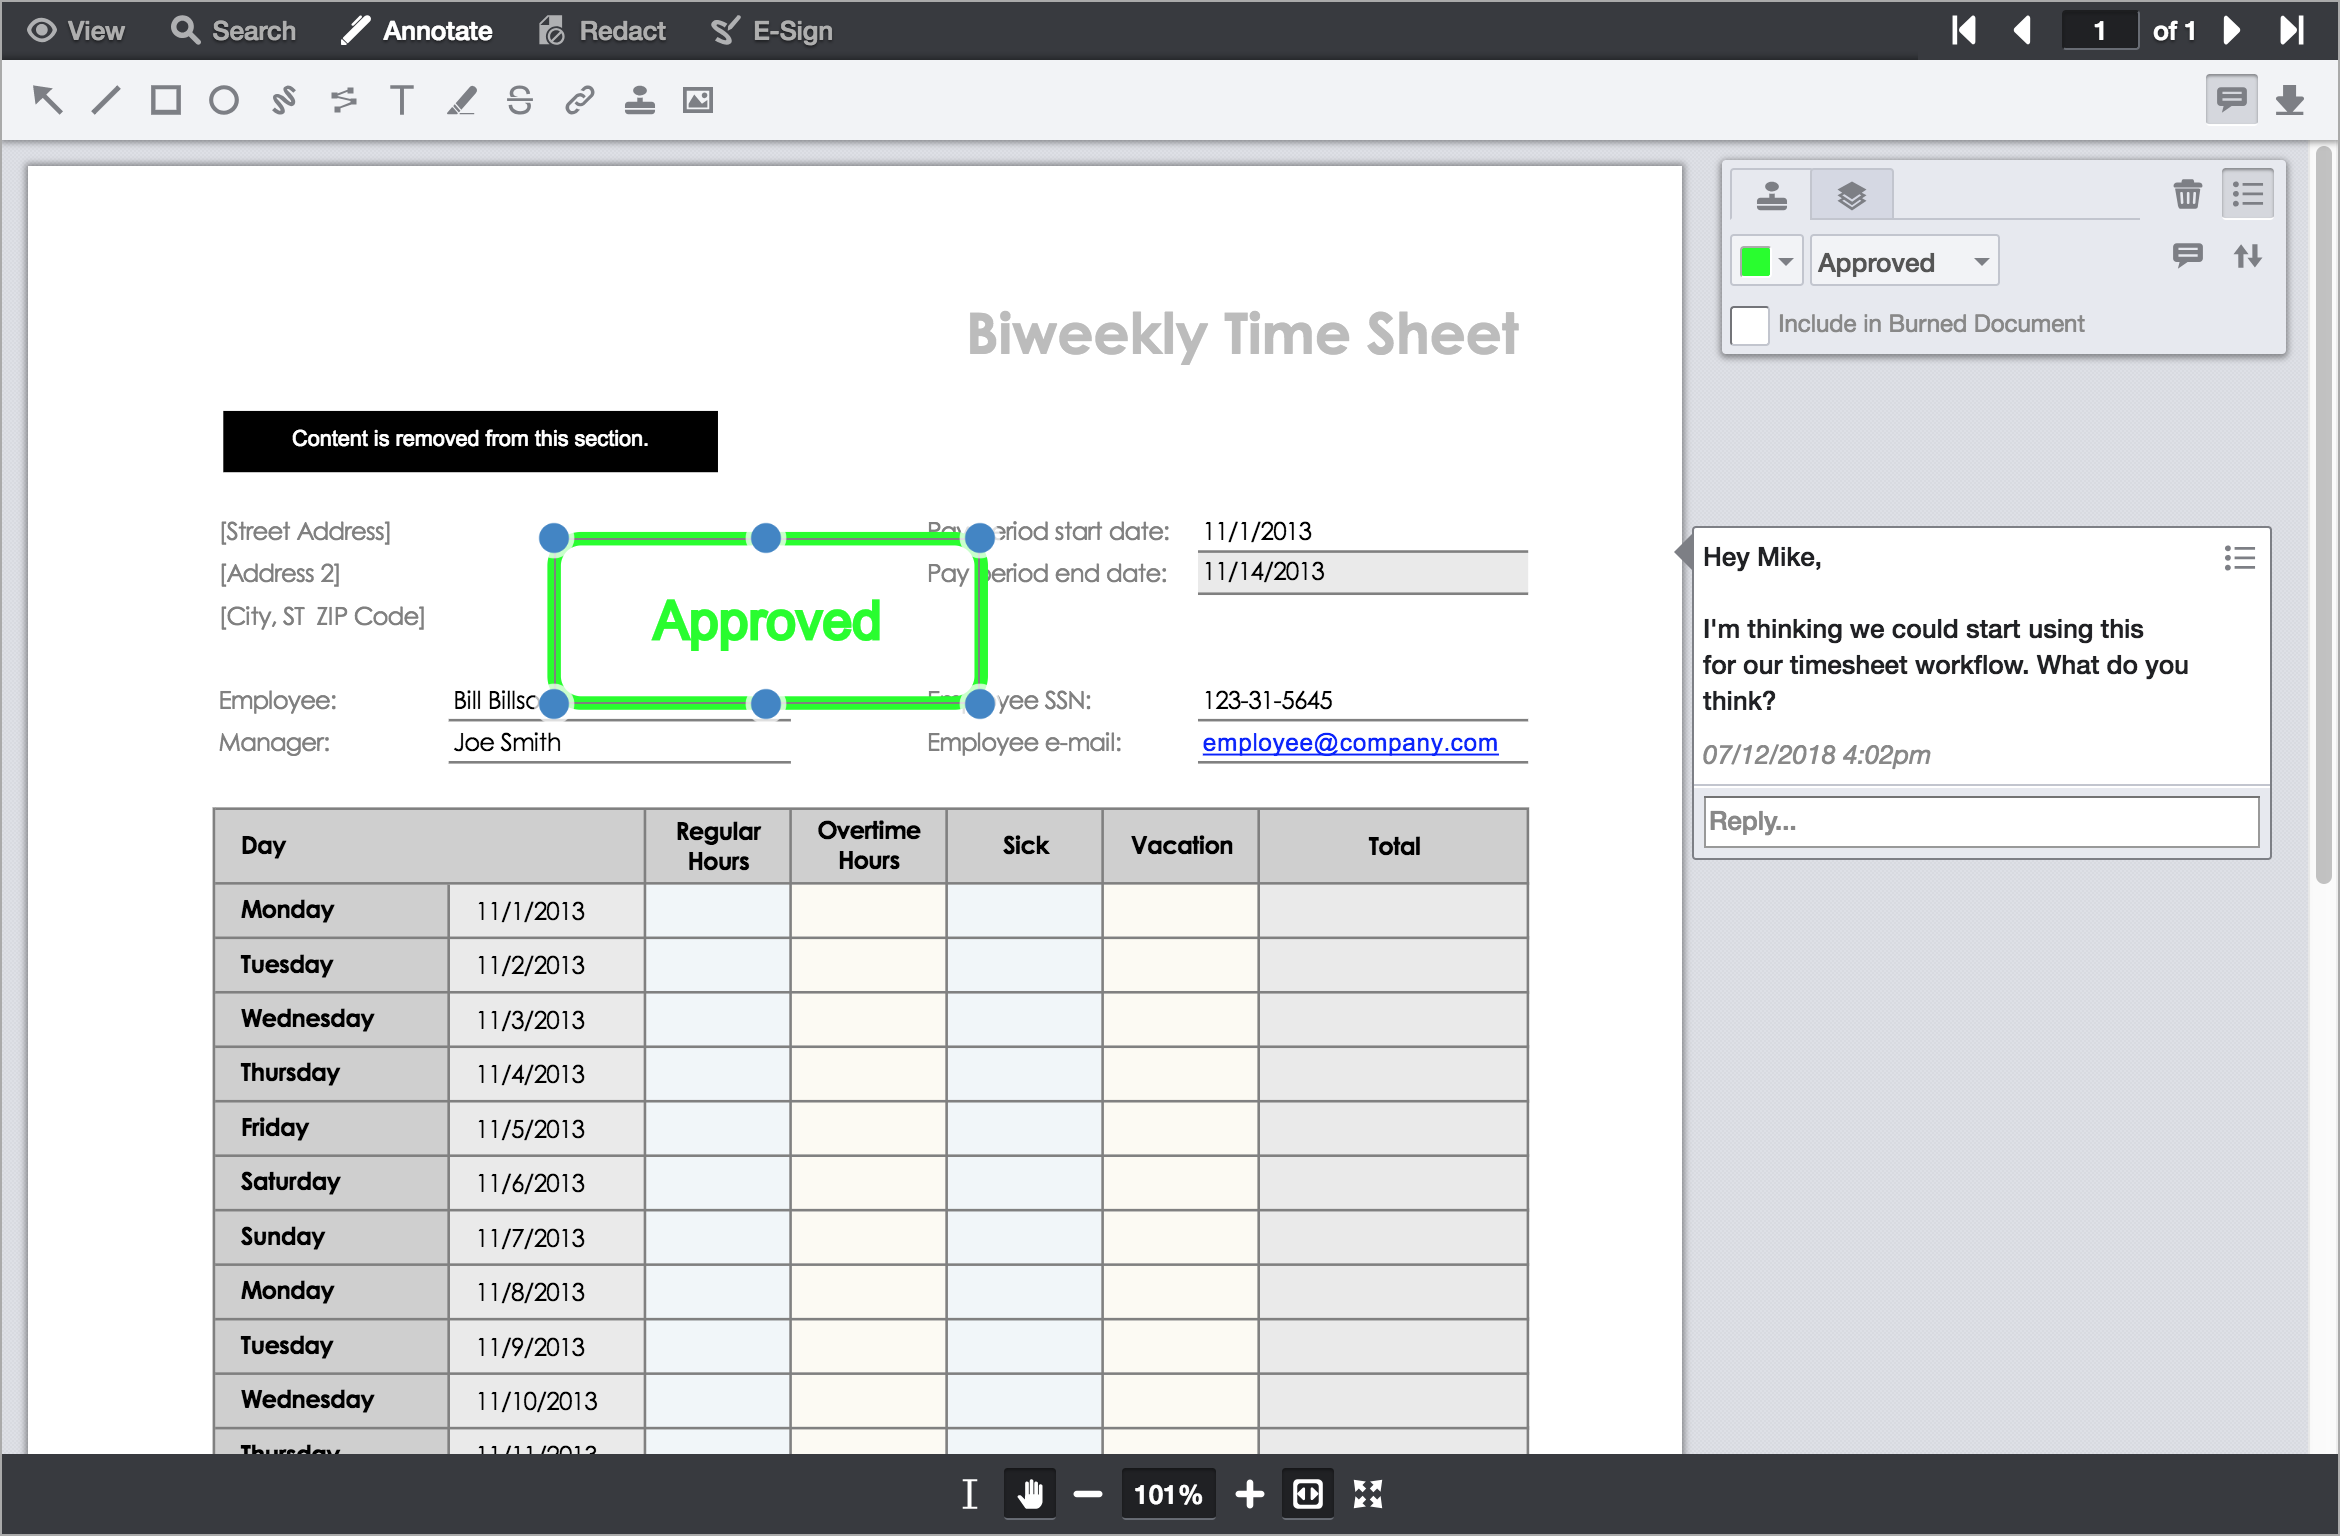
PrizmDoc includes an advanced HTML Viewer control which allows your users to view, search, annotate, redact, print, and download documents in many different file formats, right in their browser. They don't need to leave your application or install any custom software:
Seamless Integration
Our viewer is designed for seamless integration with your web application. Key features, like search and redaction, can be easily turned on or off depending on your application's needs (see the uiOptions Object). If you don't like the out-of-the-box UI layout or style, you can completely change it. And since the viewer has an extensive JavaScript API, your application can programmatically control and respond to the viewer.
Powerful Features
PrizmDoc offers powerful viewing features, including:
- The option to use Microsoft Office for high-fidelity rendering of Word, Excel, and PowerPoint files (included automatically with PrizmDoc Cloud)
- Support for viewing and searching of large documents with thousands of pages
- The ability to review changes between two different Microsoft Word files
- The option to pre-convert document content in advance for even faster viewing on the web
Overall Architecture
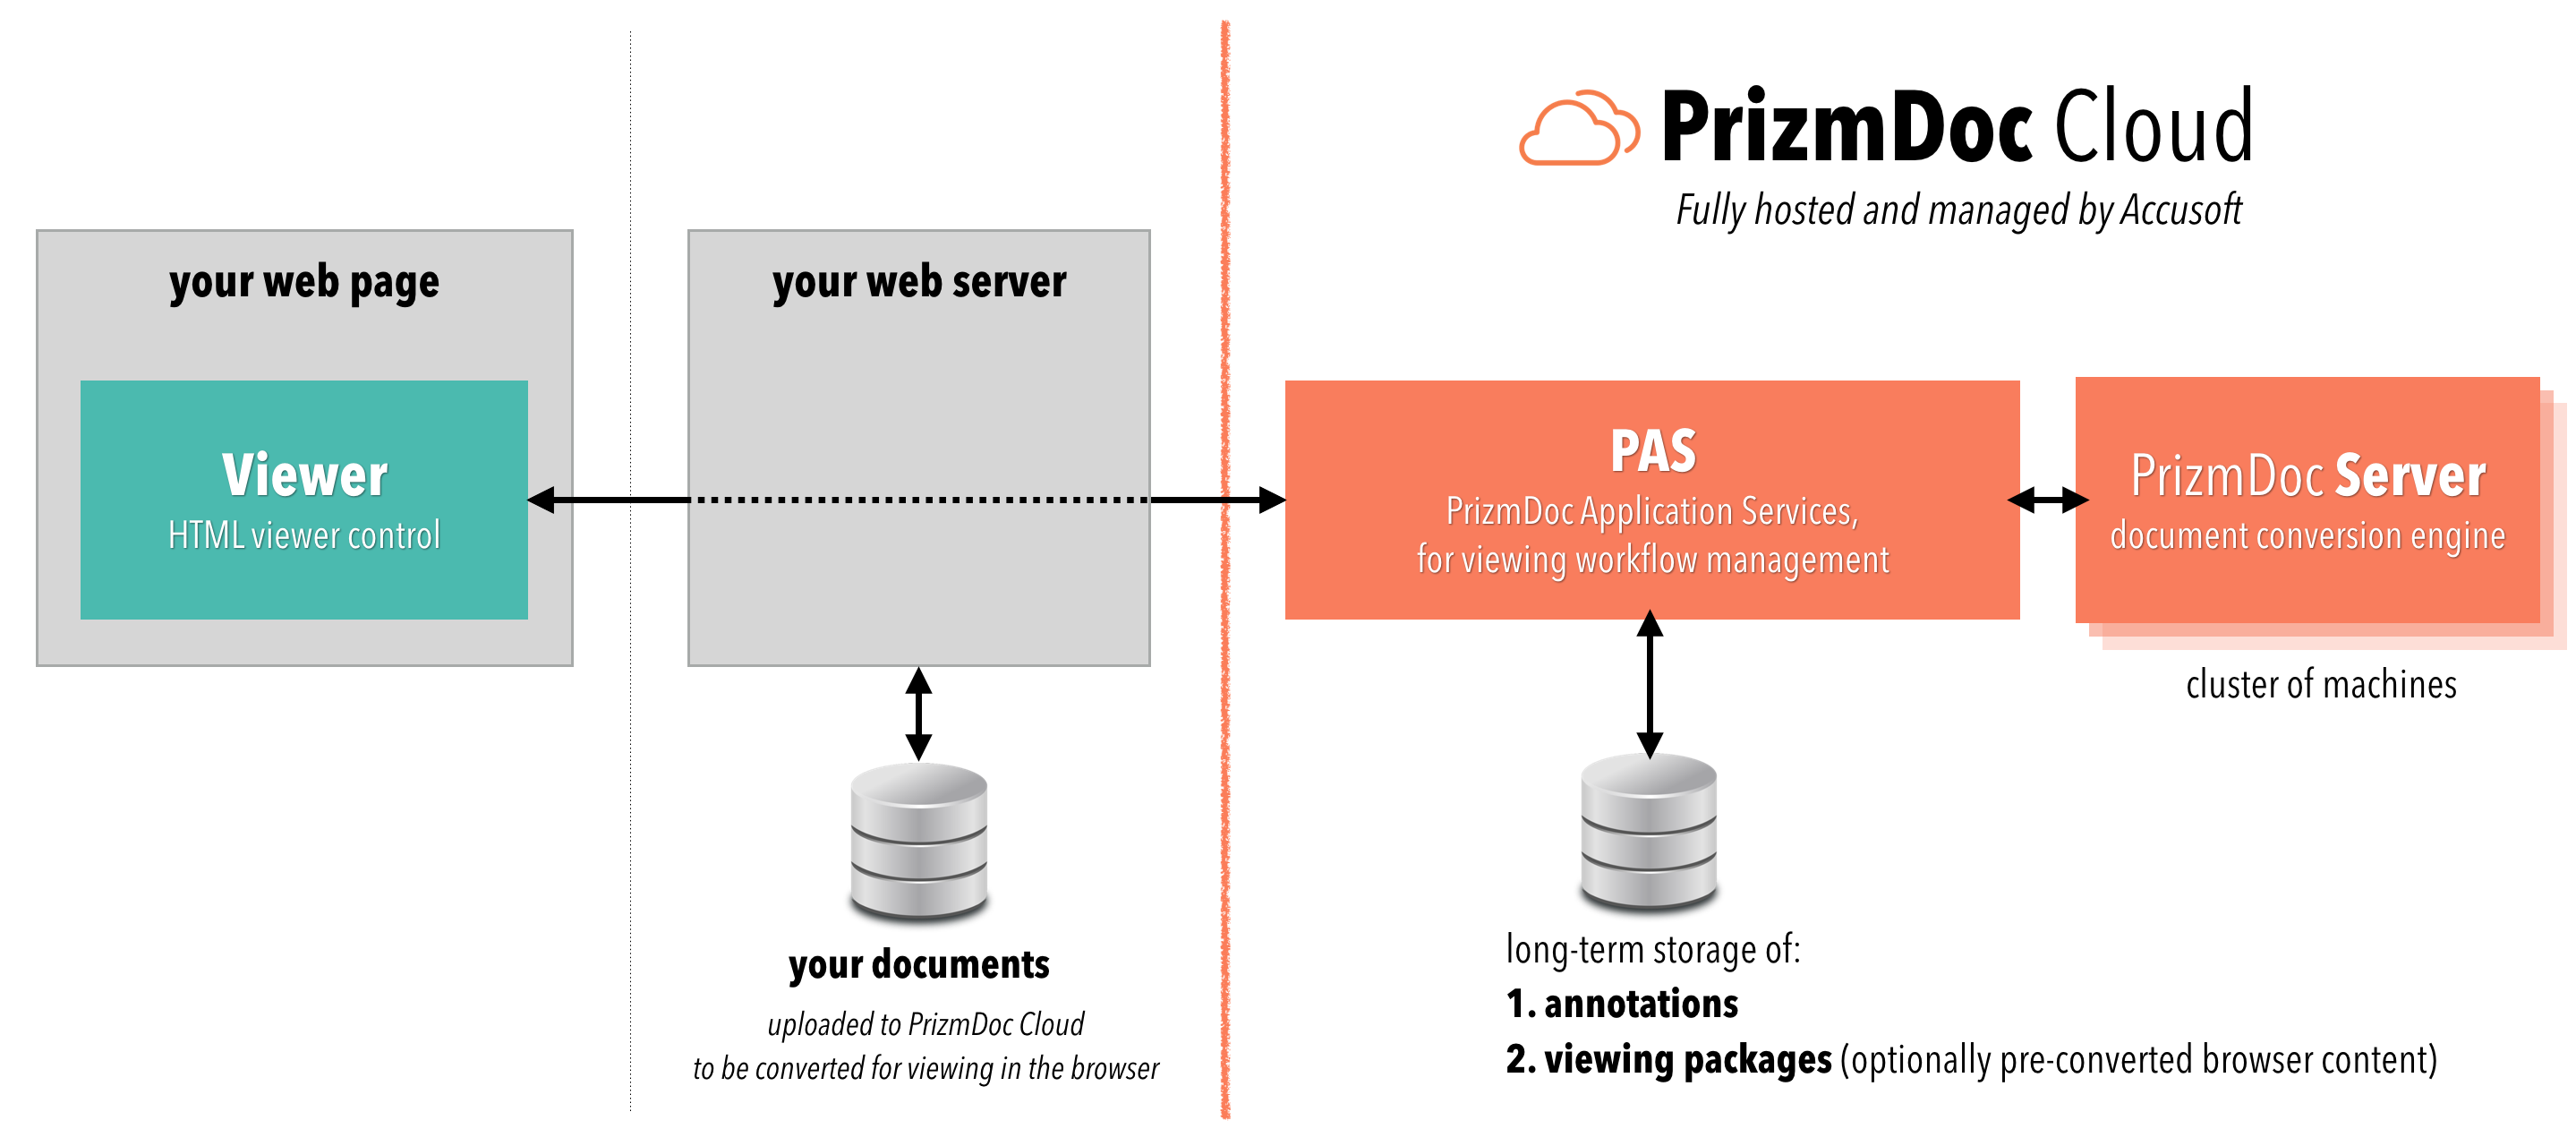
Viewing functionality is powered by 1) the HTML Viewer control and 2) powerful REST APIs and server-side software.
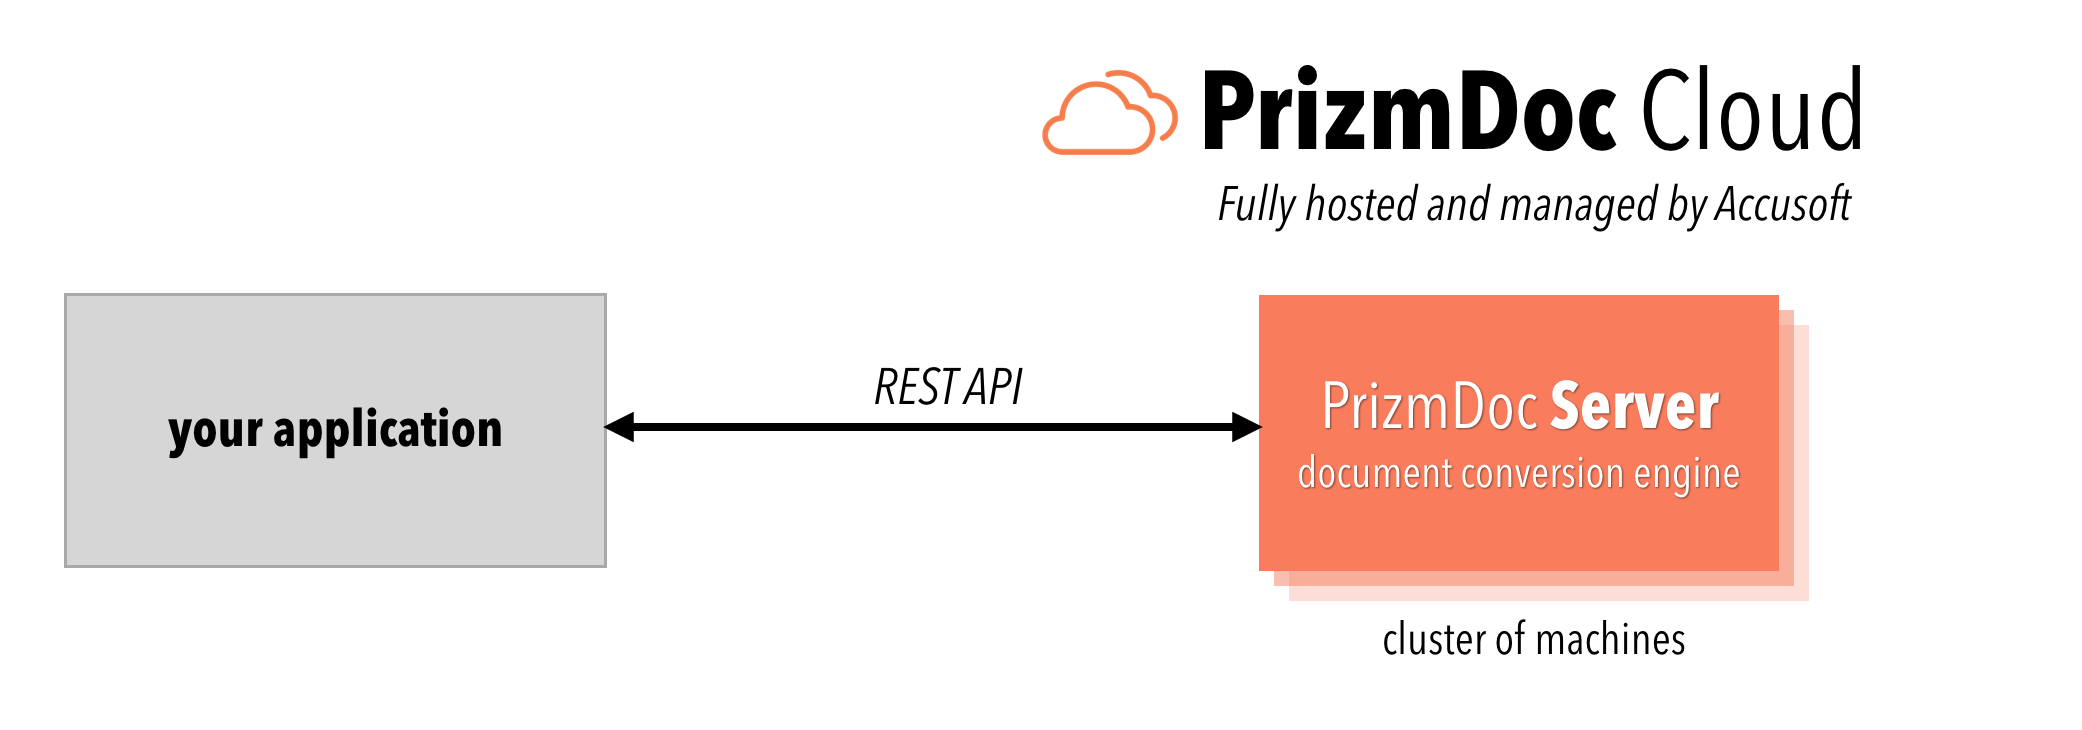
With PrizmDoc Cloud, we fully host and manage the server-side pieces of PrizmDoc for you:
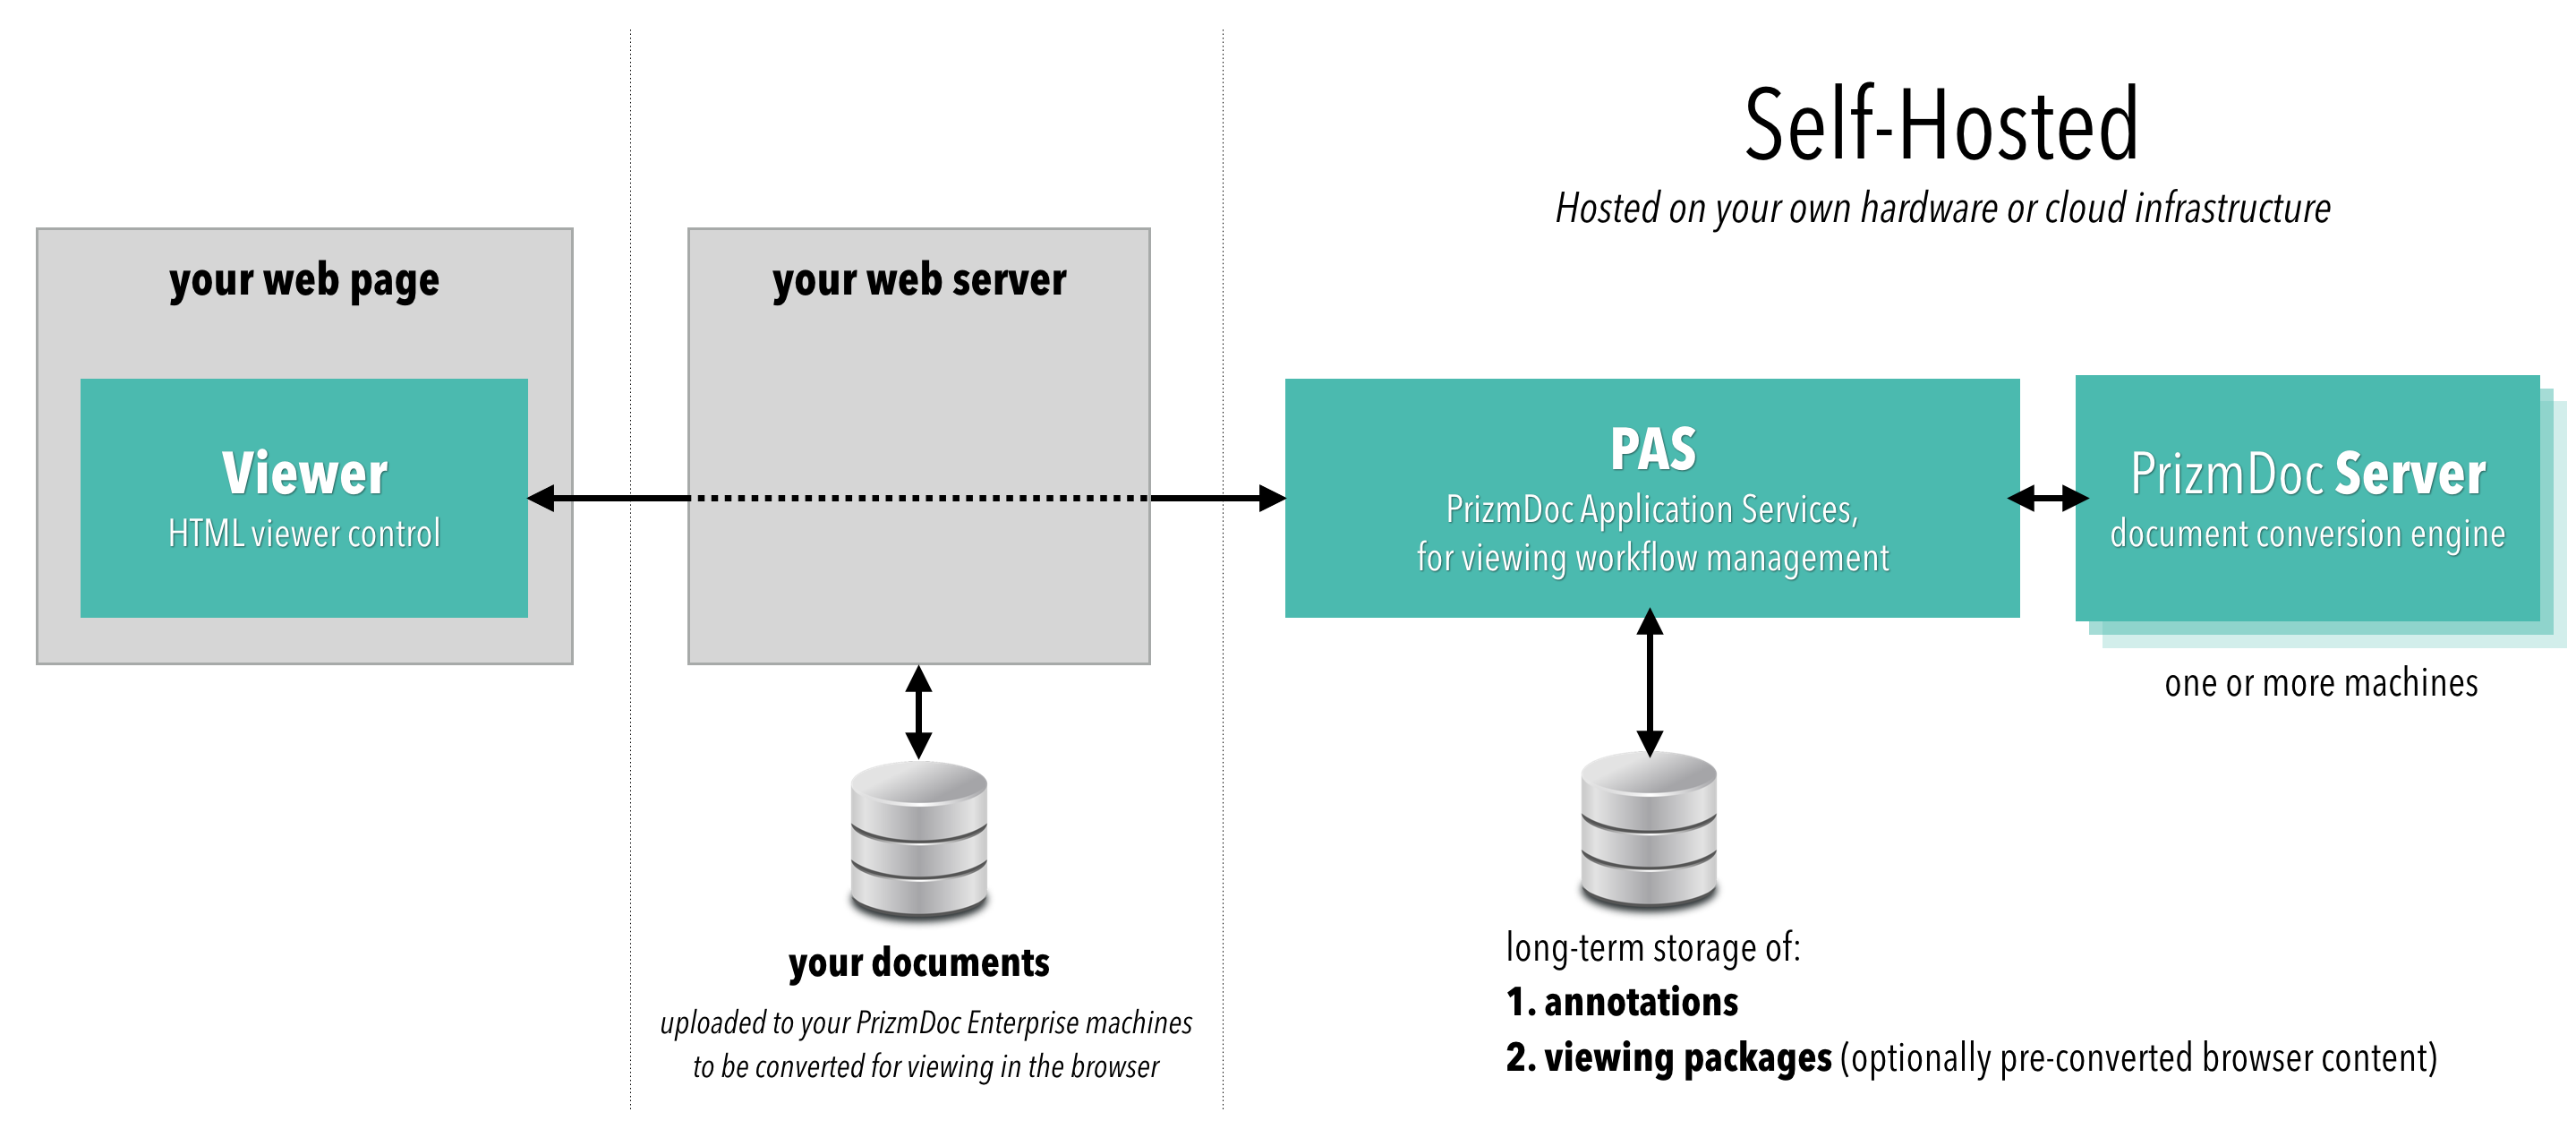
Or, you can self-host everything:
Document Conversion
You can use PrizmDoc's Content Conversion Service REST API to:
- Convert from Office, PDF, Email, HTML, TIFF, PNG, JPEG, CAD, and many other kinds of documents to PDF, TIFF, PNG, JPEG, or SVG
- Convert a non-searchable PDF or TIFF into a new, visually-identical PDF that supports full-text search
- Split and merge pages from multiple documents
- Apply headers, footers, or watermarks to a document
As with viewing, the conversion REST APIs offer the option to use Microsoft Office for high-fidelity conversion of Word, Excel, and PowerPoint files (included automatically with PrizmDoc Cloud).
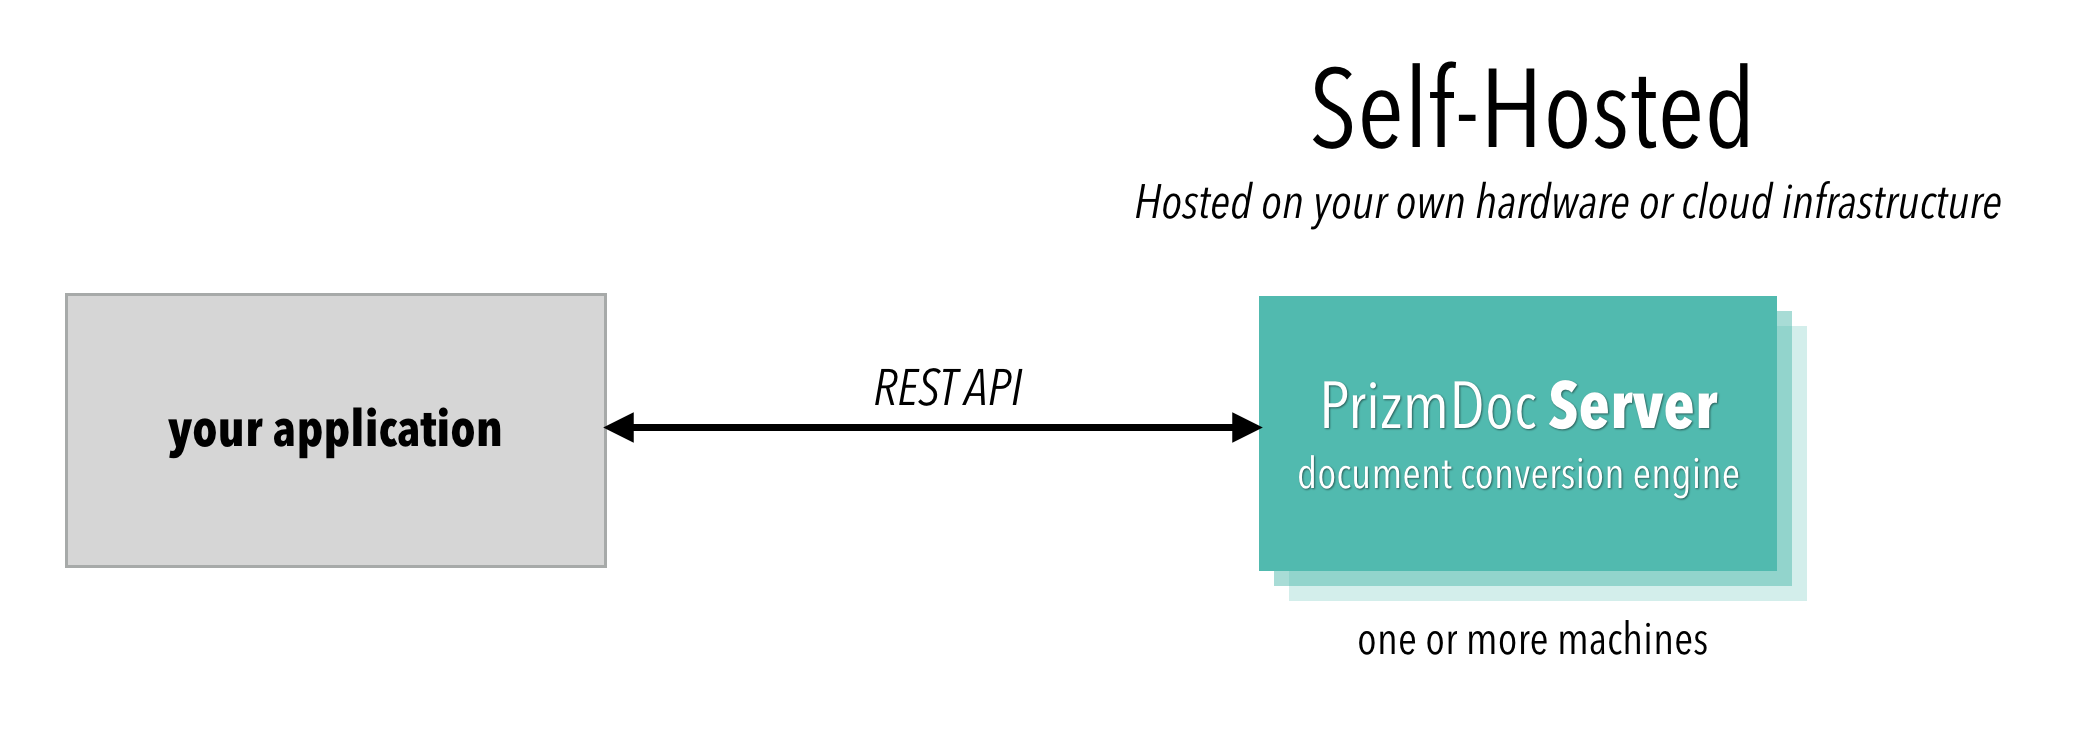
You can get started with PrizmDoc Cloud, where we fully host and manage a powerful PrizmDoc Server cluster for you:
Or, you can self-host the server: