
ImageGear for Java
Building the Core Sample with NetBeans
| ImageGear for Java User Guide > Getting Started > Building the Core Sample with NetBeans |
nThis section will walk through the process of building the ImageGear for Java Core sample. NetBeans 7.0.1 is used, but this tutorial may provide guidance for building with other versions of NetBeans.
We'll start by creating a Library containing all ImageGear for Java JAR files. This is not required but is helpful when building multiple samples.
Select Tools > Libraries to open up the Library Manager.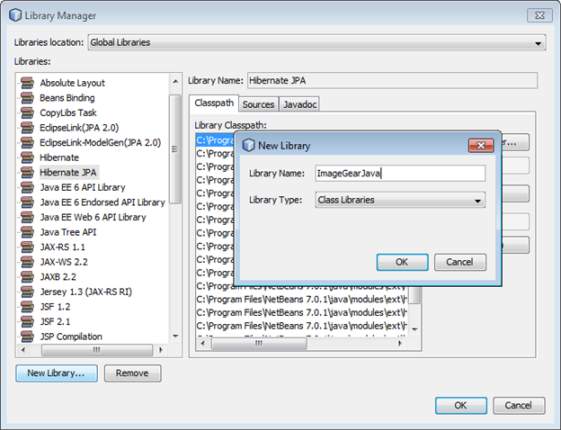
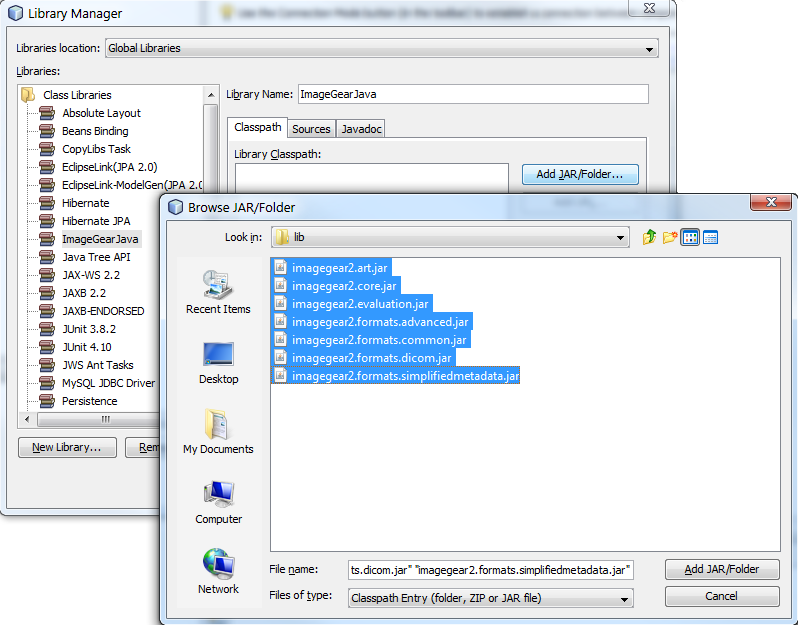
Click the button Add JAR/Folder and browse to the lib folder within the ImageGear for Java installation directory.
Select all *.jar files in the lib folder. If you know that you will not need some of the JAR files, then they don't have to be selected.
We will create a project for the Core sample application. This sample will use the Shared sample, but we will not build the Shared sample, instead we will use the pre-built imagegear2.shared.jar that installs with ImageGear for Java.
Click File > New Project to open the New Project dialog, and then select project category Java and project type Java Project with Existing Sources. Then click Next.
Give the project a name, "igsample.core", and select an appropriate project folder and click Next.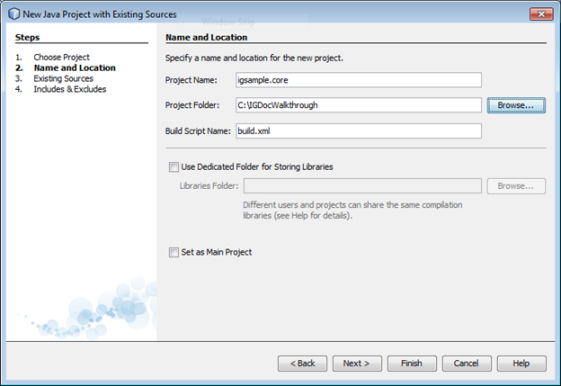
Select Source Package Folders containing the source code for the Core project that installed into the samples folder within the ImageGear for Java installation directory. It is best to select the src folder, at "[IG Java install path]\samples\Core\src\" so that the package naming is maintained.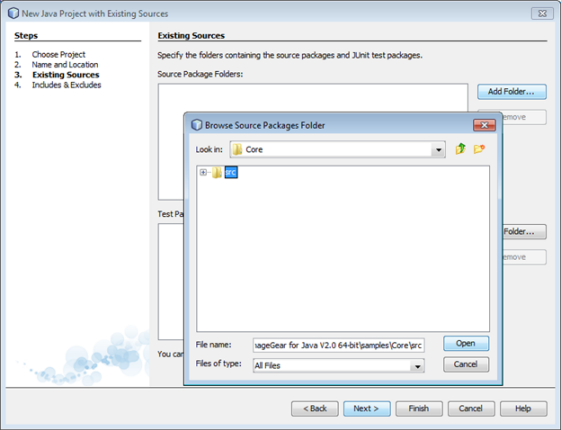
After selecting the "...\core\src" folder, click Finish to exit the New Project dialog and create the project.
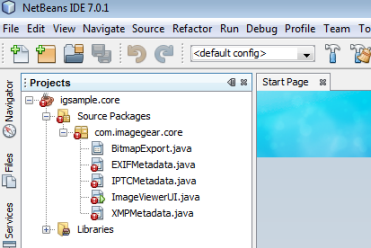
The Projects Window in the NetBeans IDE should now contain the igsample.core project, and the project tree should contain the files in the com.imagegear.core source package.
Next, add the ImageGearJava library that we created at the beginning of this walkthrough.
Right click the Libraries node on under igsample.core in the Project Window and select Add Library.
In the Add Library dialog, select the ImageGearJava library and click Add Library.
Now, add the imagegear2.shared.jar file.
Again, right click the Libraries node under igsample.com in the Project Window, but this time select Add JAR/Folder.
In the Add JAR/Folder dialog, browse to the samples folder within the ImageGear for Java installation directory. Select the file imagegear2.shared.jar and click Open.
At this point, the Projects Window should be updated and should no longer contain any icons with red exclamations, as shown in the image below.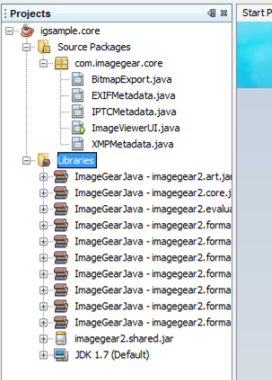
Now, set a Main Class for your project. To do this,
Click OK to close the Project Properties dialog.
If you're building the sample on a Linux or Mac OS X machine, you can skip to building and running the application. However, if you're working on a Windows machine you will now need to set the path to the native libraries (for JPEG2K and PDF support), refer to Setting the Path to the Native Libraries for instructions.