How To Use Barcode Xpress Mobile for iOS
How to Build and Run BXDemo on a Physical Device
- Open the BarcodeXpressIOS project in Xcode.
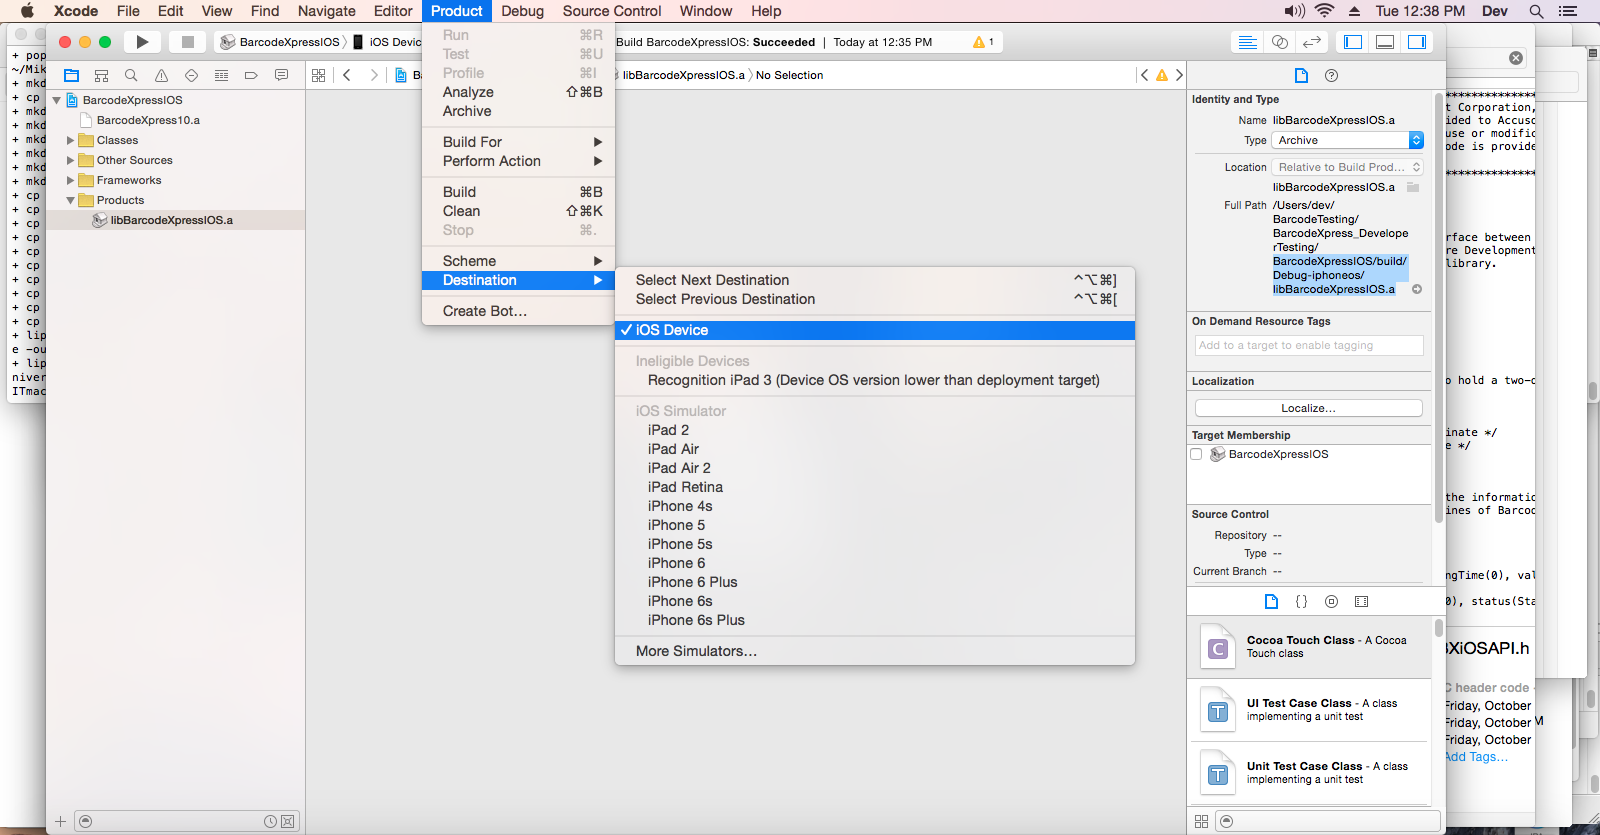
- Change the destination to “iOS Device”.
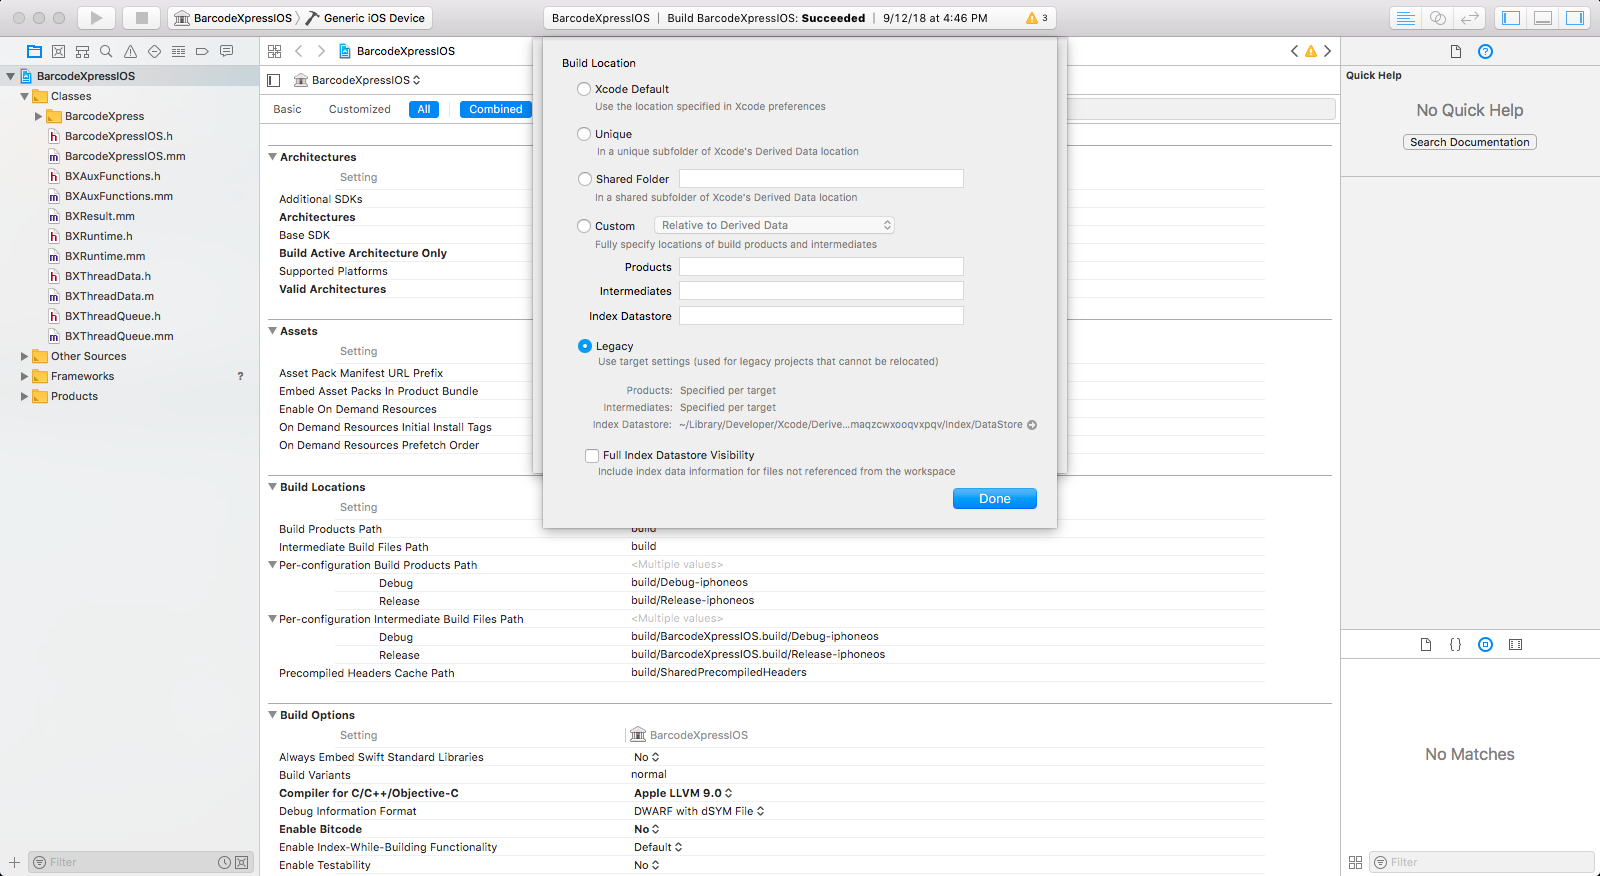
- Change the build location settings to "Legacy" in File > Project Settings > Advanced.
- Build BarcodeXpressIOS (Product->Build).
- The libBarcodeXpressIOS.a is placed in the …/BarcodeXpressIOS/build/Debug-iphoneos/ directory.
- Close the BarcodeXpressIOS project.
- Open the BXDemo project.
- Select a physical device as the destination.
- Update developer signing credentials.
- Add BXDemo to a provisioning profile and developer in the apple developer member center.
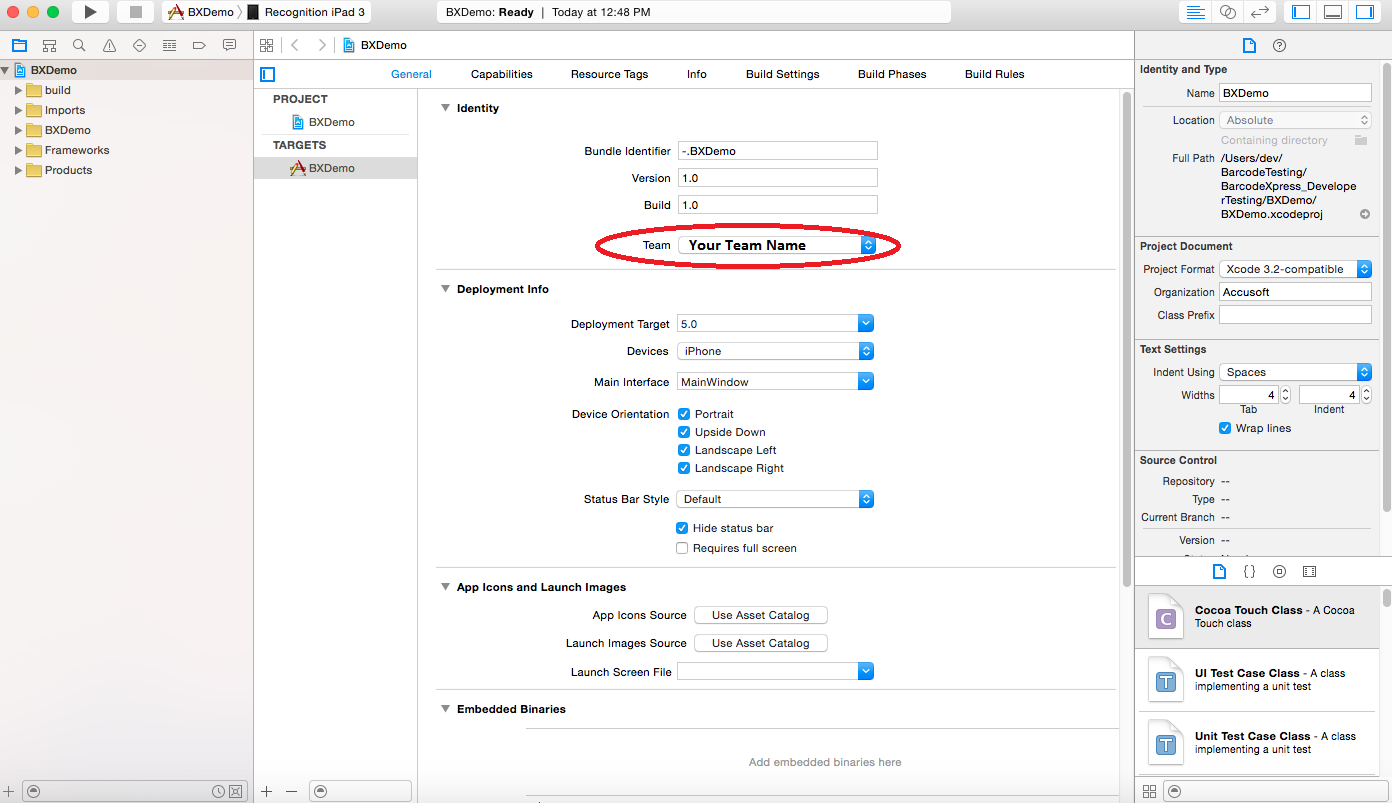
- Make sure the team/user is selected under the Identity tab of the build settings.
- Run BXDemo – this will compile/build, load, and run the application on the target device.
How to Integrate BXInterface into your own App
The BarcodeXpressIOS exposes a full objective-c API and the BXInterface defined in it provides the core functionality for programs that want to perform barcode recognition on video images. The following steps illustrate the approach to take
to integrate the BXInterface into another app:
- Open the BarcodeXpressIOS in Xcode.
- Change the destination to “iOS Device”.
- Change the build locations setting to Legacy.
- Build BarcodeXpressIOS.
- Open your app in Xcode.
- Add the libBarcodeXpressIOS.a library in the “Link Binary With Libraries” step of the Build Phases.
- Include the following header files in the ViewController of your app that will implement barcode recognition.
- BarcodeXpressIOS.h - required
- BXLicense.h – required to properly license the toolkit.
- BXAuxFunctions.h – optional to provide utility functions like binarizing an image.
- BXThreadData.h – required to receive updates when an image is being processed and/or when an image is captured from the camera.
- Implement functions that will be used as callbacks during the processing and recognition.
- A processing callback – this is called each time a decoding thread begins processing an image.
- A recognition callback – this is called when a barcode is recognized in an image.
- A camera update callback – this is called each time a new image is gathered from the camera.
- The following code from the BXDemo demonstrates initializing the BXInterface and starting the recognition process:
    // Create and initialize a BXLicense.
    // Note that the newlines (\n) at the end of each line of the license key are required.
    // Note that the values for parameters key1, key2, key3 and key4 are currently unused.
       BXLicense* license = [[BXLicense alloc]
                          initWithData:@"A/2R0LQRQeRHHaen+bqwcggdbB7kDTDCCzU/P3GtiXQlnr0byBOCQW+5FPoBG/O4\n"
                          "2hVmCcxrZr4zBuUmFgsw64jJFhKsRtUqjdvWzqyJY2guYfZNhswtgziXZZm6n/rb\n"
                          "gv9pKn9pLFWmXk579SjZw7ZFDD3wWJM1XzyeW5VbAuw=\n"
                          mainBundle:[NSBundle mainBundle]
                          key1:1 key2:2 key3:3 key4:4 ];

    // Initialize the interface to the decoding library.
    barcodeXpress = [[BXInterface alloc] initWithLicense:license];
    [license release];

    // Define the callbacks that allow program control to be altered at key points.
    [barcodeXpress SetCameraCallback :self :@selector(onCameraUpdate:)];
    [barcodeXpress SetRecognitionCallback :self :@selector(onBarcodeRecognition:)];
    [barcodeXpress SetProcessingCallback :self :@selector(onProcessingBarcode:)];

    // Create a layer that will display preview imagery from the camera.
    AVCaptureVideoPreviewLayer *previewLayer = [[AVCaptureVideoPreviewLayer alloc] init];

    // Define the types of barcodes to decode.
    // See BarcodeXpressIOS.h for definitions of barcode types.
    [barcodeXpress SetBarcodeTypes : AllBarcodeTypes];

    // Configure the camera and start processing video frames.
    [barcodeXpress StartRecognition :previewLayer];
How to Build and Run BXSwiftDemo on a Physical Device
- Open the BarcodeXpressSwift project in Xcode.
- Change the destination to "iOS Device".
- Change the build location settings to "Legacy" in File > Project Settings > Advanced.
- Build BarcodeXpressSwift (Product->Build).
- The BarcodeXpressSwift.framework is placed in the …/BarcodeXpressSwift/build/Debug-iphoneos/ directory.
- Close the BarcodeXpressSwift project.
- Open the BXSwiftDemo project.
- Select a physical device as the destination.
- Update developer signing credentials.
- Add BXSwiftDemo to a provisioning profile and developer in the apple developer member center.
- Make sure the team/user is selected under the Identity tab of the build settings.
- Run BXSwiftDemo – this will compile/build, load, and run the application on the target device.
How to Integrate the Swift Runtime Class into your own App
The BarcodeXpressSwift exposes a full Swift API and the Runtime class defined in it provides the core functionality for programs that want to perform barcode recognition on video images. The following steps illustrate the approach to take to integrate the Runtime class into another app:
- Open the BarcodeXpressSwift project in Xcode.
- Change the destination to "iOS Device".
- Change the build locations setting to Legacy.
- Build BarcodeXpressSwift.
- Open your app in Xcode.
- Add the BarcodeXpressSwift.framework library in the "Link Binary With Libraries" step of the Build Phases.
- Include the BXLicense.h header file in your bridging header.
- Implement functions that will be used as callbacks during the processing and recognition.
- A processing callback – this is called each time a decoding thread begins processing an image.
- A recognition callback – this is called when a barcode is recognized in an image.
- A camera update callback – this is called each time a new image is gathered from the camera.
- The following code from the BXSwiftDemo demonstrates initializing the Runtime class and starting the recognition process:
    setLicense(BXLicense(data: """
		Zri5Lm6UI5vh3AK7u7ur4ll491O3GJtGIZj9hYTqLsLfTH4E5jhvdne9TKho0wYu
        BvRBaQXaRh7Ec+CKgWY7Gnx6XqY+5fOBejXhvjyD6AU4tMgOtw2X0gFCIfDlZ/cp
        5JFCsfhOsYBIOLDK5tmPlChUHZ1br57R5OBBJ9EncWo=

        """,
        mainBundle: Bundle.main, key1: 1, key2: 2, key3: 3, key4: 4)!)


    setBarcodeTypes(BarcodeType.CommonMobileBarcodes)

    runtime.cameraCallback = orientCamera              // These functions defined below.
    runtime.recognitionCallback = recognitionCallback
    runtime.errorCallback = alertError

    let preview = viewfinder.videoPreviewLayer
    preview.videoGravity = AVLayerVideoGravity.resizeAspectFill
    preview.frame = self.view.bounds

    runtime.setPreviewLayer(viewfinder.videoPreviewLayer)

    do {
        try runtime.startRecognition()
    }


