Introduction
We offer two ways to try out Barcode Xpress samples. The 'Hello Barcode Xpress for Java' sample is hosted on GitHub and the ReadBarcodes sample is provided with Barcode Xpress for Java in the Samples folder.
Hello Barcode Xpress for Java
The Hello Barcode Xpress for Java is a simple barcode reading sample hosted on GitHub to demonstrate how easy it is to read barcodes from your images with Barcode Xpress.
Read Barcodes
The ReadBarcodes sample is located in the "samples" sub-folder located at samples. It also contains the ReadMe.txt file with detailed instructions on how to build and run the samples.
Please refer to the Build and Run Samples section below for information on building the sample.
Barcode Xpress for Java has the following sample to get you started:
- ReadBarcodes - Recognizes the text in an image(s) and prints results to the console.
Build and Run Samples
The commands to compile and run the sample will essentially be the same on both Windows and Linux. The only difference is the punctuation mark used to separate entities on the classpath. Java uses ";" on Windows and ":" on Linux.
Using Maven
-
Navigate to the sample folder. For example, for the
ReadBarcodessample use the following command:cd samples/ReadBarcodes -
In the sample folder, run the following command:
mvn clean package dependency:copy-dependenciesAfter the command has successfully completed, the "target" folder will be created in the sample folder.
-
Run the sample with the following command:
Linux
mvn exec:java -Dexec.args="path/to/your/image.bmp"or
java -cp "target/ReadBarcodes-1.0.jar:target/dependency/barcodexpressjava-14.0.jar" ReadBarcodes path/to/your/image.bmpWindows
mvn exec:java -Dexec.args="path/to/your/image.bmp"or
java -cp "target/ReadBarcodes-1.0.jar;target/dependency/barcodexpressjava-14.0.jar" ReadBarcodes path/to/your/image.bmp
Manual Compilation
-
Navigate to the samples folder. For example, for the
ReadBarcodessample use the following command:cd samples/ReadBarcodes -
In the sample folder, compile the sample using the following command:
Linux
javac -cp ".:src/main/java:../../bin/barcodexpressjava-14.0.jar" src/main/java/ReadBarcodes.javaWindows
javac -cp ".;src/main/java;../../bin/barcodexpressjava-14.0.jar" src/main/java/ReadBarcodes.java -
Run the sample using the following command:
Linux
java -cp ".:src/main/java:../../bin/barcodexpressjava-14.0.jar" ReadBarcodes path/to/your/image.bmpWindows
java -cp ".;src/main/java;../../bin/barcodexpressjava-14.0.jar" ReadBarcodes path/to/your/image.bmp
Running the Sample with Arguments
The ReadBarcodes sample allows you to specify the type of barcode to search. So, if you want to look for only 1D barcodes, only 2D barcodes, or all types of barcodes, use the type option to specify it.
Usage
ReadBarcodes [options] <image1> [<image2> ... <imageN>]
Options
-t, --type <type>- (optional = true, default = '1d') Barcode types to scan<type>: '1d' - all 1D | '2d' - all 2D | 'all' - all 1D + 2D | you can also specify several barcode types at once-h, --help- (optional = true) Print this help message
Examples
ReadBarcodes ../images/Barcode-All-Supported-Types.bmp ../images/Barcode-Multiple-Common.bmp

    ReadBarcodes -t 1d -t Planet --type ADD2 ../images/Barcode-All-Supported-Types.bmp

    ReadBarcodes -t 2d ../images/Barcode-All-Supported-Types.bmp

    ReadBarcodes --type all ../images/Barcode-*
Using IntelliJ IDEA
- Open IntelliJ IDEA.
- Open the folder samples.
- Click the build icon in IntelliJ IDEA.
- Add a new configuration and select Application.
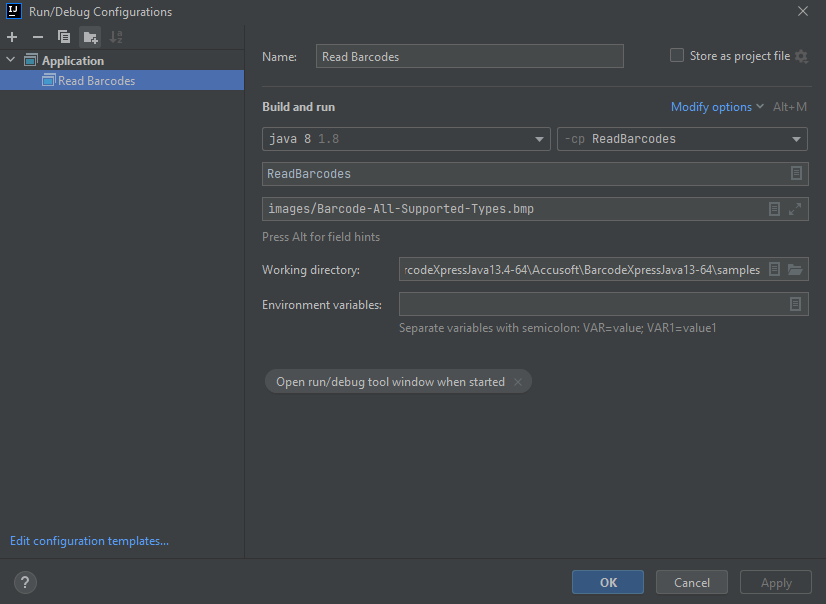
- Name your configuration.
- Set the module to the version of Java you're using to compile and run.
- Set the classpath to ReadBarcodes.
- Set the main class to ReadBarcodes.
- Set the program arguments to the path to the image.
- Save the configuration and run the sample with the new configuration.
Using Apache NetBeans
-
Launch Apache NetBeans.
-
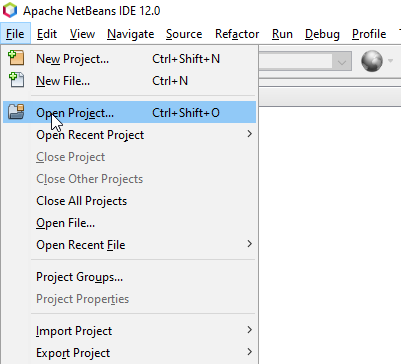
In the File menu, select Open Project...
-
Navigate to
BarcodeXpress13-64/samples. NetBeans should automatically recognize that folder as a Maven Project.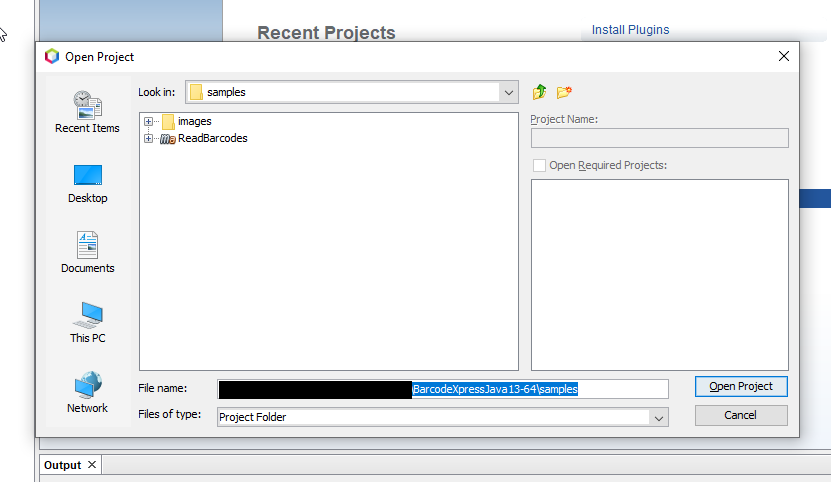
-
Open the Project Properties screen by right-clicking on the project name, ReadBarcodes in the Projects view.
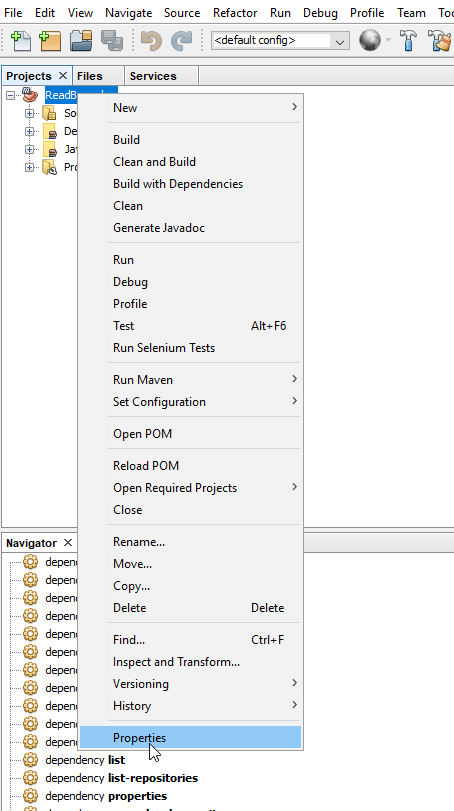
-
Navigate to the Run Properties and provide the path to a file in the
Argumentsfield.../images/Barcode-All-Supported-Types.bmpcan be used for a general demonstration: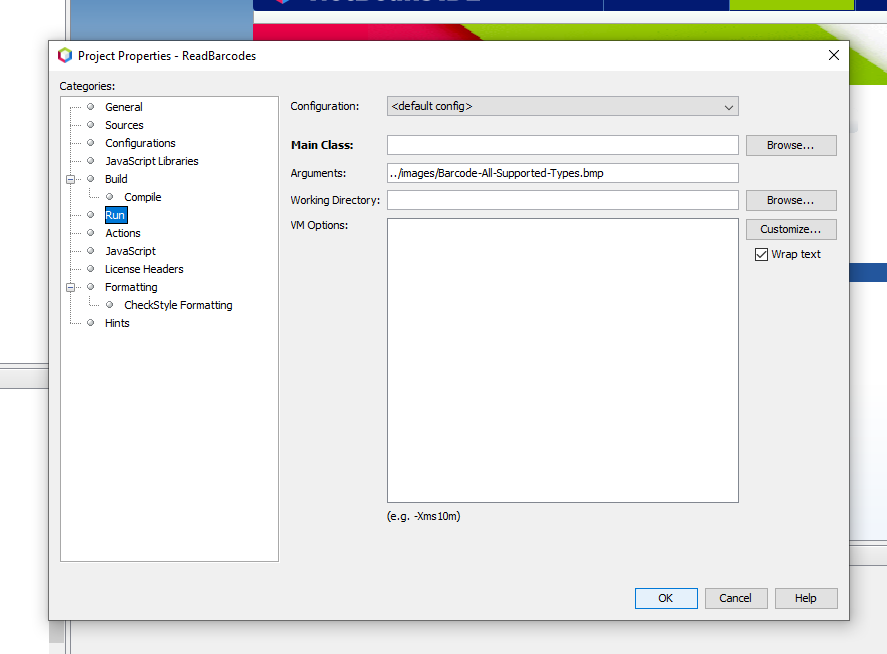
Click OK to save your changes.
-
Run the Project. This can be done via the Run menu, Run button in the toolbar, or by right-clicking on the Project and selecting Run. The first time you attempt to run the project, NetBeans will ask for confirmation of which main class you want to run:
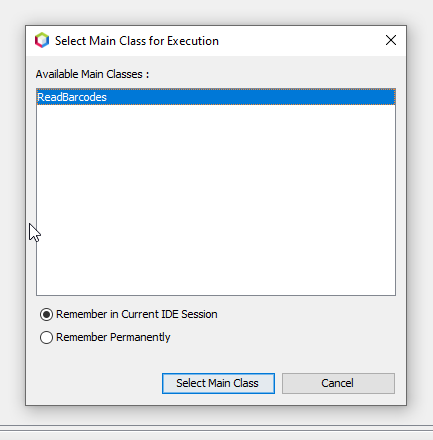
Simply press
Select Main Classto remember for the duration of the current session, or switch toRemember Permanentlyif desired. -
NetBeans will automatically run Maven to fetch all dependencies and then build and run the
ReadBarcodesproject. An Output window should be created displaying the results of the build: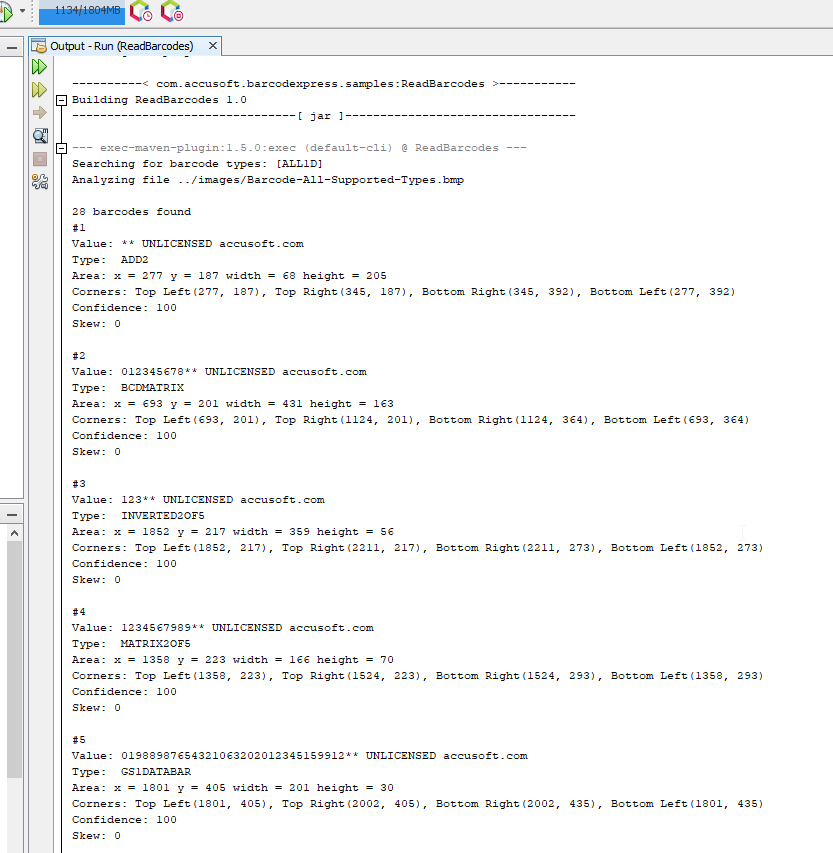
Using Eclipse IDE
-
Launch Eclipse IDE.
-
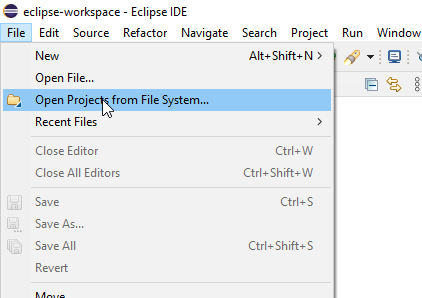
In the File menu, select Open Projects From File Systems...
-
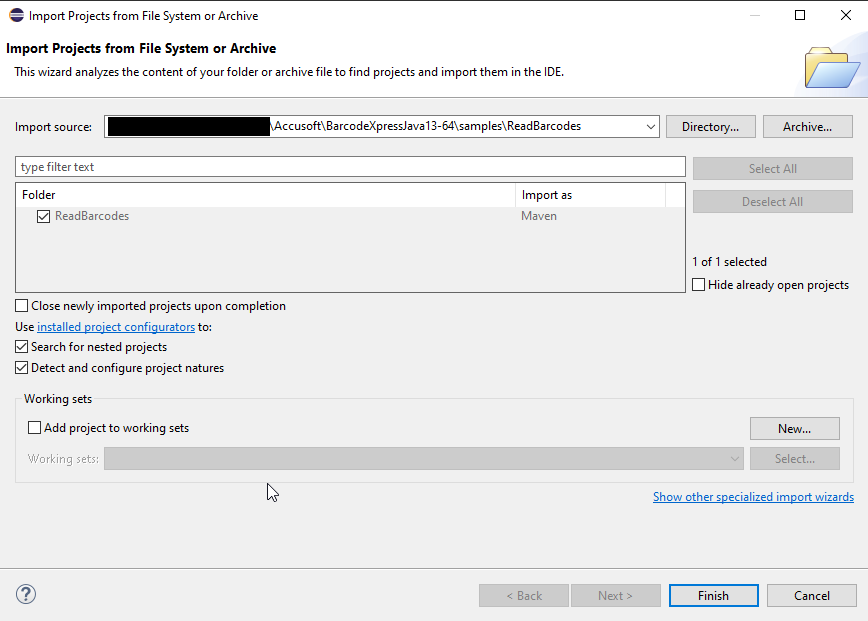
Supply the sample location as Import Source in the Import Projects from File System or Archive dialog and then click Finish:
-
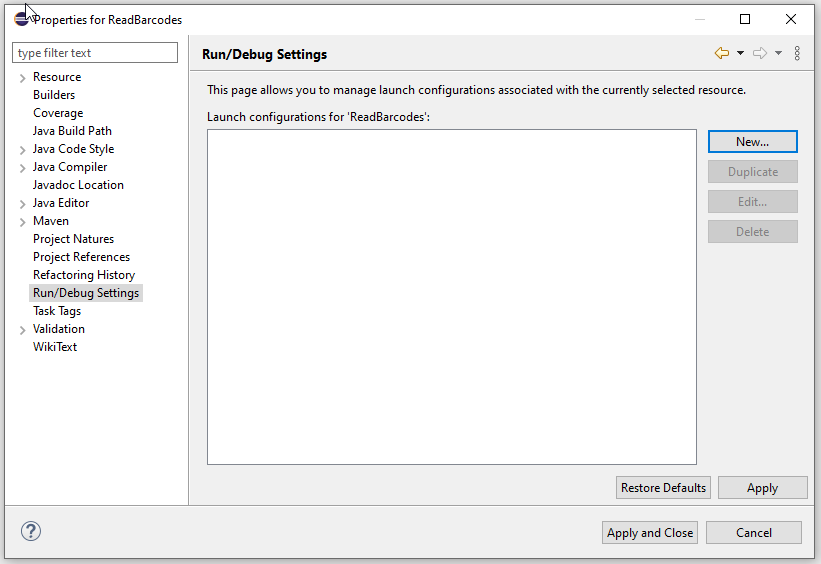
Open the Project Properties by right-clicking on the project name in the package explorer and selecting Properties. Then, navigate to the Run/Debug Settings page:
-
Click the New... button and then select Java Application from the list of configurations to create.
-
In the Main tab of the Edit Configuration dialog, enter
ReadBarcodesin the Main class: field: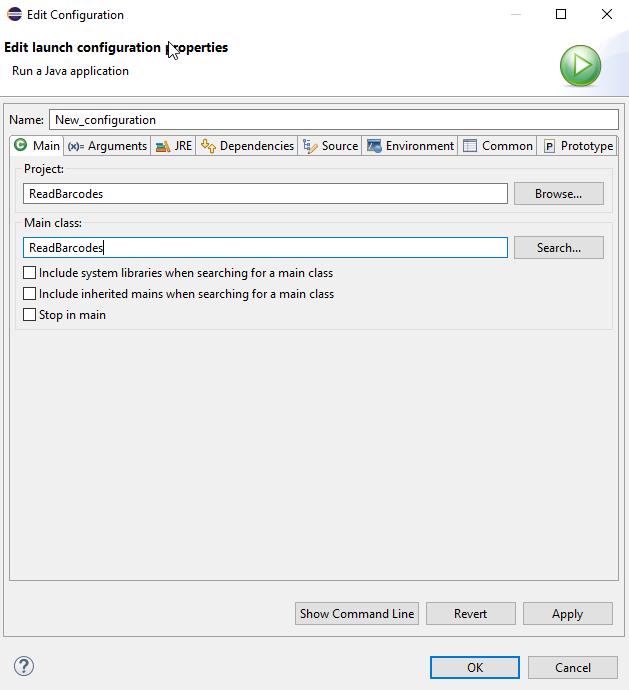
-
In the Arguments tab of the Edit Configuration dialog, provide an image file path in the Program Arguments: box. You can use
../images/Barcode-All-Supported-Types.bmpfor a general demonstration: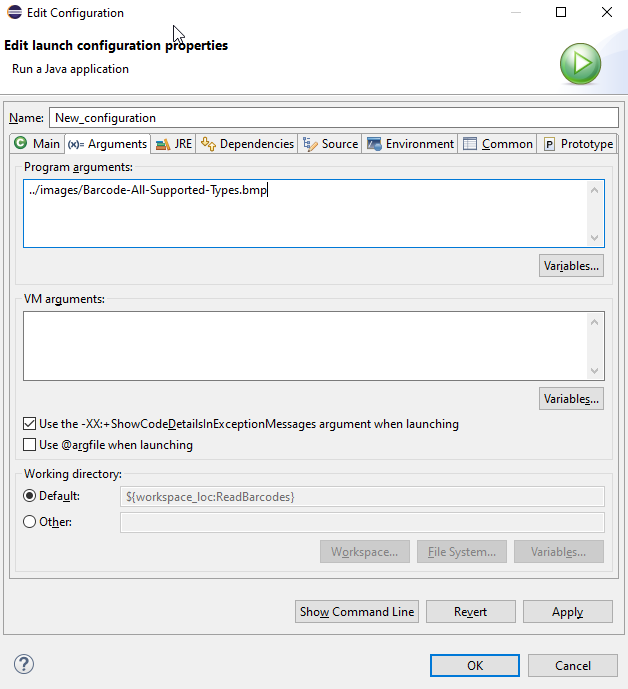
Then click OK to close the Edit Configuration Dialog and Apply and Close to close the Properties for ReadBarcodes dialog.
-
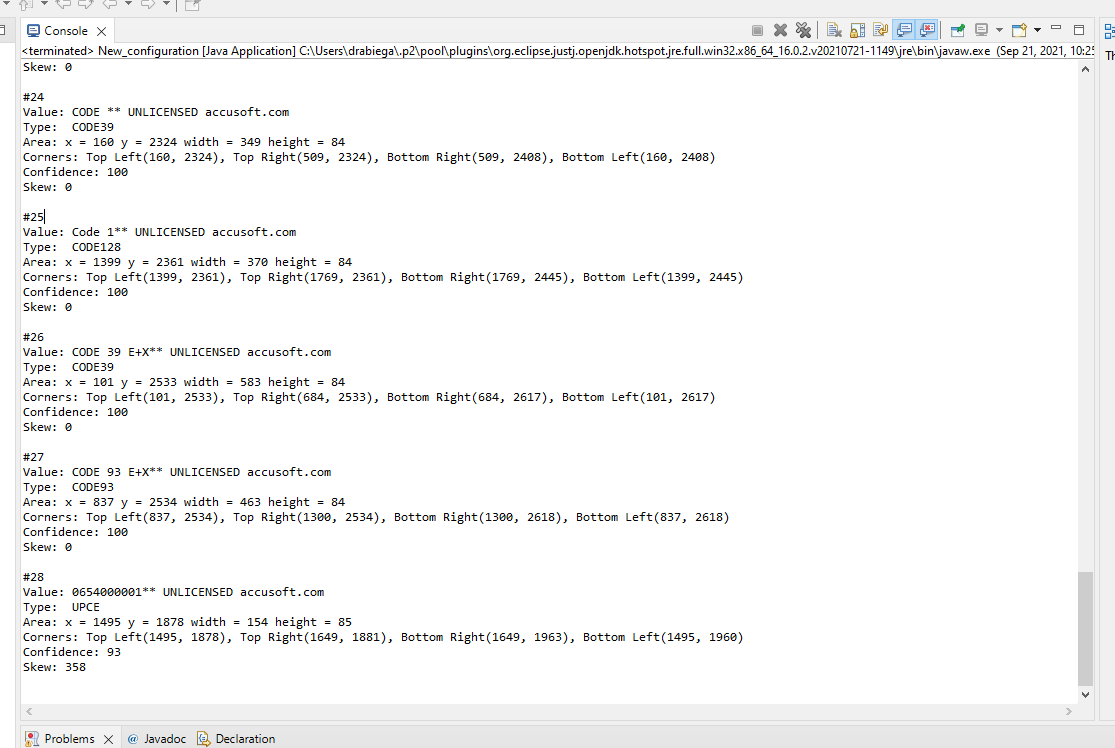
You can then run the sample application by clicking on the Run button or by selecting Run from the Run menu. A console pane should appear in Eclipse showing you the output of the sample application: