
Overview
Finally, we need to set up a simple reverse proxy so that the viewer can make requests through your web server to the backend:
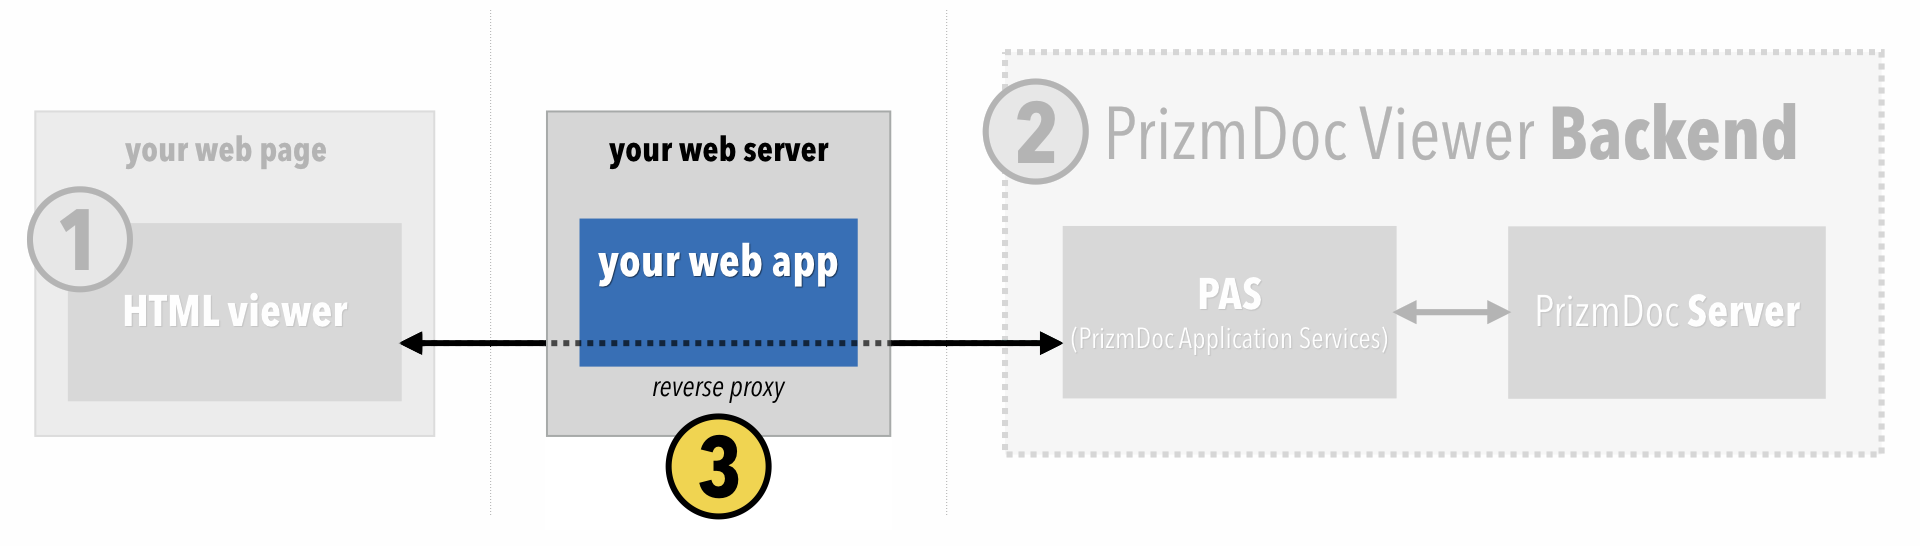
By the end of this section, the viewer should actually display real document content.
Configuring the Viewer’s Reverse Proxy Route
When we constructed the viewer, there was a special imageHandlerUrl property which we set to the value /pas-proxy:
<script type="text/javascript">
  $(function() {
    $('#viewerContainer').pccViewer({
      documentID:       'XYZ...',
      imageHandlerUrl:  '/pas-proxy',
      viewerAssetsPath: 'viewer-assets',
      resourcePath:     'viewer-assets/img',
      language: viewerCustomizations.languages['en-US'],
      template: viewerCustomizations.template,
      icons:    viewerCustomizations.icons,
      annotationsMode: "LayeredAnnotations"
    });
  });
</script>
imageHandlerUrl is just the base URL that the viewer should use when it makes GET requests to PAS for document content.
The viewer makes a variety of GET requests to PAS, such as:
GET /Page/q/0?DocumentID=uXYZ...&Scale=1GET /Document/q/Attributes?DocumentID=uXYZ...GET /Document/q/0-0/Text?DocumentID=uXYZ...- etc.
When the viewer makes those requests, it will use the imageHandlerUrl as the base URL for all of those requests. Since we set the value to /pas-proxy, the actual requests it makes will look like this:
GET /pas-proxy/Page/q/0?DocumentID=uXYZ...&Scale=1GET /pas-proxy/Document/q/Attributes?DocumentID=uXYZ...GET /pas-proxy/Document/q/0-0/Text?DocumentID=uXYZ...- etc.
Notice that these requests to /pas-proxy/* are still going to your web server. We still need to set up a reverse proxy for this /pas-proxy/* route to ensure that all such HTTP requests are forwarded to PAS.
The Reverse Proxy and Your PrizmDoc Cloud API Key
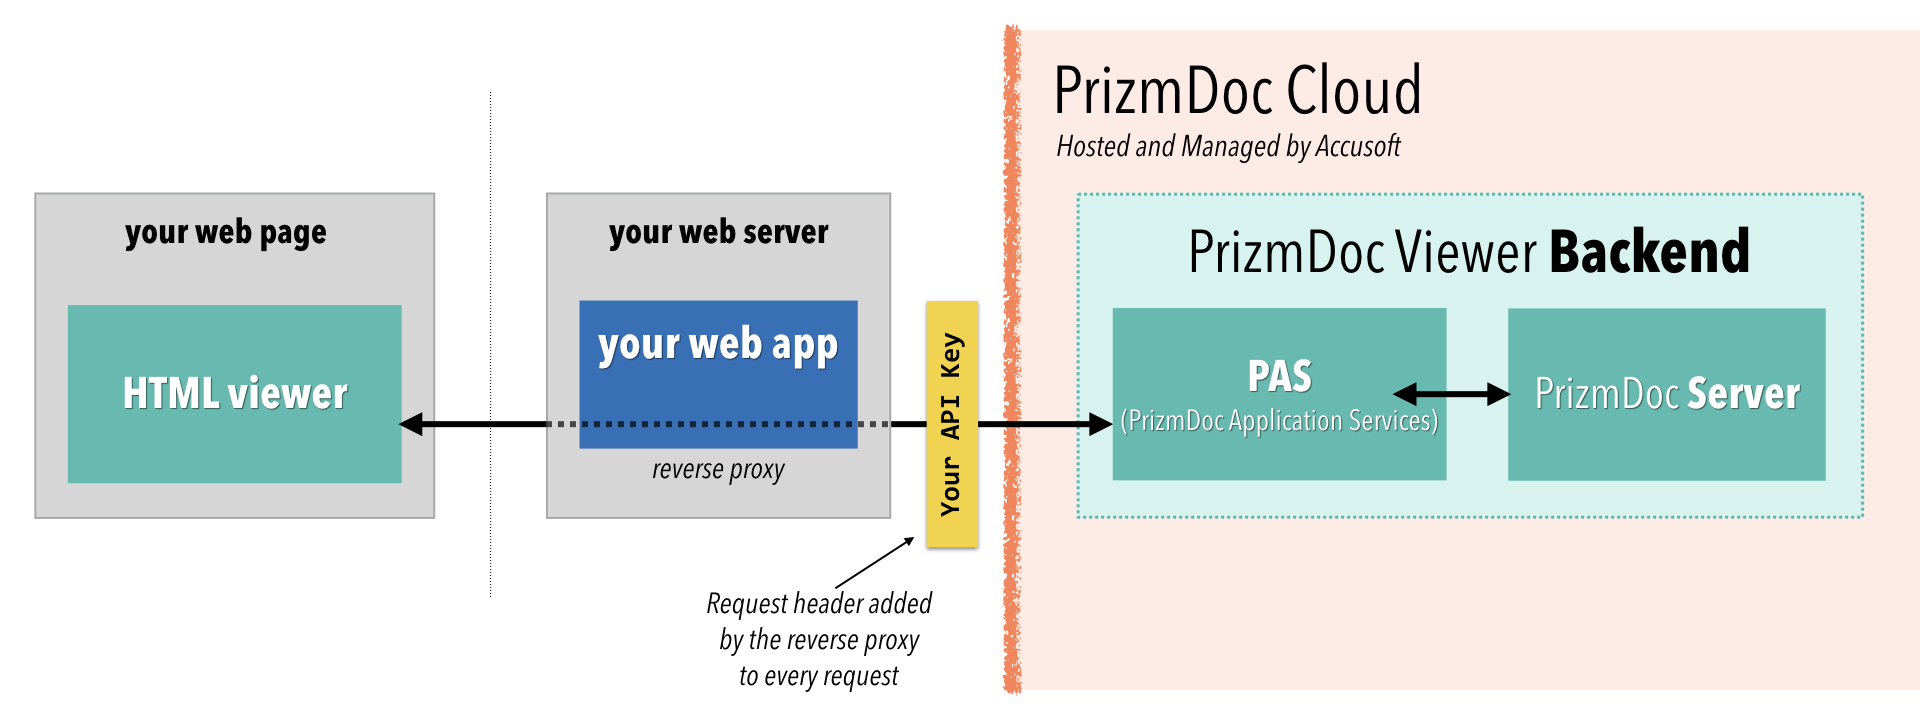
If you’re using PrizmDoc Cloud, your reverse proxy has an important responsibility: it must add your PrizmDoc Cloud API key to each HTTP request before sending it along to the backend.
Every HTTP request made to PrizmDoc Cloud must be authenticated with an API key provided in a request header named Acs-Api-Key.
However, you need to keep your API key private. It’s what gives you access to everything within PrizmDoc Cloud, and it’s what we use to determine how many billable transactions you’ve performed. To avoid people abusing your account and incurring unwanted charges, you should never send your API key to the browser. Instead, this responsibility should be handled by your reverse proxy.
So, the viewer will send GET requests to your web application. Your reverse proxy will accept the request, add the API key header, and then forward the request along to PrizmDoc Cloud:
Setting Up a Reverse Proxy
There are lots of options for setting up a reverse proxy. Fundamentally, you need to decide whether to set up your reverse proxy 1) as part of your application code or 2) as part of an external web server, like nginx or IIS. We offer examples of both. Pick one that most-closely matches what you need:
Setting Up a Reverse Proxy Within Your Web Application
node.js
If you’re using node.js and express, you can use a package like http-proxy-middleware.
NOTE: For a complete example application, check out our Hello PrizmDoc Viewer with node.js and HTML sample on GitHub.
Here is how you would set up a /pas-proxy route:
const express = require('express');
const proxy = require('http-proxy-middleware');

const app = express();

app.use(proxy('/pas-proxy', {
  pathRewrite: {
    '^/pas-proxy': '', // remove the /pas-proxy prefix when forwarding
    target: 'https://api.accusoft.com/prizmdoc', // PAS base URL
    changeOrigin: true, // necessary to convert from HTTP to HTTPS
    headers: {
      'Acs-Api-Key': 'YOUR_API_KEY' // for PrizmDoc Cloud
    }
  }
});
And that's how you can configure your express application to proxy all GET /pas-proxy/* requests to PAS!
Once you've set that up, you can skip ahead to the conclusion.
ASP.NET
If you’re using ASP.NET, you can use SharpReverseProxy, an OWIN middleware package available on nuget.
NOTE: For a complete example application, check out our Hello PrizmDoc Viewer with .NET and HTML sample on GitHub.
Within the Configure method of your Startup.cs, here is how you would set up a /pas-proxy route:
app.UseProxy(new List<ProxyRule> {
    new ProxyRule {
        Matcher = uri => uri.AbsolutePath.StartsWith("/pas-proxy/"),
        Modifier = (req, user) =>
        {
            // Create a corresponding request to the actual PAS host
            var match = Regex.Match(req.RequestUri.PathAndQuery, "/pas-proxy/(.+)");
            var path = match.Groups[1].Value;
            var pasBaseUri = new Uri("https://api.accusoft.com/prizmdoc/");
            req.RequestUri = new Uri(pasBaseUri, path);

            // For PrizmDoc Cloud
            req.Headers.Add("Acs-Api-Key", "YOUR_API_KEY");
        }
    }
}, result =>
{
    Logger.LogDebug($"Proxy: {result.ProxyStatus} Url: {result.OriginalUri} Time: {result.Elapsed}");
    if (result.ProxyStatus == ProxyStatus.Proxied)
    {
        Logger.LogDebug($"        New Url: {result.ProxiedUri.AbsoluteUri} Status: {result.HttpStatusCode}");
    }
});
And that's how you can configure your ASP.NET application to proxy all GET /pas-proxy/* requests to PAS.
Once you've set that up, you can skip ahead to the conclusion.
Java / Spring
In a Java Spring application you can use Netflix Zuul.
NOTE: For a complete example application, check out our Hello PrizmDoc Viewer with Java and HTML sample on GitHub.
Your application.properties will define the information Zuul needs to set up a reverse proxy route for /pas-proxy:
prizmdoc.pas.baseUrl=https://api.accusoft.com/prizmdoc/
prizmdoc.cloud.apiKey=YOUR_API_KEY

# ===== Proxy all requests from /pas-proxy/* to PAS =====
ribbon.eureka.enabled=false
zuul.routes.pas-proxy.path=/pas-proxy/**
zuul.routes.pas-proxy.url=${prizmdoc.pas.baseUrl}
zuul.routes.pas-proxy.stripPrefix=true
Your main Application.java will look like this:
package myapp;

import org.springframework.boot.SpringApplication;
import org.springframework.boot.autoconfigure.SpringBootApplication;
import org.springframework.cloud.netflix.zuul.EnableZuulProxy;
import org.springframework.context.annotation.Bean;
import sample.pasProxy.AddApiKeyRequestHeaderFilter;

@EnableZuulProxy
@SpringBootApplication
public class Application {
    public static void main(String[] args) {
        SpringApplication.run(Application.class, args);
    }
}
If you’re using PrizmDoc Cloud, you’ll need to also make sure that your API key is added as a request header before requests are forwarded to the backend. You can do that by setting up a Zuul “pre” filter Spring component:
package myapp;

import javax.servlet.http.HttpServletRequest;
import com.netflix.zuul.context.RequestContext;

import org.slf4j.Logger;
import org.slf4j.LoggerFactory;
import org.springframework.beans.factory.annotation.Value;

import com.netflix.zuul.ZuulFilter;

/**
 * Ensures that the PrizmDoc Cloud API key, if defined, is injected
 * as a request header before proxied requests are sent to PAS.
 *
 * Netflix Zuul will execute this "pre" filter before sending the request on to PAS, allowing
 * this class to inject the configured PrizmDoc Cloud API key.
 *
 * See https://spring.io/guides/gs/routing-and-filtering/
 */
@Component
public class AddApiKeyRequestHeaderFilter extends ZuulFilter {

  private static final Logger log = LoggerFactory.getLogger(AddApiKeyRequestHeaderFilter.class);

  @Value("${prizmdoc.cloud.apiKey:#{null}}")
  private String apiKey;

  @Override
  public String filterType() {
    return "pre";
  }

  @Override
  public int filterOrder() {
    return 0;
  }

  @Override
  public boolean shouldFilter() {
    return true;
  }

  @Override
  public Object run() {
    RequestContext ctx = RequestContext.getCurrentContext();
    HttpServletRequest request = ctx.getRequest();

    if (apiKey != null) {
      ctx.addZuulRequestHeader("Acs-Api-Key", apiKey);
    }

    log.info("Proxying {} {}", request.getMethod(), request.getRequestURL());

    return null;
  }

}
And that's how you can configures your Java Spring application to proxy all GET /pas-proxy/* requests to PAS.
Once you've set that up, you can skip ahead to the conclusion.
Setting Up a Reverse Proxy Outside of Your Web Application
In a production application, it’s common to keep the reverse proxy concern outside of your application code, using something like nginx or IIS in front of your web application:
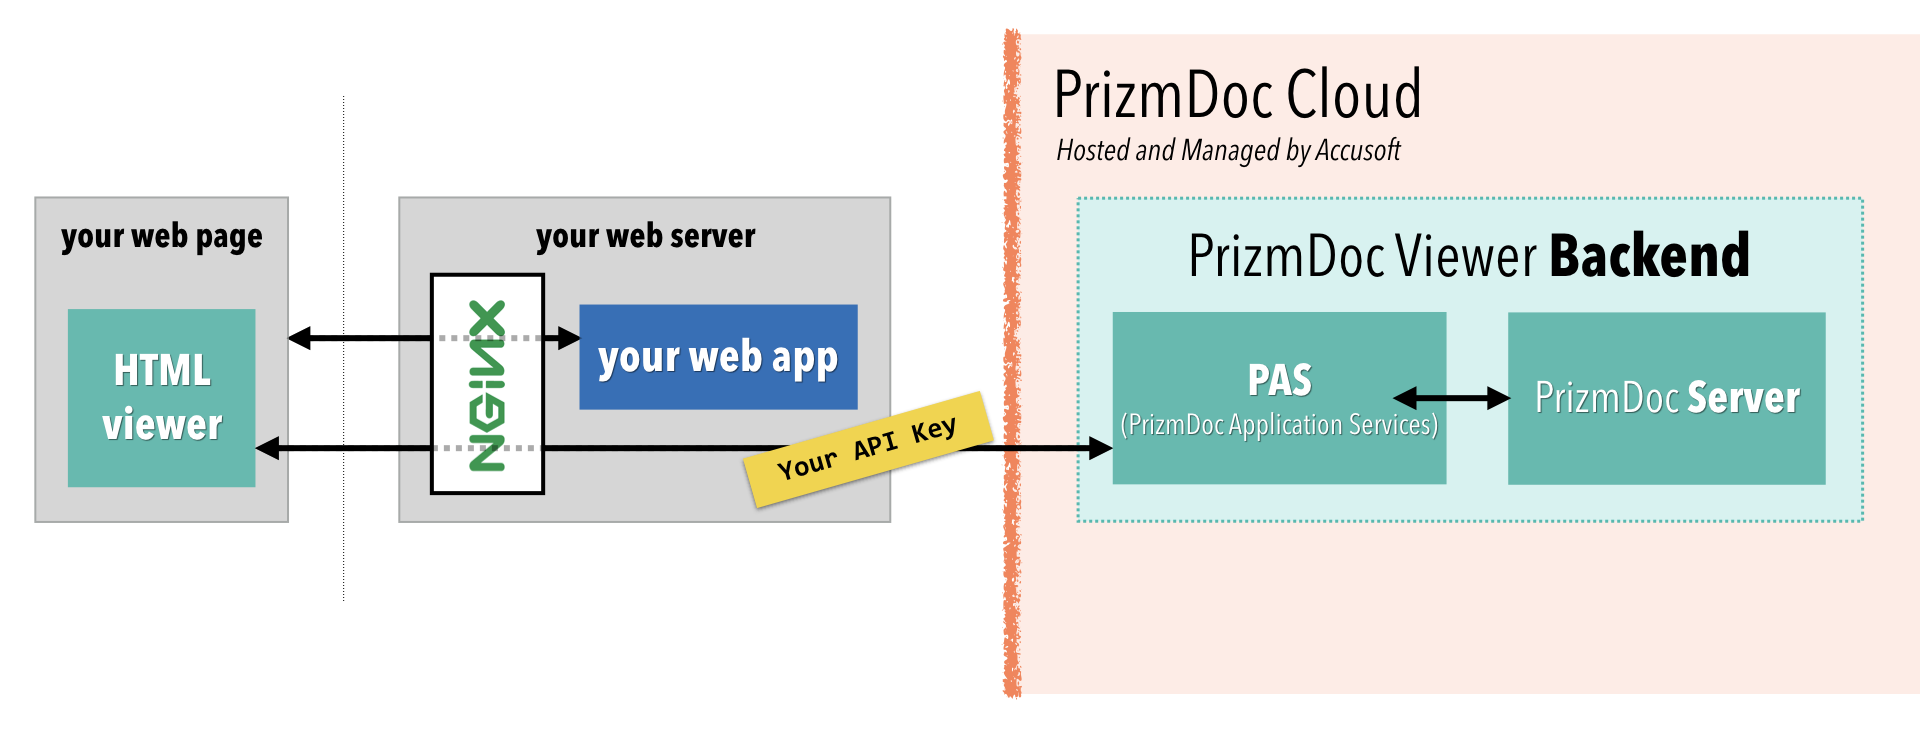
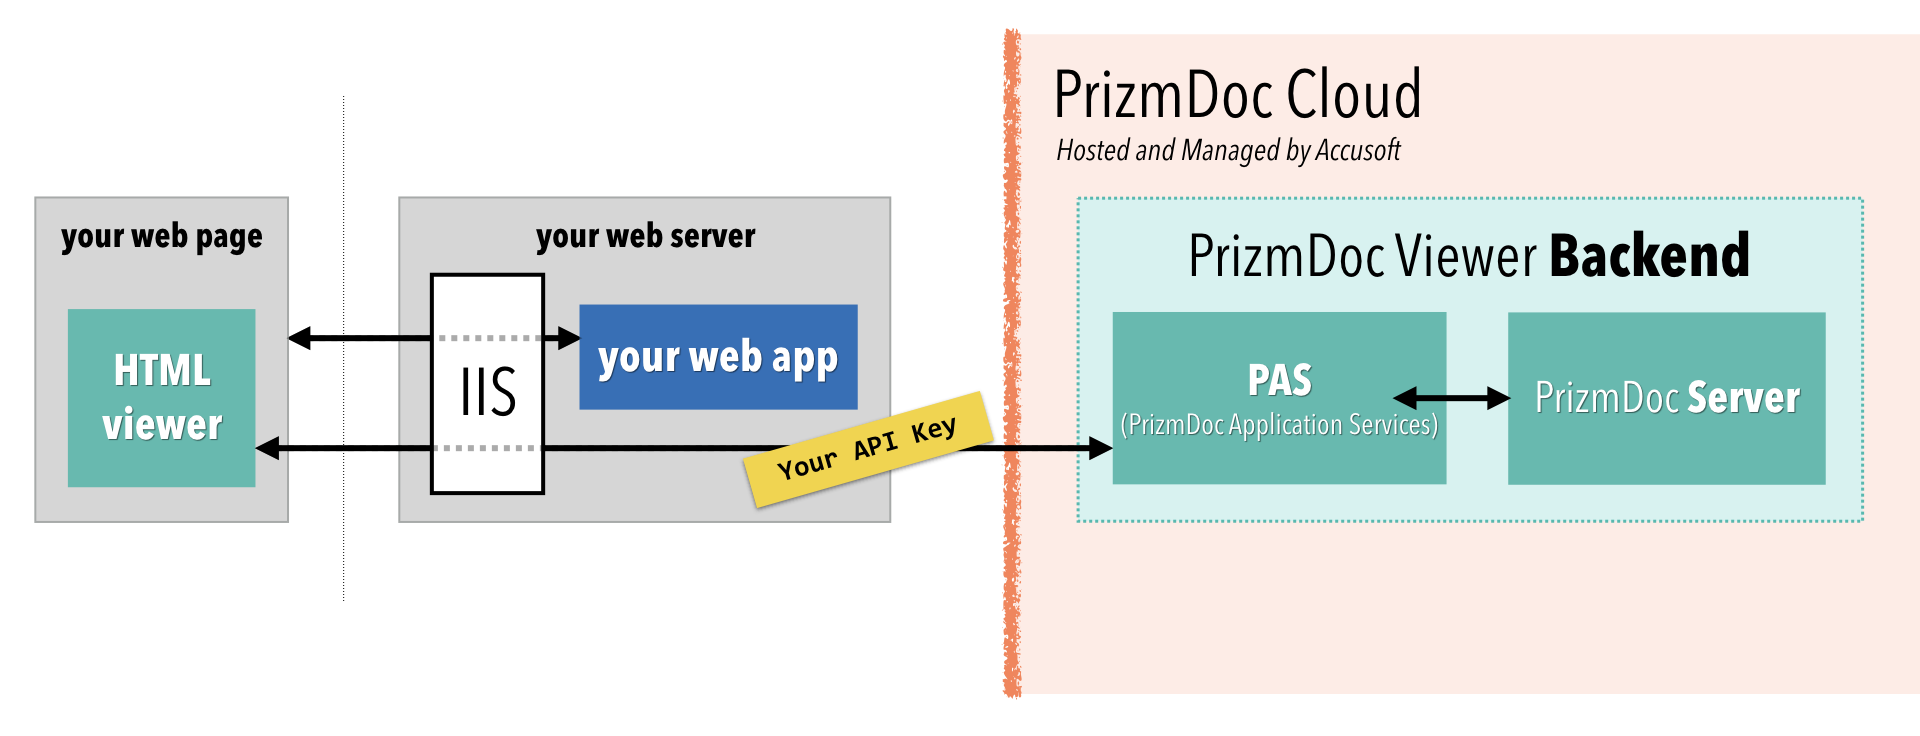
With this approach, all incoming traffic goes to nginx or IIS and then, based on the URL, gets routed either to your web application or to PAS.
Assuming you already have nginx or IIS in front of your web application, this section will explain how to configure an additional reverse proxy rule to route all GET /pas-proxy/* requests to PAS.
nginx
Within your nginx config file, you can easily add a location directive to a server defining a reverse proxy route to PAS:
location /pas-proxy/ {
    # Limit to GET requests (which is all the viewer needs)
    limit_except GET {
        deny all;
    }

    # For PrizmDoc Cloud:
    proxy_set_header Acs-Api-Key YOUR_API_KEY;

    # PAS base URL
    proxy_pass https://api.accusoft.com/prizmdoc/;
}
Note carefully the trailing slashes in the example above! They are important.
And that's how you configure nginx to proxy all GET /pas-proxy/* requests to PAS.
Once you've set that up, you can skip ahead to the conclusion.
IIS
This section will walk you through setting up a reverse proxy route in IIS.
First, make sure you have these IIS extensions installed:
Next, we need to actually define the reverse proxy rule for your Site or Application in IIS. This sort of rule can only be applied at the Site or Application level. Let's walk through how to set this up:
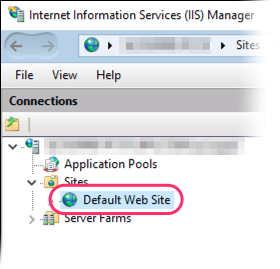
-
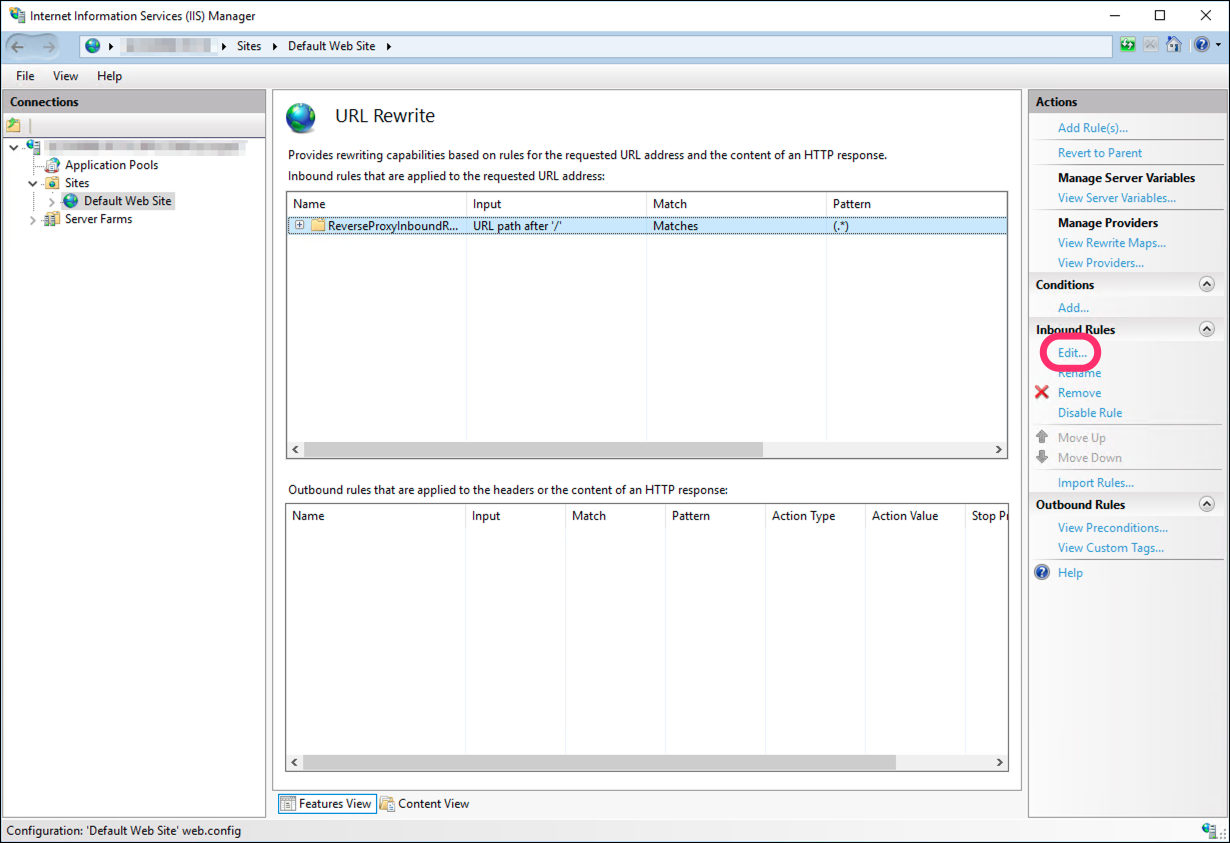
Select the Site or Application you want to modify, such as Default Web Site:
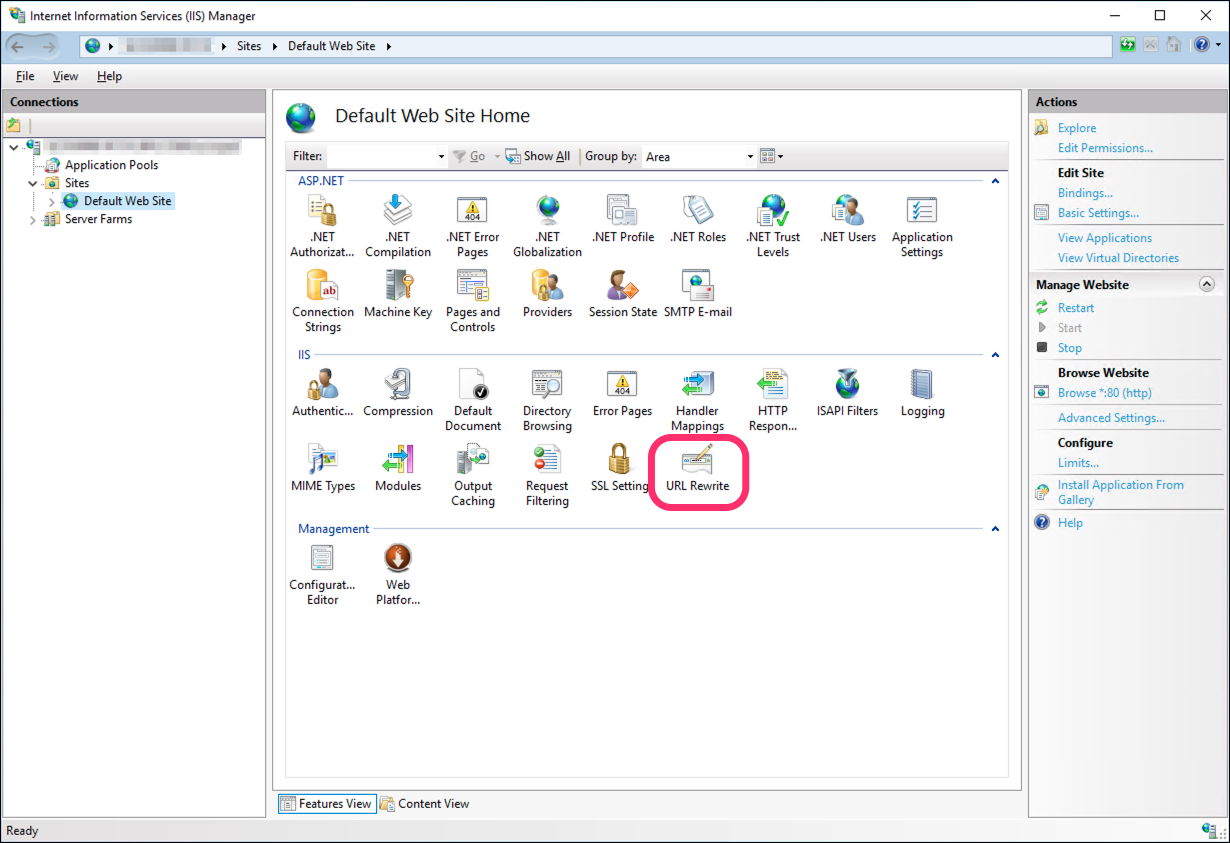
-
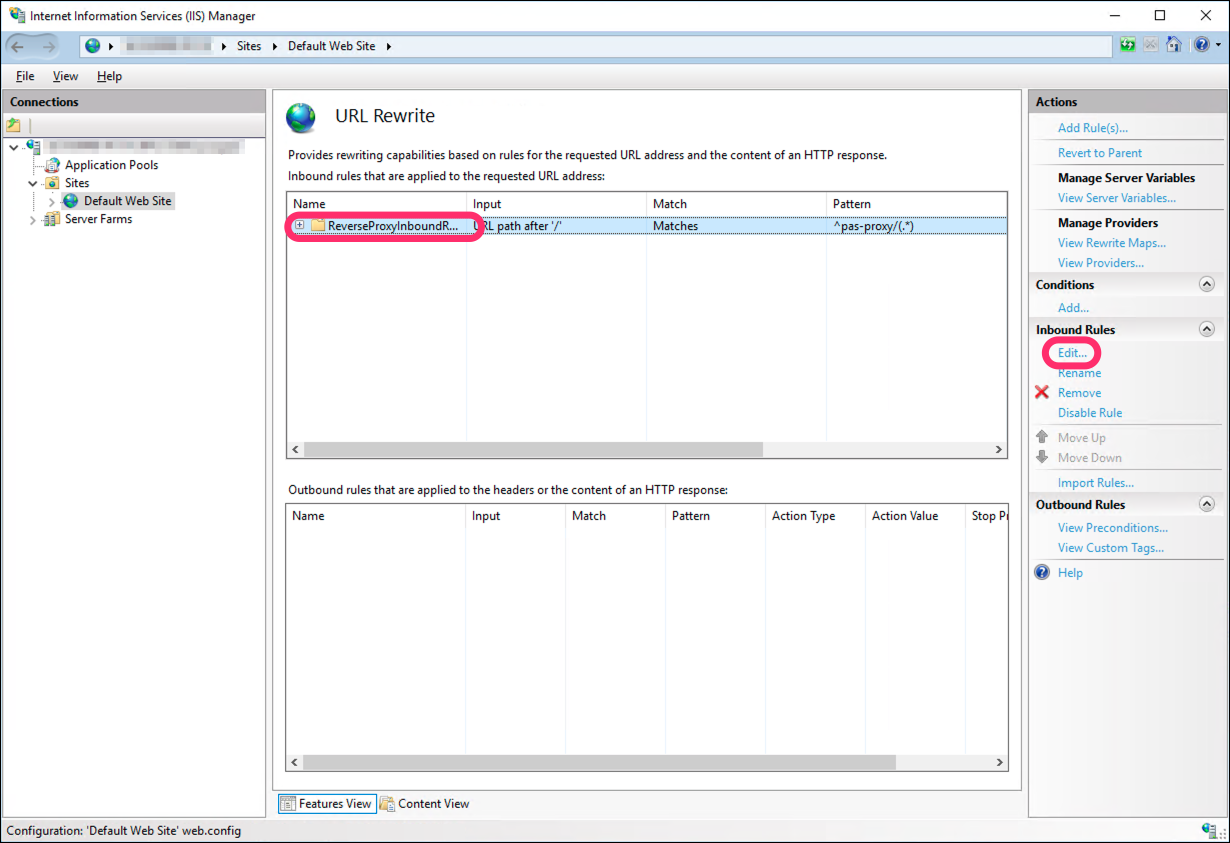
Open the URL Rewrite feature:
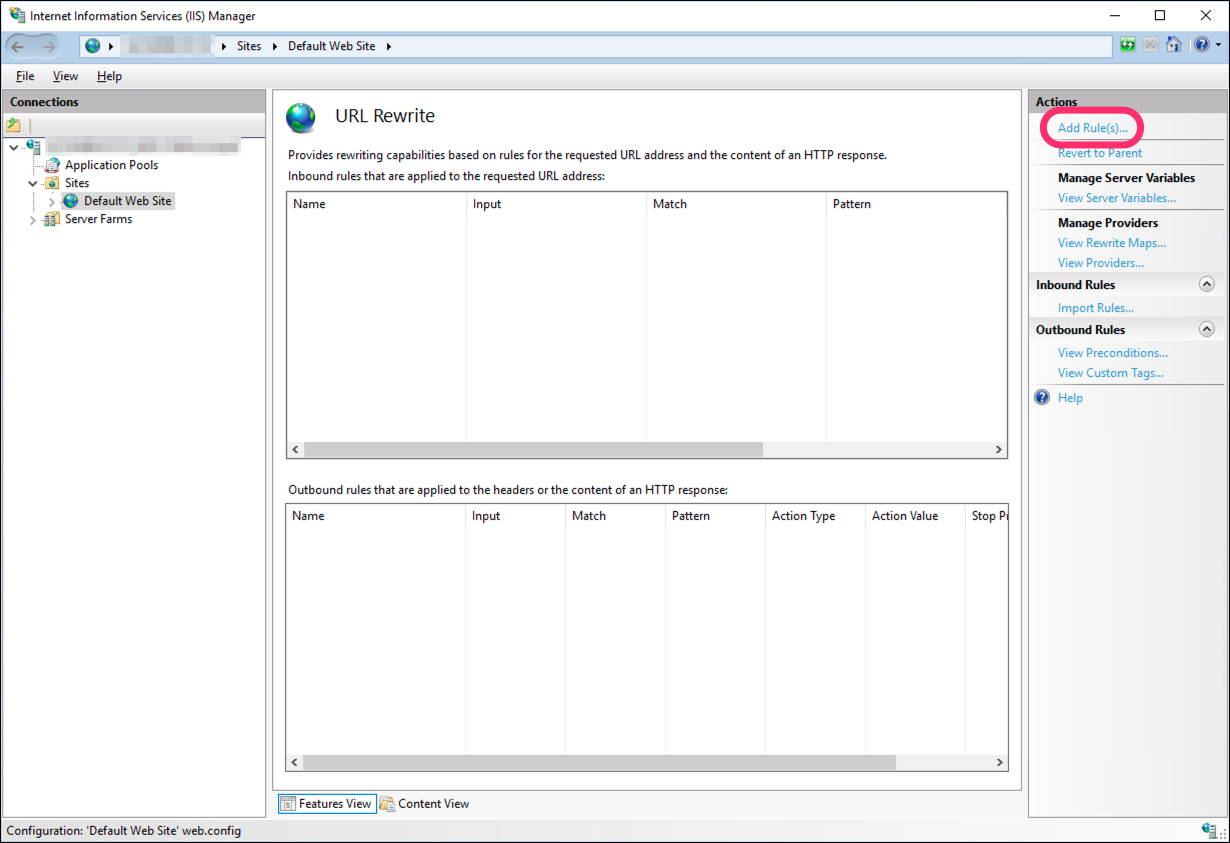
-
Click Add Rule(s)...
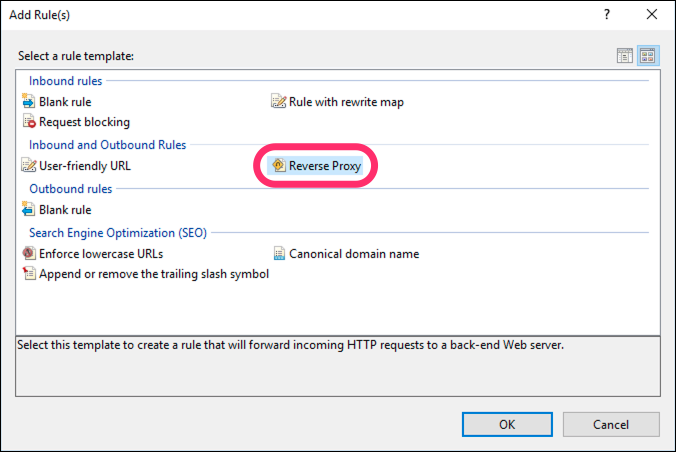
-
Choose the Reverse Proxy template:
-
In the dialog:
- Enter a value for your PAS host. If you’re using PrizmDoc Cloud for your backend, use the value
api.accusoft.com/prizmdocfor now. - Uncheck the Enable SSL Offloading checkbox.
- Click OK to create the new rule.
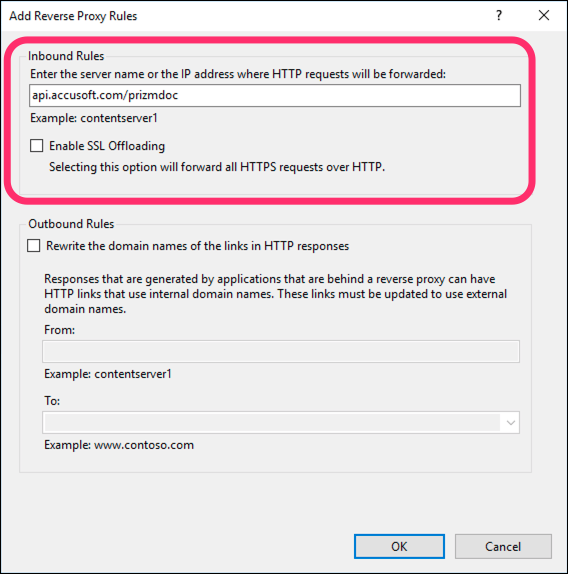
- Enter a value for your PAS host. If you’re using PrizmDoc Cloud for your backend, use the value
-
Now, click Edit... to further modify the rule you just created:
-
Under Match URL, change the Pattern value to
^pas-proxy/(.*)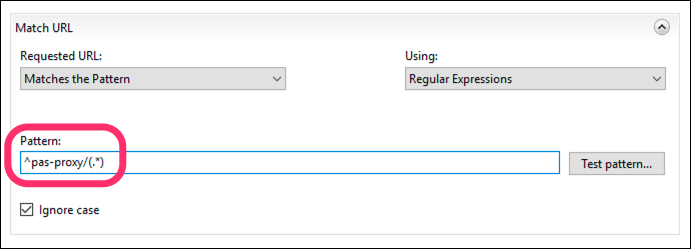
-
Under Conditions, click Remove to delete the default
{CACHE_URL}rule that was created: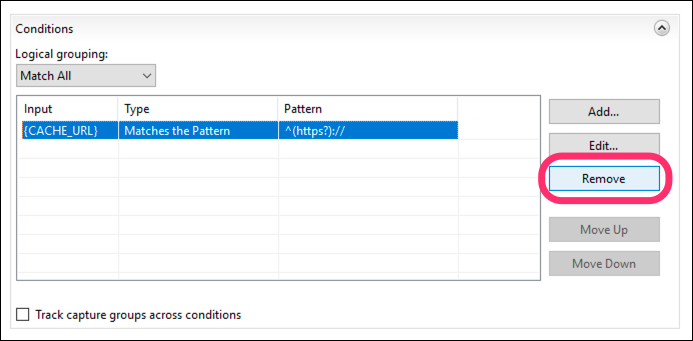
-
At the bottom of the page, under Action, adjust the Rewrite URL to your actual PAS base URL, using
httpsif possible.- The default Rewrite URL value begins with
{C:1}to dynamically usehttporhttpsbased on the original request. But, if your PAS instance is running on HTTPS, you should replace{C:1}withhttpsto ensure that all requests to PAS are over HTTPS. - If you’re using PrizmDoc Cloud for your backend, change the Rewrite URL to
https://api.accusoft.com/prizmdoc/{R:1}: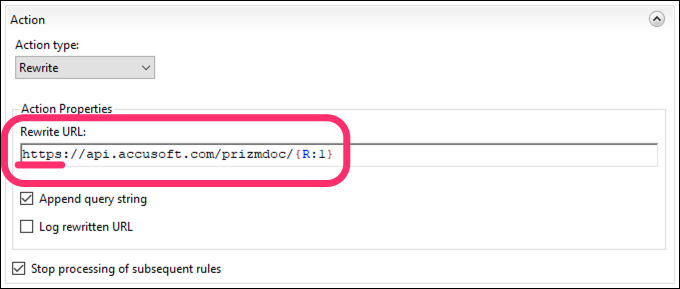
- The default Rewrite URL value begins with
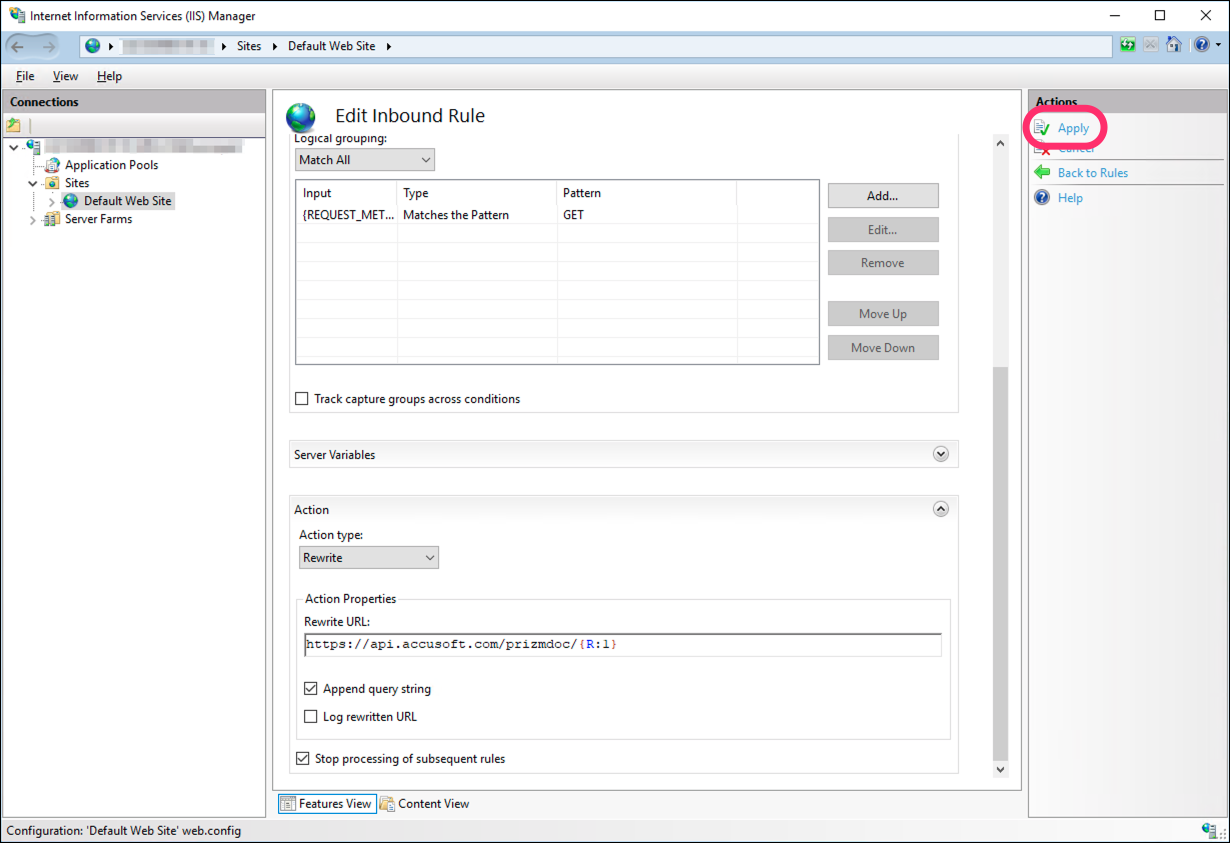
-
Click Apply to save your changes to the rule:
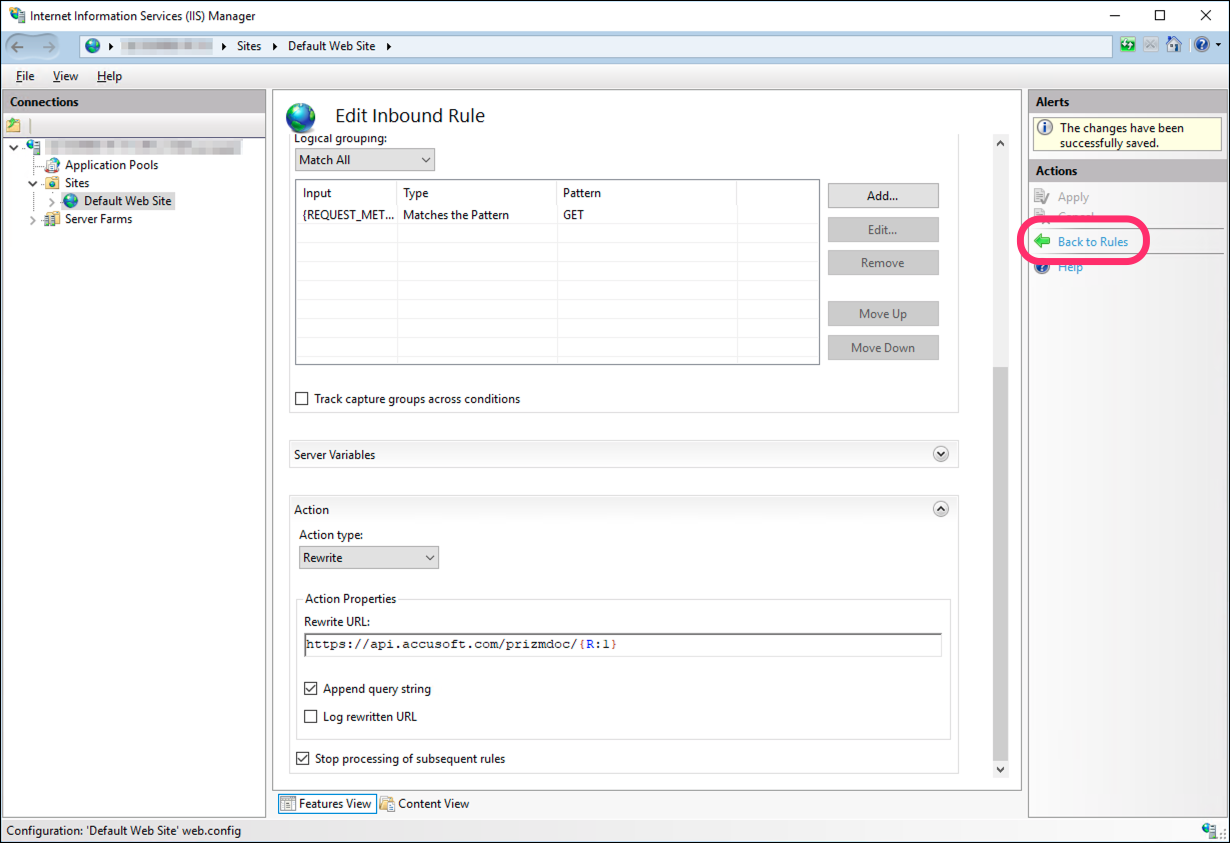
-
Click Back to Rules:
Finally, if you’re using PrizmDoc Cloud for your backend, you need to ensure the reverse proxy adds your API key to every request before it sends it along to PAS. PrizmDoc Cloud requires that your API key be provided via an HTTP request header named ACS_API_KEY. With IIS, you can achieve this by setting an IIS server variable named HTTP_ACS_API_KEY to your actual API key value (the URL Rewrite module will add a request header for any server variable beginning with HTTP_, basing the header name on the rest of the server variable name; see the URL Rewrite module docs for more information).
Setting up this server variable is a two-step process.
First, we need to define the HTTP_ACS_API_KEY server variable so we can actually use it.
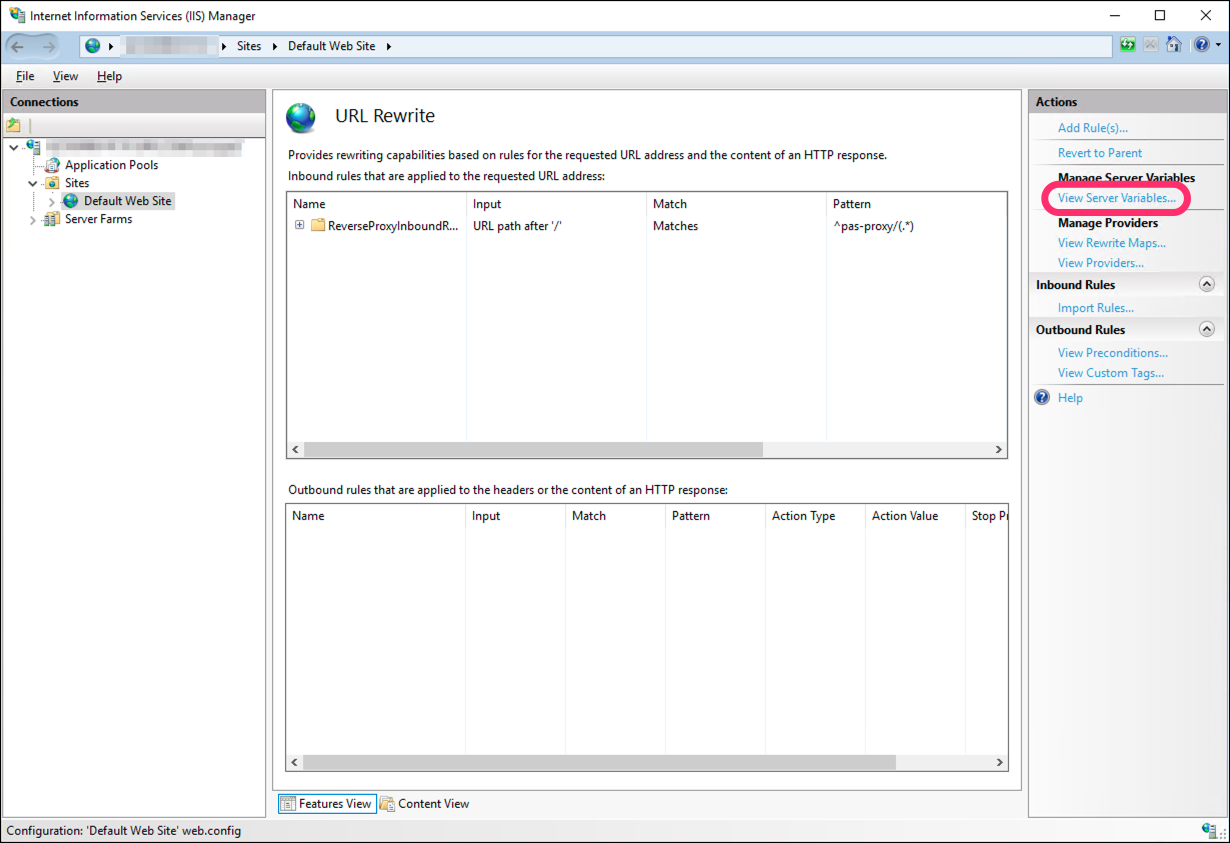
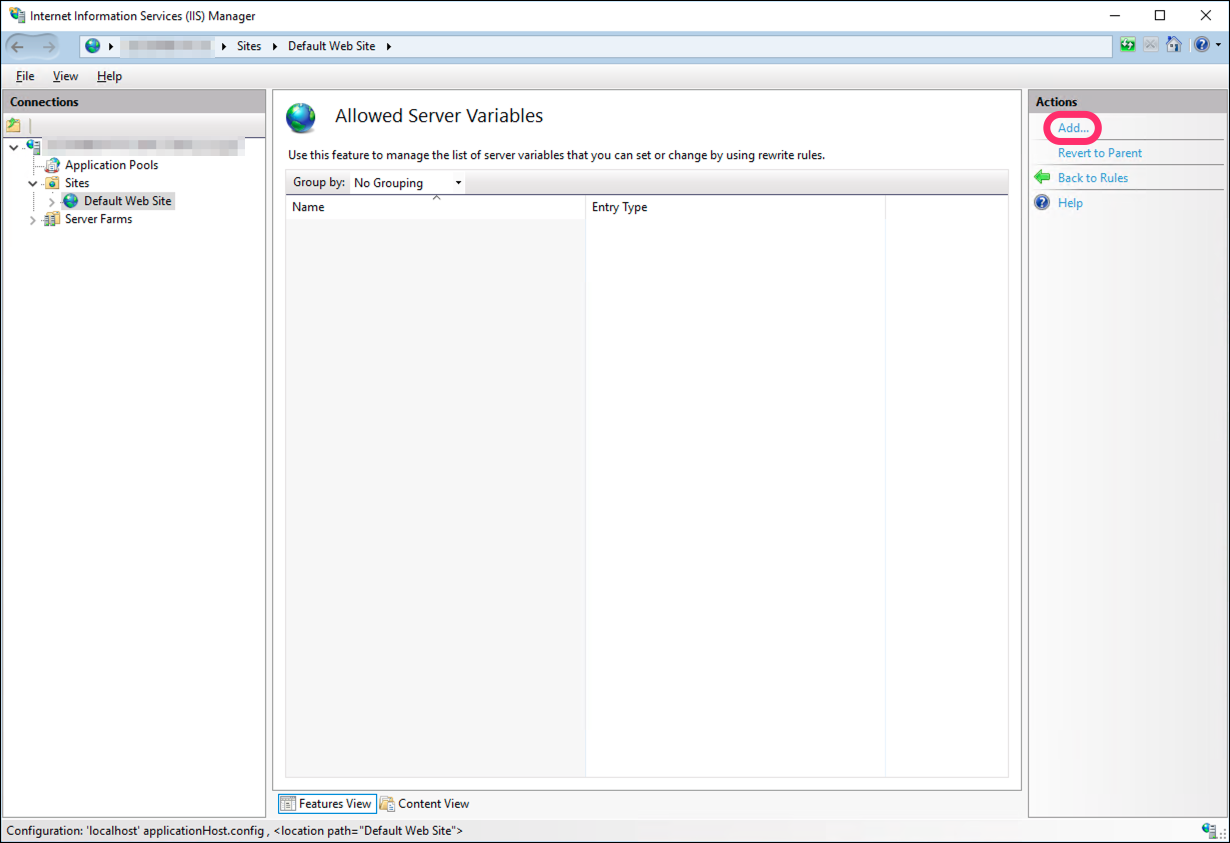
-
On the URL Rewrite module screen, click View Server Variables...
-
Click Add...
-
In the dialog:
- Set the Server variable name to
HTTP_ACS_API_KEY: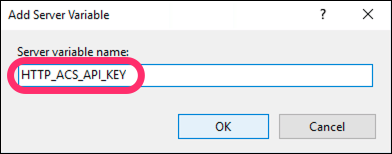
- Click OK. The Allowed Server Variables screen should now look like this:
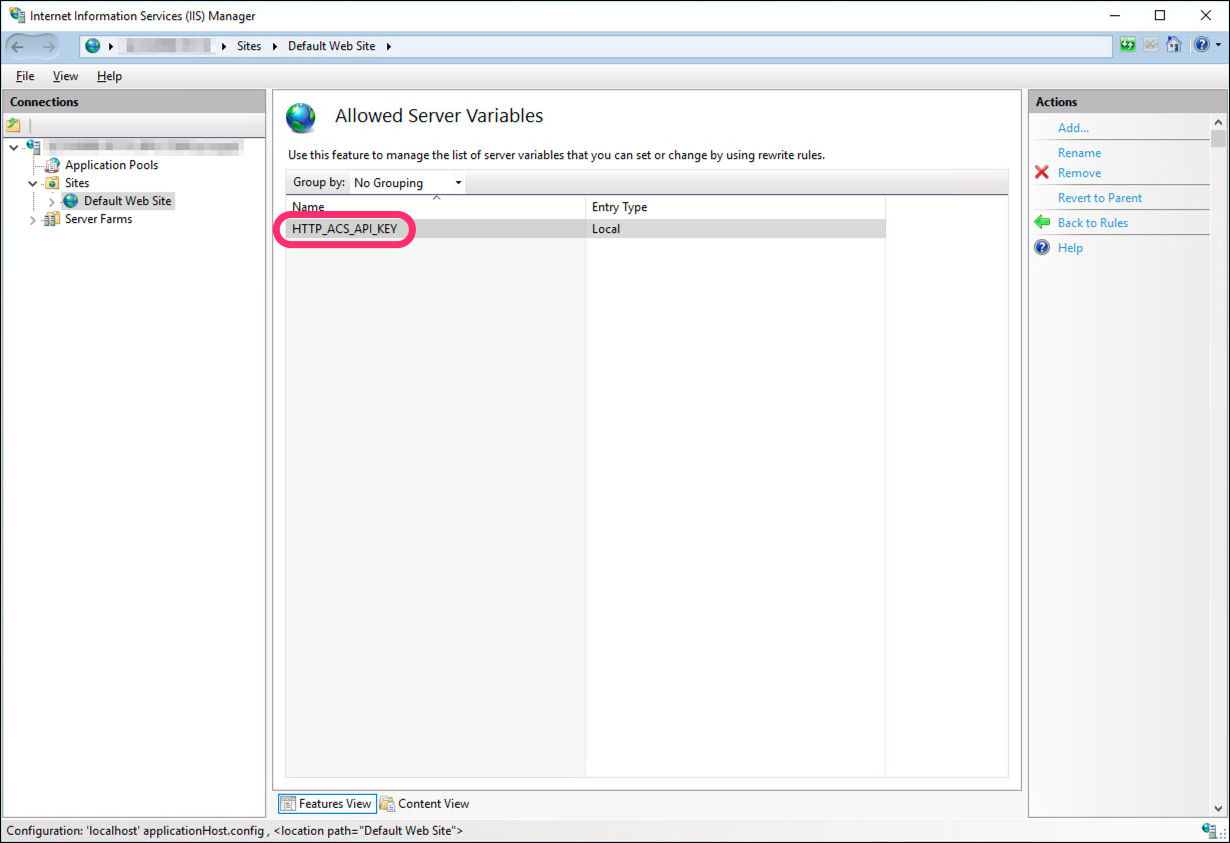
- Set the Server variable name to
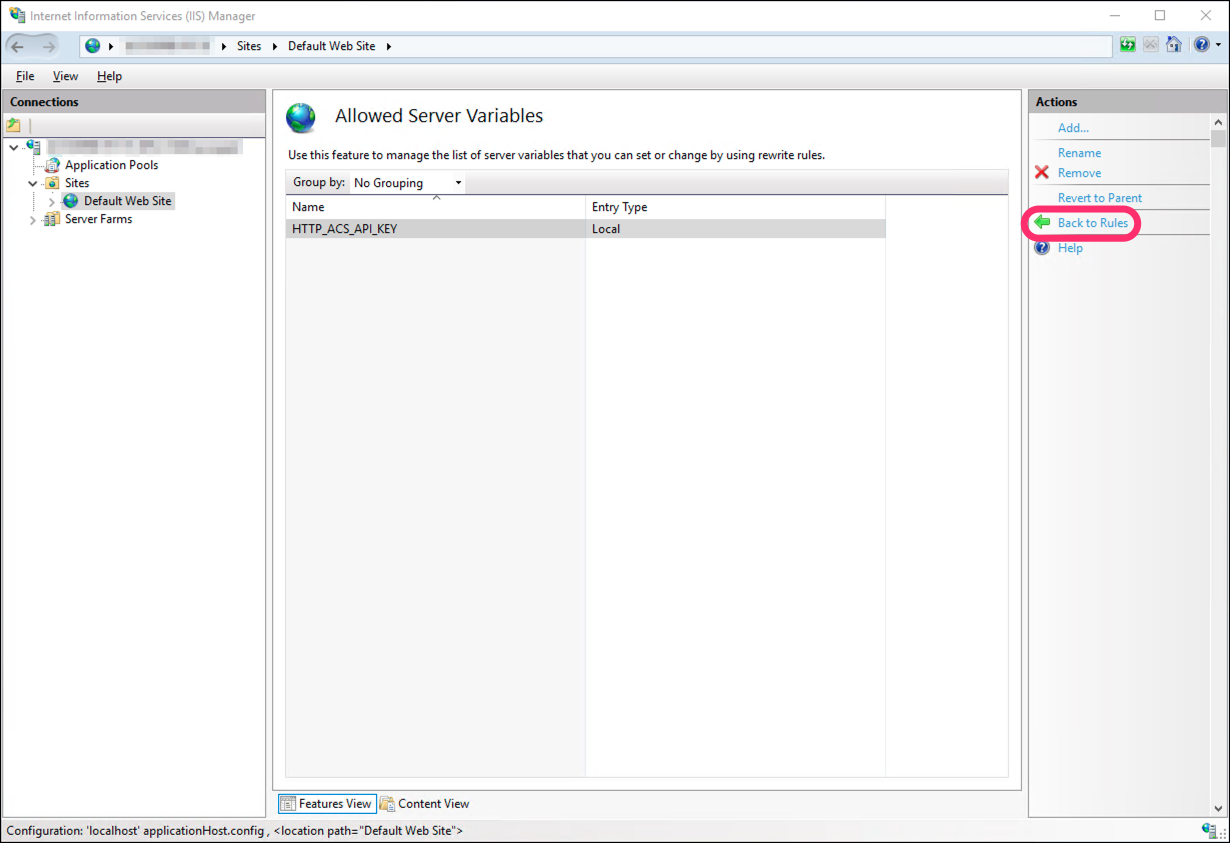
Now that we’ve allowed this variable, we need to actually use it in our reverse proxy.
-
Click Back to Rules to return to the list of URL Rewrite rules:
-
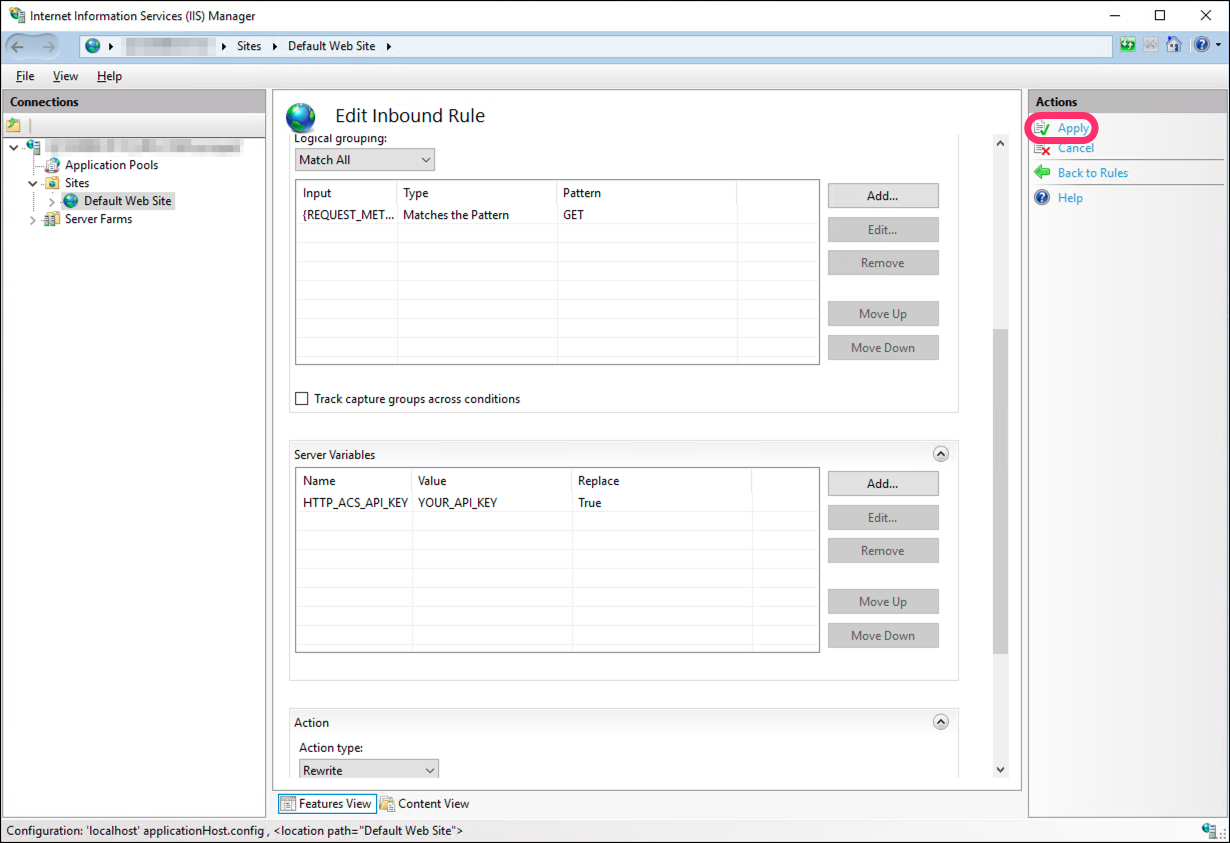
Select the reverse proxy rule we created earlier, then click Edit...
-
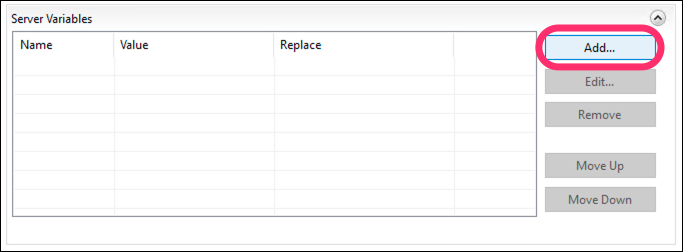
Expand Server Variables and click Add...
-
In the dialog:
- Set Server variable name to
HTTP_ACS_API_KEY - Set Value to your actual API key
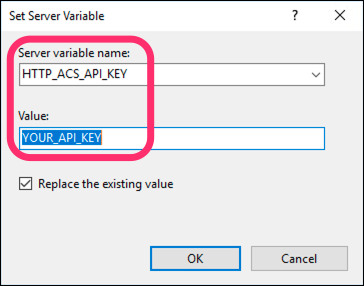
- Click OK to create this new server variable, which will add an
acs-api-keyrequest header to every request before forwarding it on to PAS. Your Server Variables list should now look like this: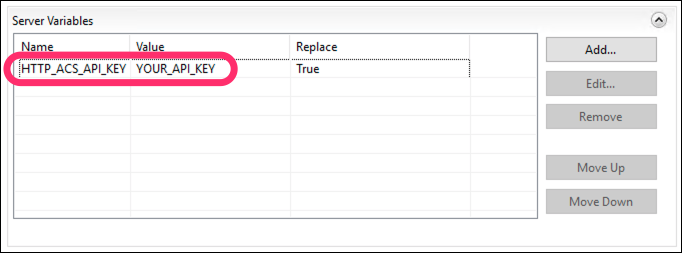
- Set Server variable name to
-
Click Apply to save your changes to the rule:
That’s it! You’ve now configured your IIS site or application to proxy all GET /pas-proxy/* requests to PAS.
What We Have Now
If you've configured everything correctly, your web application should now display a viewer with actual document content:
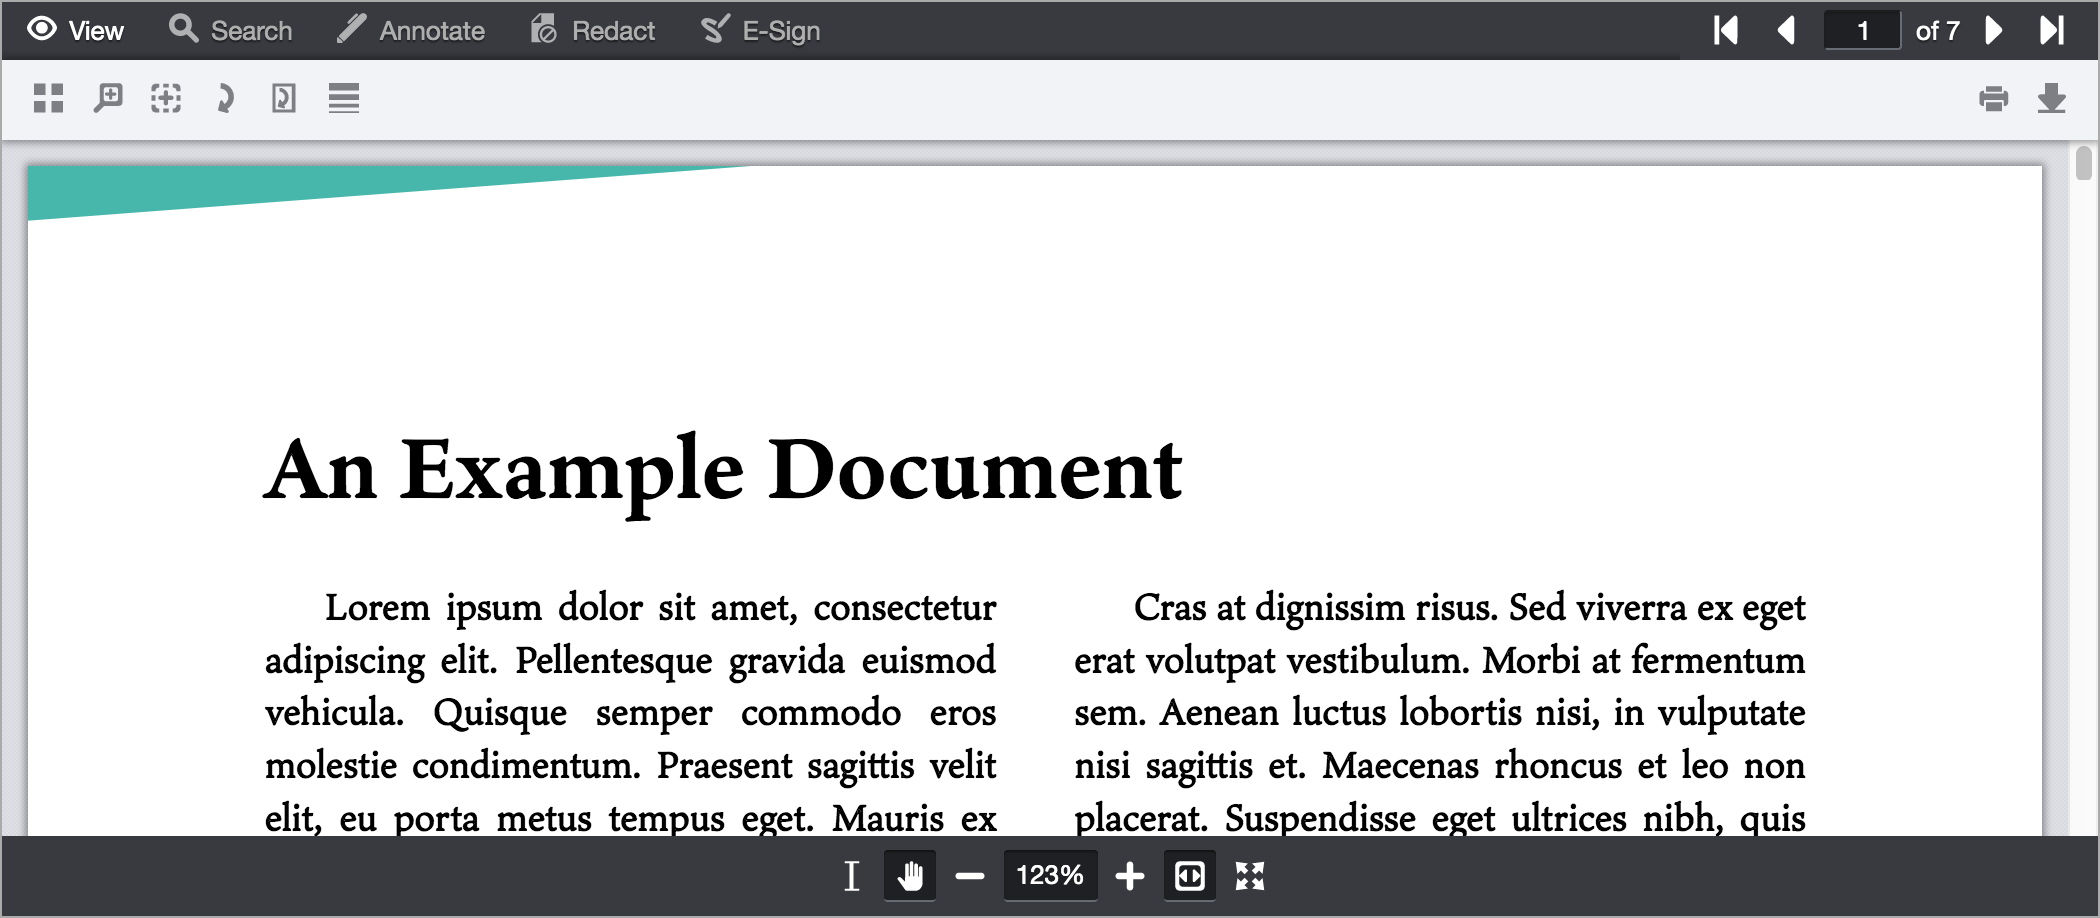
Congratulations, you've integrated PrizmDoc Viewer into your application!