
Build a Custom User Interface
It is possible to build a custom Viewer UI by directly embedding the ViewerControl instead of embedding the Viewer using the jQuery plugin.
There are several benefits to building a custom Viewer UI, including the ability to:
- Design menus and button placement that is unique for your customer’s workflow.
- Create custom UI elements/behavior.
- Arrange UI elements distributed throughout a web page, rather than all Viewer UI elements in a single div.
- Choose your own UI framework(s).
- The ViewerControl (viewercontrol.js) does not have a dependency on any third-party frameworks/libraries
Customization Example
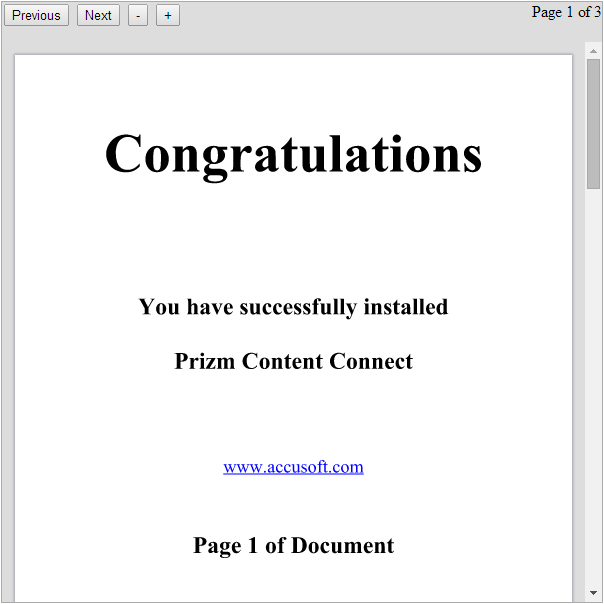
In the example below, the ViewerControl is embedded into a page and a simple UI is built around the ViewerControl. The Viewer created by the example code is shown in the figure below:
The directory structure for this example is:
- /
- css/
- viewercontrol.css (product)
- simple.css (custom - shown below)
- js/
- viewercontrol.js (product)
- viewerCustomizations.js (product)
- simple.js (custom - shown below)
- viewercontrol.js (product)
- simple.html (custom - shown below)
- css/
NOTE: This example uses jQuery for simplicity and because it is well known to many readers. jQuery is served from the Google Hosted Libraries CDN.
HTML (simple.html)
  <!DOCTYPE html>
<html>
<head lang="en">
   <meta charset="UTF-8">
   <title>Custom Viewer UI Example</title>
   <!--resources for the viewer-->
   <link rel="stylesheet" href="css/viewercontrol.css">
   <script src="js/viewercontrol.js"></script>
   <script src="js/viewerCustomizations.js"></script>
   <!--Use jQuery to build the UI of the viewer-->
   <script src="//ajax.googleapis.com/ajax/libs/jquery/3.6.0/jquery.min.js"></script>
   <!-- Script tag for simple.js, which creates and embeds the custom viewer. -->
   <script src="js/simple.js"></script>
   <!-- CSS for the page -->
   <link rel="stylesheet" href="css/simple.css">
</head>
<body>
<!-- This div contains the custom viewer and UI elements. -->
<div class="viewerWrapper">
   <!-- There are some buttons/tools in the viewer UI. These will be disabled until the ViewerReady event. -->
   <button id="prevPage" class="viewerButton" disabled>Previous</button>
   <button id="nextPage" class="viewerButton" disabled>Next</button>
   <button id="zoomOut" class="viewerButton" disabled>-</button>
   <button id="zoomIn" class="viewerButton" disabled>+</button>
   <!-- There is a status bar that shows the current and total page number. -->
   <div class="floatRight">Page <span id="currentPage">1</span> of <span id="totalPages">1</span></div>
   <!-- The ViewerControl is embedded in this element. -->
   <div id="viewerControlContainer">ViewerControl goes here</div>
</div>
</body>
</html>
JavaScript (js/simple.js)
$(document).ready(function() {
   // Get the element where the viewer will be embedded.
   var element = document.getElementById("viewerControlContainer");
   // Create the options object for the viewer
   var options = {
       documentID : "a_valid_document_id",
       imageHandlerUrl: "my_pas_proxy",
       icons : viewerCustomizations.icons,
       language : viewerCustomizations.languages['en-US'],
       // printTemplate : "..."        // include a print template for printing to work
   };
   // Create the viewer control
   var viewerControl = new PCCViewer.ViewerControl(element, options);
   // It's best practice to wait for the "ViewerReady" event before calling the viewer API.
   viewerControl.on("ViewerReady", function() {
       // Display the page count when the estimated and actual page count are available.
       viewerControl.on("PageCountReady", displayPageCount);
       viewerControl.on("EstimatedPageCountReady", displayPageCount);
       function displayPageCount(ev) {
           $("#totalPages").html(ev.pageCount);
       }
       // Display the current page number when the page changes.
       viewerControl.on("PageChanged", function(ev) {
           $("#currentPage").html(ev.pageNumber);
       });
       // It's safe to enable the UI buttons during the ViewerReady event
       $(".viewerButton").prop("disabled", false);
       // ...and then hookup the UI buttons
       $("#nextPage").click(function() {
           viewerControl.changeToNextPage();
       });
       $("#prevPage").click(function() {
           viewerControl.changeToPrevPage();
       });
       $("#zoomOut").click(function() {
           viewerControl.zoomOut(1.25); // Zoom out 1.25x
       });
       $("#zoomIn").click(function() {
           viewerControl.zoomIn(1.25);  // Zoom in 1.25x
       });
   });
});
NOTE: The sample code that installs with the product demonstrates how to generate a document ID. The code is too large to be shown in this example.
CSS (css/simple.css)
.viewerWrapper {
   width: 600px;
   height: 600px;
   position: relative;
   border: 1px solid #aaa;
   background: #ddd;
}
#viewerControlContainer {
   position: absolute;
   top: 40px;
   bottom: 0px;
   left: 0px;
   right: 0px;
}
.floatRight {
   float: right
}