
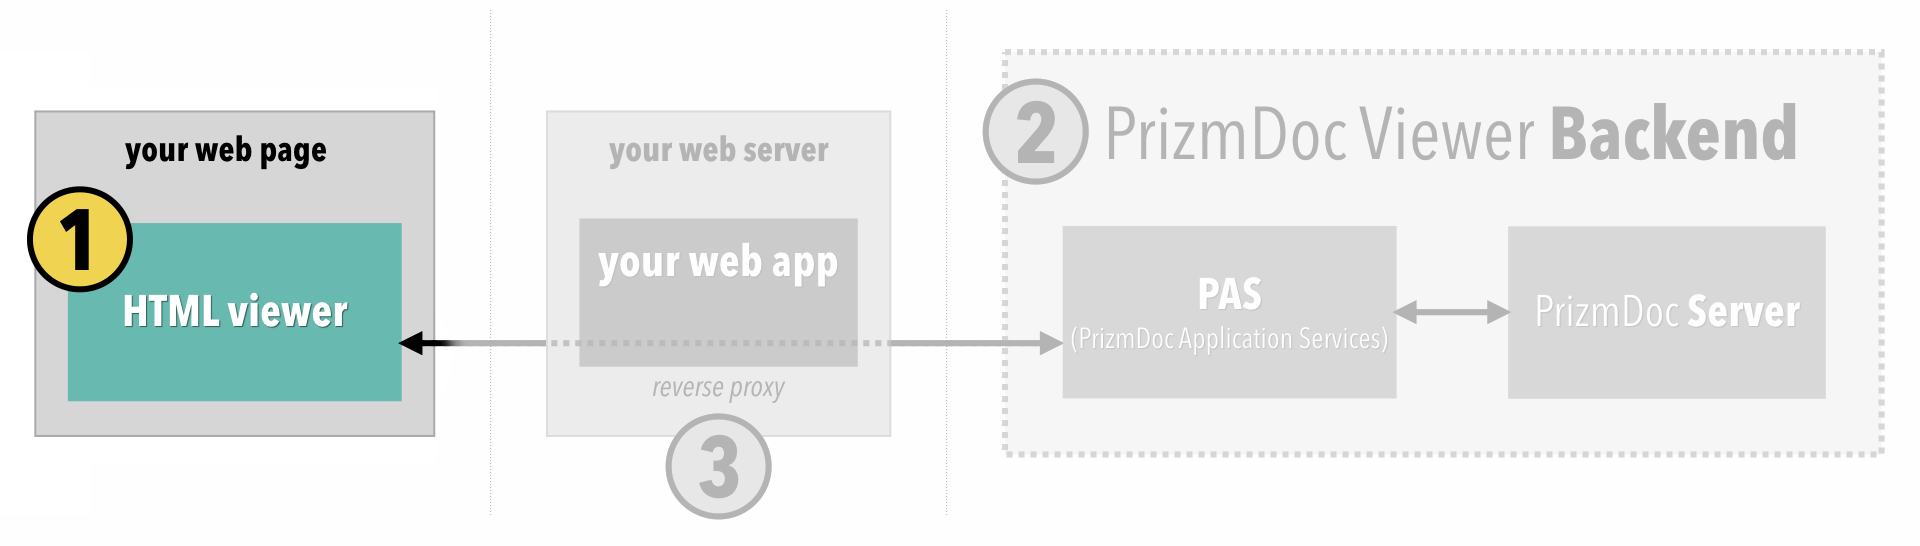
Overview
First, we’ll need to add the viewer itself into your web application:
By the end of this section your web application should be able to display an empty viewer.
Update Your Web Application to Serve the Static Files Needed by the Viewer
There are a set of static JavaScript, CSS, font, and image files which define the viewer UI. You’ll need to add these to your web application in such a way that the browser can GET them.
You can download the static files needed for the viewer here:
Unzip that file and move the unzipped viewer-assets directory and all of its contents into your web application at a place where the files can be served statically. For example, perhaps you configure your web application to map the route viewer-assets/ to the unzipped viewer-assets directory which you just added to your application. Make sure to include all of the files and folders as defined in the ZIP file, including all of the fonts and images. This is important for all the parts of the viewer UI to display correctly.
Integrate the Viewer Into a Page
To include the viewer in a particular page of your web application, you’ll need to:
- Add boilerplate code in the
<head>of your page to include the required JavaScript and CSS. - Declare a
<div>somewhere in your HTML as the placeholder for the viewer. - Call a JavaScript function which creates the viewer at the location of the specified
<div>.
1. Include the required JavaScript and CSS
IMPORTANT: Scripts must be loaded in the specified order as shown below.
Assuming you have set up your web application to serve the static JavaScript and CSS files at viewer-assets/, you would add the following to the <head> of your HTML:
<!-- Ensures the viewer works best across various browsers and devices -->
<meta http-equiv="Content-Type" content="text/html; charset=utf-8">
<meta name="viewport" content="width=device-width, initial-scale=1, maximum-scale=1 user-scalable=no"/>
<meta http-equiv="X-UA-Compatible" content="IE=edge" />

<!-- CSS required by the viewer -->
<link rel="stylesheet" href="viewer-assets/css/normalize.min.css">
<link rel="stylesheet" href="viewer-assets/css/viewer.css">

<!-- JS required by the viewer -->
<script src="viewer-assets/js/jquery-3.6.0.min.js"></script>
<script src="viewer-assets/js/jquery.hotkeys.min.js"></script>
<script src="viewer-assets/js/underscore.min.js"></script>
<script src="viewer-assets/js/viewercontrol.js"></script>
<script src="viewer-assets/js/viewer.js"></script>
<script src="viewer-assets/js/viewerCustomizations.js"></script>
NOTE: If your static files are hosted at a path other than
viewer-assets/, adjust accordingly.
2. Declare a <div> placeholder for the viewer
Somewhere in your HTML, at the location where you want the viewer to appear, add a placeholder div with a unique id, like this:
<div id="viewerContainer" />
Make sure you style the width and height of the div to be the dimensions you want used for the viewer.
3. Create the viewer
Finally, instantiate the viewer with a JavaScript call like this:
<script type="text/javascript">
  $(function() {
    $('#viewerContainer').pccViewer({
      //documentID:     'TODO: We'll handle this in part 2',
      imageHandlerUrl:  '/pas-proxy',
      viewerAssetsPath: 'viewer-assets',
      resourcePath:     'viewer-assets/img',
      language: viewerCustomizations.languages['en-US'],
      template: viewerCustomizations.template,
      icons:    viewerCustomizations.icons,
      annotationsMode: "LayeredAnnotations"
    });
  });
</script>
NOTE: If your static files are hosted at a path other than
viewer-assets/, adjustviewerAssetsPathandresourcePathaccordingly.
You’ll notice that the documentID has not been set yet. We’ll get to that soon.
What We Have So Far
At this point, if you run your web application and view the page in a browser, you should see the viewer UI with the following error:
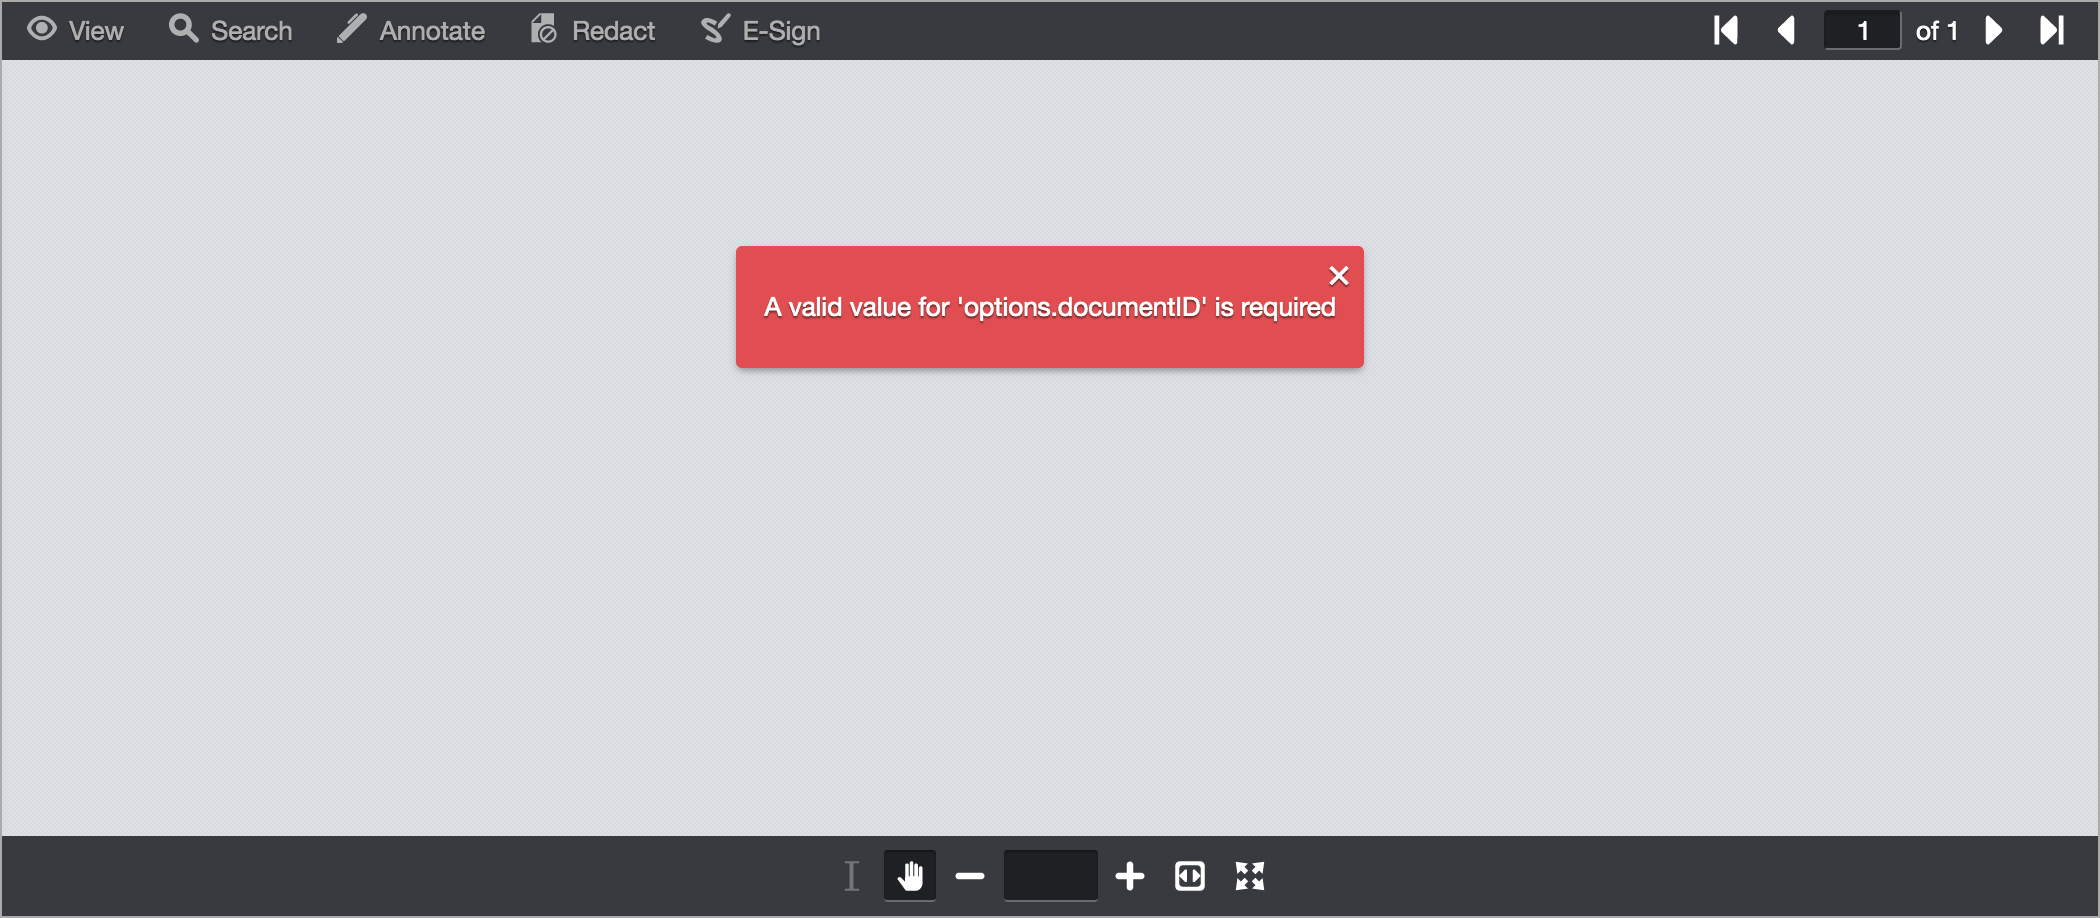
The error is occurring because we have not yet connected the viewer to a backend viewing session. We’ll do that now in part 2.