PrizmDoc v13.0 - Updated
View Tab
The View Tab is the default tab that is displayed when you first open a document in the Viewer. Once you've loaded a document, it should look similar to this:

You will immediately note that you can scroll the page up and down via either the mouse or touch, just like any web page you’ve ever worked with. As you scroll through the document, each page becomes visible until you reach the last page in the document.
In addition to scrolling, there are several other Viewer adjustments that can be made for reading a document. These are located at the top and bottom of the browser window, and they allow you to easily adjust the page to your viewing needs. The following section provides you with more information on these features.
The following table shows the icons and their meanings:
|
|
Thumbnails - The Thumbnail panel provides an overview of the document and your current position in it. Scrolling through the document is easy via this panel, and by simply clicking on a specific page you can load that page into the Viewer. Also, by adjusting the slider at the top of the thumbnail pane you can make the thumbnail images smaller or larger. |
|
|
Magnifier Tool - The Magnifier Tool allows you to dynamically zoom in on specific portions of the document, similar to using a magnifying glass. By clicking the mouse and then dragging it across the document, you can see an enlargement of the area directly under the mouse cursor. |
|
|
Rectangle Zoom - The Rectangle Zoom tool makes it easy to zoom in on an arbitrary rectangle in the document. Simply click and drag out the portion of the document you wish to zoom in on and the document zoom percentage will be adjusted accordingly. Unlike the Magnifier, the zoom level is set by the rectangle you draw, and once set in this way, will remain in effect until you modify it. |
|
|
Rotate Document - The Rotate Document tool makes it easy to rotate all the pages in the document by 90 degrees. To continue to rotate all the pages in the document by another 90 degrees, continue to press the Rotate Document button. |
|
|
Rotate Page - The Rotate Page tool allows you to rotate one page 90 degrees without rotating all the pages in the document. Simply scroll to the page you want to rotate and select the Rotate Page tool. To continue to rotate that page another 90 degrees, continue to press the Rotate Page button. |
|
|
Image Tools - The Image Tools feature allows you to enhance the document you are viewing for clarity. The slider provides three options: Sharpening, Brightness, and Line Width. Image Tools are available for viewing only; if you print or save the file after applying any of the Image Tools, the changes will not show in the printed or saved document. |
|
|
First Page - Select the First Page button to go to the very first page of the document. |
|
|
Previous Page - Select the Previous Page button to go back one page from your current location in the document. |
|
|
Next Page - Select the Next Page button to go forward one page from your current location in the document. |
|
|
Last Page - Select the Last Page button to go to the very last page of the document. |
|
|
Print - When you click on the Print button, a dialog is displayed that allows you to choose the Pages, Orientation, Paper Size, Auto Fit Margins, Annotations, Redactions, Comments and Redaction Reasons you would like to print. For more details on printing, refer to Printing Documents. |
|
|
Download - When you click on the Download button, a panel is displayed that allows you to choose the Original Document or PDF and if you want any Annotations, Redactions or E-Signatures to print as well. For more details on downloading documents and the options available, refer to Downloading Documents. |
The navigation buttons at the bottom of the screen remain available through all pages of the document that you are viewing. The following table shows the icons and their meanings:
|
|
Select Text - The Select Text tool allows you to select text and perform actions such as copying it to the clipboard or highlighting it. |
|
|
Pan Tool - The hand-shaped tool is an important one for you to remember. It’s called the Pan Tool, and when it’s active (when the button appears indented) you are in "Pan mode" in the Viewer, which is the "base" state where you can select and work with items. If you’re ever attempting to select an item and it draws an annotation instead, it’s because this tool isn’t currently selected. Many times this mode will be selected automatically for you. For example, the default behavior after drawing an annotation using one of the annotation tools is to return immediately to Pan mode so the newly created annotation can be manipulated as desired. |
|
|
Zoom Out - The Zoom Out tool allows you to reduce the document size in the viewing area so you can easily see the borders of the document. |

|
Viewing Options (Percentage, Full Width, Full Height, Full Page) - The Viewing Options field displays your current zoom level (in this example, the area that displays 151%). Click the Viewing Options field to open a menu for additional viewing options. |
|
|
Zoom In - The Zoom In tool allows you to enlarge the document in the viewing area so it is easier to read. |
|
|
Fit Content - The Fit Content tool allows you to quickly expand the document to fit the width of the viewing area, with minimal borders on each side of the document. |
|
|
Full Screen - The Full Screen tool allows you to expand the document to fit the width of the entire Viewer, with no visible borders on each side of the document. |
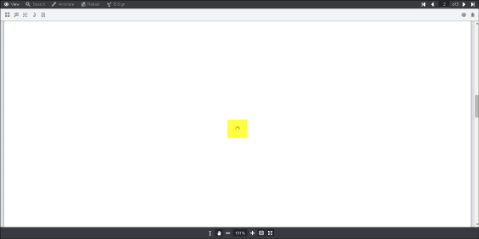
Note that if you open, scroll-through or use set page number for a very large file, you may see the spinning circle (highlighted in yellow below) displayed in the middle of the Viewer while the document loads: