

The E-Signature module opens up a set of PrizmDoc workflows based on forms stored in any of the many file formats supported by PrizmDoc. As with the PrizmDoc Viewer, the E-Signature module works in your website to empower your customers as you see fit.
With v12.0, the introduction of forms detection makes the process faster. The E-signature module will automatically detect form fields in a PDF or raster image document and convert them so that it's easier to fill out your templates. Depending on the quality of the forms in the document, there may be no manual effort required by the template designer.
The process starts with any document that you would like to "fill in" with some content. Note that this doesn’t have to be an actual "form", it can really be any document that PrizmDoc can display.
If the document that you upload to the E-Signature module doesn't have any detectable form fields, a template designer then annotates it with the proper fields that will allow an end user to fill it out, burn in their signature, and create a finalized document that can then be forwarded as needed.
As an example, let’s consider a blank Word document, a form for requesting time off:
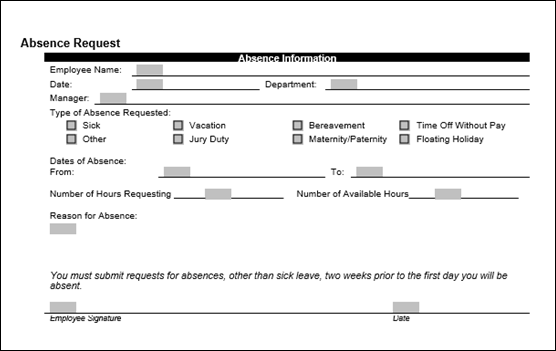
Normally, an employee would fill this out in Word, print it, sign and date it, then submit to their manager. This is not a very friendly workflow, and it requires both a copy of Word (expensive) and printing a physical copy of the form (wasteful).
The goal of our eSigning module is to make this workflow entirely electronic, including signing and producing a final electronic document that can be forwarded for approval. In order to make this workflow a reality, you would need to do the following:
It’s important to note that these two workflows are entirely independent. The people who might be template creators would normally be a very different set of people from those who need to fill out a form.
To illustrate the process, let’s take the Absence Request form from above and load it in the template creator module:
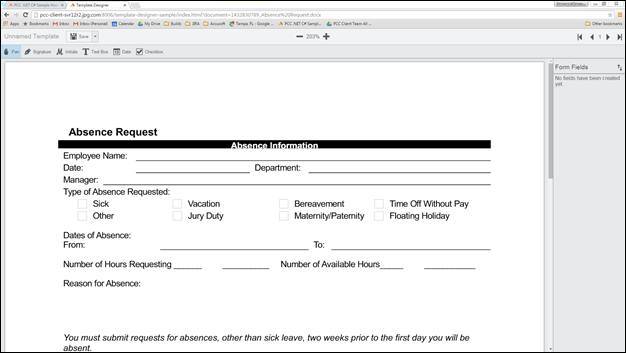
Note the tools available in the upper left of the screen. Currently we support Signatures, Initials, Text, Dates, and Checkboxes. So let’s create the template using these field types, shown below:
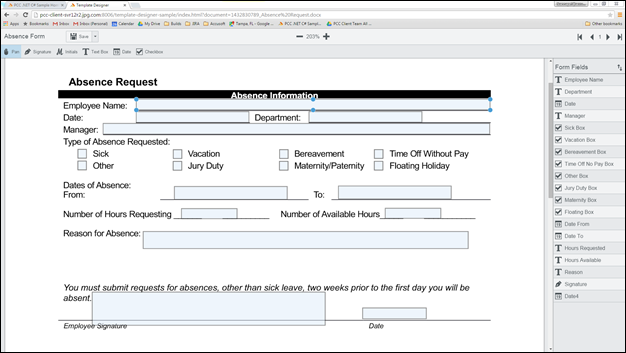
Here you can see the form fields that have been overlaid on the original document. The right hand panel shows the list of all fields by name and type. Once this template is created and saved, it’s now ready to be consumed and filled in by users. Below you can see how this looks in the default template signing module:
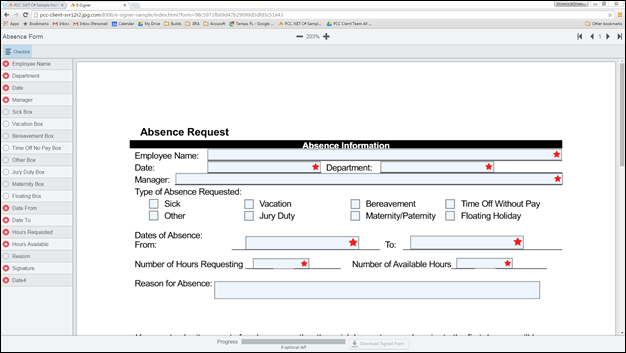
Here you can see the field layout that users will see. The fields with red stars are the required fields and the progress bar at the bottom of the screen illustrates how complete the required fields are in the form. Once all required fields have been completed, the "Download Signed Form" button will be enabled, allowing the user to download a PDF of the fully completed form as shown below:
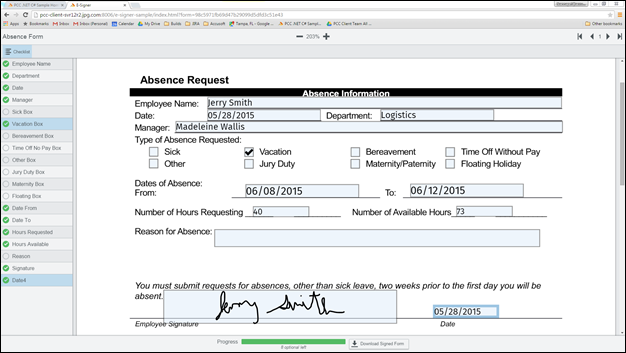
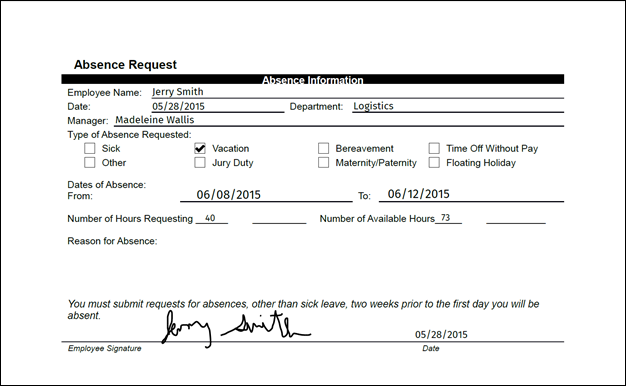
Now that the form is complete, the download button will allow downloading the final burned document, shown below:
This is just a quick overview that should illustrate how useful this could be in your product or your business. The most powerful part of the whole system is that it exists in your web pages, under your full control. And just like our Viewer, this viewer is heavily configurable via APIs and eventing.