Creating New File Providers
In This Topic
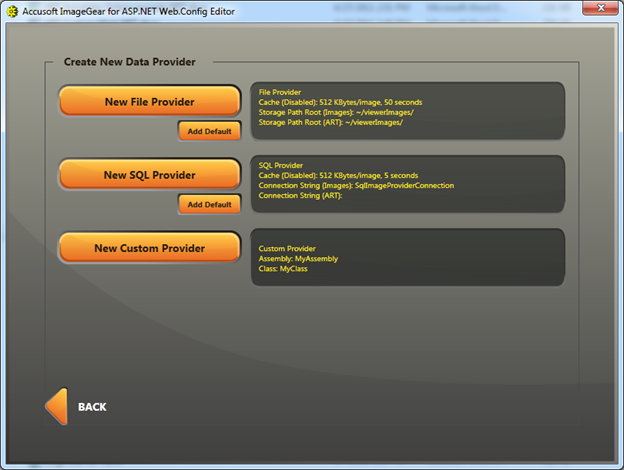
To create a new file provider, select New File Provider to launch a set of two dialog boxes that guide you through customizing a File Data Provider:

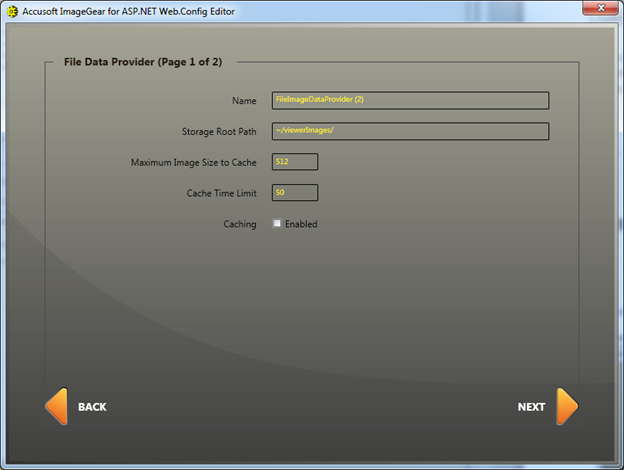
The File Data Provider (Page 1 of 2) dialog is displayed. This dialog allows you to define the location of the image data and how it should be handled:

| File Data Provider Option |
Description |
| Name |
Specifies the name used to reference the Data Provider; this value will be used to reference this data provider. |
| Storage Root Path |
The base location where files will be located. This path can be defined as a hard path or a relative path based on the location of the web.config file (by using a tilde). |
| Maximum Image Size to Cache |
This value is in kilobytes. It allows you to put an upper limit on the size of the image that can be cached. When deciding on the value, bear in mind the amount of memory your system has. A larger value on infrequently used images will unnecessarily use up the memory for cache. The default value is 512K. |
| Cache Time Limit |
Represents the amount of time in minutes that the image is to remain in the cache. Upon remaining in the cache for the amount of time specified, the system will flush the cache of the stored image. |
| Caching |
Indicates whether caching is enabled. |
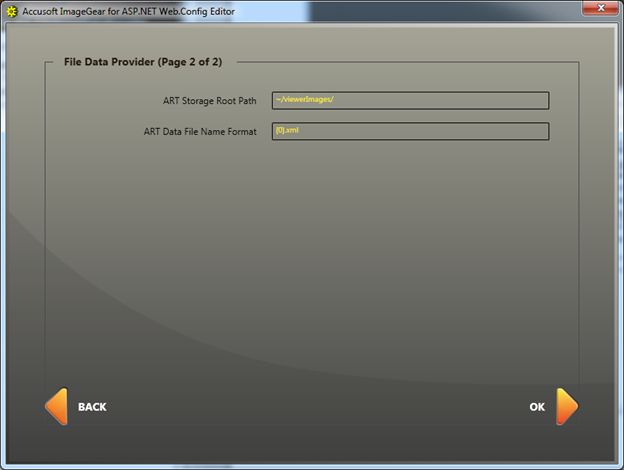
To continue configuring the file data provider, click Next. The File Data Provider (Page 2 of 2) dialog is displayed. This dialog allows you to define the annotation related parameters:

| Annotation Related Parameters |
Description |
| ART Storage Root Path |
The storage root folder path where the annotation data files are stored. The application defaults the path to the previously defined "Storage Root Path". |
| ART Data File Name Format |
Specifies the replacement scheme used to determine the name of the annotation data file. The application sets this value to "{0}.xml". The {0} in this format is replaced with the value of Document Identifier. For example, if your image file is Myimage.tif, then the annotations file will be Myimage.tif.xml. |
After you have defined the Data Provider with your settings, click the OK button to add the Data Provider to the Data Provider list. The Data Provider has been added to the web.config stored in memory, but it has not been written to disk at this point. To save your Web.Config settings, refer to the Saving Your Web.Config Settings topic.


