This topic provides information about the following:
ImageGear .NET GUI Components
A variety of components are provided which can be used to both speed up and improve the integration of ImageGear .NET with your GUI application. These components are available for both WinForms and WPF applications and only require a few simple steps.
The steps detailed in the sections below assume the use of:
Installation for WinForms GUI Development
To begin, open your C# or VB.NET WinForms project in Visual Studio. If you do not already have one, then first create a new “Windows Forms App (.NET Framework)” using your desired language.
Once your project is open in Visual Studio:
- Open the Toolbox (View > Toolbox).
- In the Toolbox, right-click and select Add Tab and name it Accusoft.
- Right-click the Accusoft tab and select Choose Items….
- In the Choose Toolbox Items dialog box, click Browse….
- Navigate to the $INSTALLDIR\ImageGear .NET v24\Bin\x64 directory, select the following DLL files and then click Open:
- ImageGear24.Windows.Forms
- Ensure the following components are added and highlighted:
- ImGearMagnifier
- ImGearPageView
- ImGearPan
- ImGearThumbnailCtl
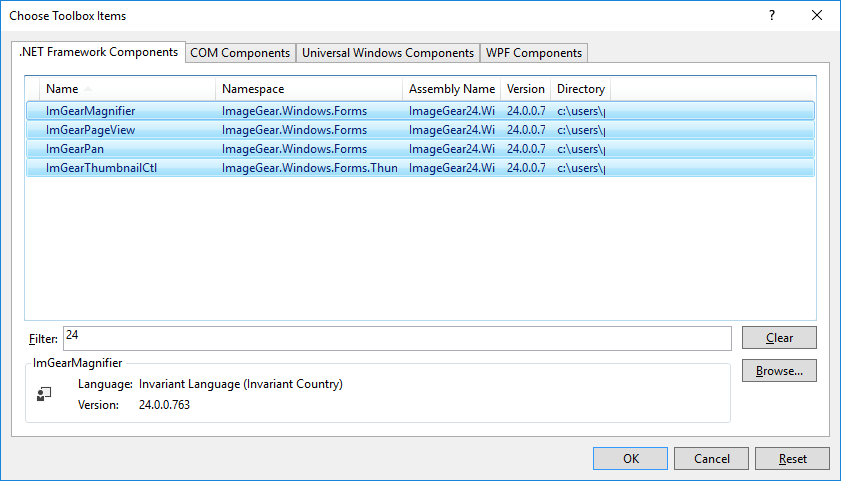
- Click OK.
The selected components should now be available within the Accusoft tab of the Toolbox. In Design mode, these components can be drag-and-dropped onto your GUI application.
Installation for WPF GUI Development
To begin, open your C# or VB.NET WPF project in Visual Studio. If you do not already have one, then first create a new “WPF App (.NET Framework)” using your desired language.
Once your project is open in Visual Studio:
- Open the Toolbox (View > Toolbox).
- In the Toolbox, right-click and select Add Tab and name is Accusoft.
- Right-click the Accusoft tab and select Choose Items….
- Once the Choose Toolbox Items dialog box is open, click Browse….
- Navigate to the $INSTALLDIR\ImageGear .NET v24\Bin\x64 directory, select the following DLL files and then click Open:
- ImageGear24.WPF
- ImageGear24.Windows.Controls
- Ensure the following components are added and highlighted:
- ImGearMagnifierCtl
- ImGearPageViewContextMenu
- ImGearPageViewToolbar
- ImGearPanCtl
- ImGearThumbnailCtl
- ImGearThumbnailList
- ImGearThumbnailListItem
- ImGearVirtualizingWrapPanel
- PageView

- Click OK.
The selected components should now be available within the Accusoft tab of the Toolbox. In Design mode, these components can be drag-and-dropped onto your GUI application.