ImageGear for .NET
Designing the Window

| ImageGear for .NET User Guide > Getting Started > ImageGear for .NET Visual Studio 2010 Tutorials > ImageGear for .NET C# WPF Tutorial > Designing the Window |
| XAML |
Copy Code |
|---|---|
<Window x:Class="IG_WPF_Tutorial.MainWindow" xmlns="http://schemas.microsoft.com/winfx/2006/xaml/presentation" xmlns:x="http://schemas.microsoft.com/winfx/2006/xaml" xmlns:custom="clr-namespace:IG_WPF_Tutorial" xmlns:IGWC="clr-namespace:ImageGear.Windows.Controls;assembly=ImageGear21.Windows.Controls" Title="MainWindow" Height="300" Width="300"> </Window> | |
| XAML |
Copy Code |
|---|---|
<Window.CommandBindings> <CommandBinding Command="Open" Executed="OpenExecuted"/> <CommandBinding Command="{x:Static custom:MainWindow.ZoomInCmd}" CanExecute="CanExectutePageAvailable" Executed="ZoomInExecuted"/> <CommandBinding Command="{x:Static custom:MainWindow.ZoomOutCmd}" CanExecute="CanExectutePageAvailable" Executed="ZoomOutExecuted"/> <CommandBinding Command="{x:Static custom:MainWindow.Rotate90Cmd}" CanExecute="CanExectutePageAvailable" Executed="ExectutedRotate90"/> <CommandBinding Command="{x:Static custom:MainWindow.Rotate180Cmd}" CanExecute="CanExectutePageAvailable" Executed="ExectutedRotate180"/> <CommandBinding Command="{x:Static custom:MainWindow.Rotate270Cmd}" CanExecute="CanExectutePageAvailable" Executed="ExectutedRotate270"/> <CommandBinding Command="{x:Static custom:MainWindow.ExitCmd}" Executed="ExitExecuted"/> </Window.CommandBindings> | |
| XAML |
Copy Code |
|---|---|
<Grid> <DockPanel Name="DockPanel1"> <Menu DockPanel.Dock="Top" Height="22" Name="menu1"> </Menu> <IGWC:PageView x:Name="imGearPageView1"/> </DockPanel> </Grid> | |
| XAML |
Copy Code |
|---|---|
<Menu DockPanel.Dock="Top" Height="22" Name="menu1"> <MenuItem Name="mnuFile" Header="_File"> <MenuItem Name="mnuFileOpen" Header="_Open" Command="Open"/> <MenuItem Name="mnuFileExit" Header="E_xit" Command="{x:Static custom:MainWindow.ExitCmd}"/> </MenuItem> <MenuItem Name="mnuView" Header="_View"> <MenuItem Name="mnuViewZoomIn" Header="Zoom _In" Command="{x:Static custom:MainWindow.ZoomInCmd}"/> <MenuItem Name="mnuViewZoomOut" Header="Zoom _Out" Command="{x:Static custom:MainWindow.ZoomOutCmd}"/> </MenuItem> <MenuItem Name="mnuProcessing" Header="_Processing"> <MenuItem Name="mnuProcessingRot90" Header="Rotate 90" Command="{x:Static custom:MainWindow.Rotate90Cmd}"/> <MenuItem Name="mnuProcessingRot180" Header="Rotate 180" Command="{x:Static custom:MainWindow.Rotate180Cmd}"/> <MenuItem Name="mnuProcessingRot270" Header="Rotate 270" Command="{x:Static custom:MainWindow.Rotate270Cmd}"/> </MenuItem> </Menu> | |
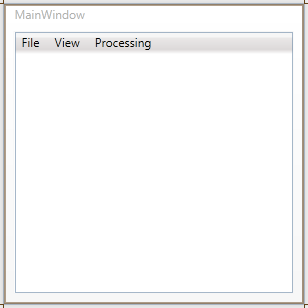
You should now see something like this in your Design panel:
