


- Double-click on the button labeled "Show Full Page" and add the following JavaScript code:
JavaScript  Copy Code
function Button1_onclick() {
 $find('PageView1').fitImage(ImageGear.Web.UI.FitType.FullImage);
}
- Return to Visual Studio's Design View and double-click on the button labeled "Rotate Right". Add the following code:
JavaScript Copy Codefunction Button2_onclick() { $find('PageView1').rotate(90); }
- Double-click the button labeled "Draw Ellipse" and add the following code:
JavaScript Copy Codefunction Button3_onclick() { var mark = new ImageGear.Web.UI.Mark(ImageGear.Web.UI.MarkType.Ellipse); mark.set_rectangle(new ImageGear.Web.UI.Rectangle(Math.random()*800, Math.random()*800, 800, 350)); mark.set_fillColor('#ffc0cb'); mark.set_lineWidth(10); mark.set_lineColor('#008020'); mark.set_opacity(127); $find('PageView1').get_artPage().addMark(mark); }
- In Design View, double-click "Data Provider 1" and add the following code:
JavaScript Example function Button4_onclick() { var _ctrlView = $find('PageView1'); if (_ctrlView.get_pageIsOpen() == true) { ctrlView.closePage(); } ctrlView.openPage({ documentIdentifier: 'FileImageDataProvider1:myImage.tif', pageNumber: 2, viewFitType: ImageGear.Web.UI.FitType.ActualSize }); }You will need to find the myImage.tif file from the “.\ImageGear.NET v21\Samples\ASP.NET\CSharp\ ASP.NET Tutorial” folder installed sample or use another image but change myImage.tif in the above code to the image name being used. The pageNumber value may need to be changed to 0 if the image is a single page document.
- In Design View, double-click "Data Provider 2" and add the last code snippet:
JavaScript Example function Button5_onclick() { var _ctrlView = $find('PageView1'); if (_ctrlView.get_pageIsOpen() == true) { ctrlView.closePage(); } _ctrlView.openPage({ documentIdentifier: 'FileImageDataProvider2:ccitt.tif', pageNumber: 2, viewFitType: ImageGear.Web.UI.FitType.ActualSize }); }Find the ccitt.tif as done in Step 4 above or use a different document image but make the corresponding code changes for the name and pageNumber as in Step 4 appropriately.
- Two image storage folders will need to be created in the application directory where your Default.aspx page is located. The two folders must match the Data Provider attributes in the web.config file. In the previous tutorial section, “Creating a Page Using the Project Item Template”, Step 7 had a step to configure the ImageGear Web Settings. If the Data Provider setup was not attempted there, either copy the web.config file from the ASP.NET Tutorial sample found in the ImageGear.NET v21\Samples\ASP.NET\CSharp location or edit the web.config and replace the current ImageGear.Web.DataProviders.ImageProvider section with this version:
Example
- Copy the document image myImage.tif and ccitt.tif or whatever image documents you used into the two folders respectively. If other images were used, make sure the appropriate images are copied into the viewImages and viewerImages2 folders. Button 4 will select the image in viewerImages and button 5 will select the image in viewerImages2. The JavaScript openPage method has documentIdentifier concatenating a file provider name with a document identifier with a “:” separating the provider name from the file name. As illustrated in the JavaScript, FileImageDataProvider1 is used with button 4 and FileImageDataProvider2 with button 5. The storageRootPath attribute associated with those file providers indicate the directory to be used to locate the file names being requested.
The parseToken attribute defined in the ImageProvider section determines what character or set of characters that define the separation between the data provider name and the document identifier. In this example, the “:” is used for the separation character. If the parseToken attribute is not provided, the “!” character is the default separator.

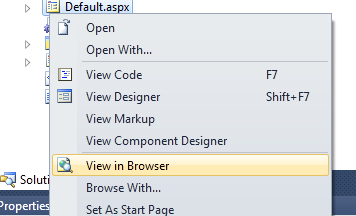
- Save your changes, and then run the application by right-clicking on Default.aspx in the Visual Studio Solution Window and selecting View in Browser.
- You can drag a rectangle on the image to zoom in (because the MouseTool property is set to RectangleZoom) and click the buttons to show the full image and rotate it.