- Now return in the IDE to MainWindow.xaml with both the Design and XAML panes for the window visible.
- In the XAML pane, you need to alias some namespaces. So add some code to the header so it looks like this:
XAML  Copy Code
<Window x:Class="IG_WPF_Tutorial.MainWindow"
    xmlns="http://schemas.microsoft.com/winfx/2006/xaml/presentation"
    xmlns:x="http://schemas.microsoft.com/winfx/2006/xaml"
    xmlns:custom="clr-namespace:IG_WPF_Tutorial"
    xmlns:IGWC="clr-namespace:ImageGear.Windows.Controls;assembly=ImageGear21.Windows.Controls"
    Title="MainWindow" Height="300" Width="300">
- Below this, add the Command Bindings for the RoutedCommands created above. Each will have its own handler for 'Executed', but they will share a single handler for 'CanExecute'. Right-click over each entry and click 'Navigate to Even Handler' to add the C# handler to the Window1 class in the .xaml.cs. You should have something like this:
XAML Copy Code<Window.CommandBindings> <CommandBinding Command="Open" Executed="OpenExecuted"/> <CommandBinding Command="{x:Static custom:MainWindow.ZoomInCmd}" CanExecute="CanExectutePageAvailable" Executed="ZoomInExecuted"/> <CommandBinding Command="{x:Static custom:MainWindow.ZoomOutCmd}" CanExecute="CanExectutePageAvailable" Executed="ZoomOutExecuted"/> <CommandBinding Command="{x:Static custom:MainWindow.Rotate90Cmd}" CanExecute="CanExectutePageAvailable" Executed="ExectutedRotate90"/> <CommandBinding Command="{x:Static custom:MainWindow.Rotate180Cmd}" CanExecute="CanExectutePageAvailable" Executed="ExectutedRotate180"/> <CommandBinding Command="{x:Static custom:MainWindow.Rotate270Cmd}" CanExecute="CanExectutePageAvailable" Executed="ExectutedRotate270"/> <CommandBinding Command="{x:Static custom:MainWindow.ExitCmd}" Executed="ExitExecuted"/> </Window.CommandBindings>
- Now open the Toolbox (View | Toolbox) and drag a DockPanel onto the Window. Stretch to fit if you wish; you can edit the properties in the xaml later. Add to that a Menu.
- In the xaml pane, set some defaults for each of the UI elements added.
- Remove all attributes from the DockPanel to set them to defaults.
- Add DockPanel.Dock="Top" attribute to the Menu.
- And finally, add a PageView below the Menu. It should look like this:
XAML Copy Code<Grid> <DockPanel Name="DockPanel1"> <Menu DockPanel.Dock="Top" Height="22" Name="menu1"> </Menu> <IGWC:PageView x:Name="imGearPageView1"/> </DockPanel> </Grid>
- Now set up the menu items.
- Use the default command for Open, but otherwise make use of the custom RoutedEvents created and bound in steps 1 and 2.
- Create top-level MenuItems for 'File', 'View', and 'Processing'.
- Nest 'Open' and 'Exit' inside 'File', 'Zoom In' and Out within 'Display', and 'Rotate 90', 180, and 270 within 'Processing'. The xaml written should look something like this:
XAML Copy Code<Menu DockPanel.Dock="Top" Height="22" Name="menu1"> <MenuItem Name="mnuFile" Header="_File"> <MenuItem Name="mnuFileOpen" Header="_Open" Command="Open"/> <MenuItem Name="mnuFileExit" Header="E_xit" Command="{x:Static custom:MainWindow.ExitCmd}"/> </MenuItem> <MenuItem Name="mnuView" Header="_View"> <MenuItem Name="mnuViewZoomIn" Header="Zoom _In" Command="{x:Static custom:MainWindow.ZoomInCmd}"/> <MenuItem Name="mnuViewZoomOut" Header="Zoom _Out" Command="{x:Static custom:MainWindow.ZoomOutCmd}"/> </MenuItem> <MenuItem Name="mnuProcessing" Header="_Processing"> <MenuItem Name="mnuProcessingRot90" Header="Rotate 90" Command="{x:Static custom:MainWindow.Rotate90Cmd}"/> <MenuItem Name="mnuProcessingRot180" Header="Rotate 180" Command="{x:Static custom:MainWindow.Rotate180Cmd}"/> <MenuItem Name="mnuProcessingRot270" Header="Rotate 270" Command="{x:Static custom:MainWindow.Rotate270Cmd}"/> </MenuItem> </Menu>
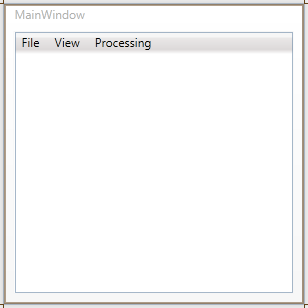
You should now see something like this in your Design panel: