- Now return in the IDE to Window1.xaml with both the Design and XAML panes for the window visible.
- In the xaml pane, we'll need to alias some namespaces. So add some code to the header so it looks like this:
XAML  Copy Code
<Window x:Class="IG_WPF_Tutorial.Window1"
    xmlns="http://schemas.microsoft.com/winfx/2006/xaml/presentation"
    xmlns:x="http://schemas.microsoft.com/winfx/2006/xaml"
    xmlns:custom="clr-namespace:IG_WPF_Tutorial"
    xmlns:IGWC="clr-namespace:ImageGear.Windows.Controls;assembly=ImageGear21.Windows.Controls"
    Title="Window1" Height="300" Width="300">
- Below this, add the Command Bindings for the RoutedCommands created above. Each will have its own handler for 'Executed', but they will share a single handler for 'CanExecute'. Right-click over each entry and click Navigate to Event Handler to add the C# handler to the Window1 class in the .xaml.cs. You should have something like this:
XAML Copy Code<Window.CommandBindings> <CommandBinding Command="Open" Executed="OpenExecuted"/> <CommandBinding Command="{x:Static custom:Window1.ZoomInCmd}" CanExecute="CanExectutePageAvailable" Executed="ZoomInExecuted"/> <CommandBinding Command="{x:Static custom:Window1.ZoomOutCmd}" CanExecute="CanExectutePageAvailable" Executed="ZoomOutExecuted"/> <CommandBinding Command="{x:Static custom:Window1.Rotate90Cmd}" CanExecute="CanExectutePageAvailable" Executed="ExectutedRotate90"/> <CommandBinding Command="{x:Static custom:Window1.Rotate180Cmd}" CanExecute="CanExectutePageAvailable" Executed="ExectutedRotate180"/> <CommandBinding Command="{x:Static custom:Window1.Rotate270Cmd}" CanExecute="CanExectutePageAvailable" Executed="ExectutedRotate270"/> <CommandBinding Command="{x:Static custom:Window1.ExitCmd}" Executed="ExitExecuted"/> </Window.CommandBindings>
- Now open the Toolbox (View | Toolbox) and drag a DockPanel onto the Window. Stretch to fit if you wish; we will be editing the properties in the xaml later. Add to that a Menu.
- In the xaml pane, we will set some defaults for each of the UI elements added. Remove all attributes from the DockPanel to set them to defaults. Add DockPanel.Dock="Top". attribute to the Menu. And finally, add a PageView below the Menu. It should look like this:
XAML Copy Code<Grid> <DockPanel Name="DockPanel1"> <Menu DockPanel.Dock="Top" Height="22" Name="menu1"> </Menu> <IGWC:PageView x:Name="imGearPageView1"/> </DockPanel> </Grid>
- Now to set up the menu items. We will be using the default command for Open, but otherwise make use of the custom RoutedEvents created and bound in steps 1 and 2. We will create top-level MenuItems for 'File', 'View', and 'Processing'. We will nest 'Open' and 'Exit' inside 'File', 'Zoom In' and Out within 'Display', and 'Rotate 90', 180, and 270 within 'Processing'. The xaml written should look something like this:
XAML Copy Code<Menu DockPanel.Dock="Top" Height="22" Name="menu1"> <MenuItem Name="mnuFile" Header="_File"> <MenuItem Name="mnuFileOpen" Header="_Open" Command="Open"/> <MenuItem Name="mnuFileExit" Header="E_xit" Command="{x:Static custom:Window1.ExitCmd}"/> </MenuItem> <MenuItem Name="mnuView" Header="_View"> <MenuItem Name="mnuViewZoomIn" Header="Zoom _In" Command="{x:Static custom:Window1.ZoomInCmd}"/> <MenuItem Name="mnuViewZoomOut" Header="Zoom _Out" Command="{x:Static custom:Window1.ZoomOutCmd}"/> </MenuItem> <MenuItem Name="mnuProcessing" Header="_Processing"> <MenuItem Name="mnuProcessingRot90" Header="Rotate 90" Command="{x:Static custom:Window1.Rotate90Cmd}"/> <MenuItem Name="mnuProcessingRot180" Header="Rotate 180" Command="{x:Static custom:Window1.Rotate180Cmd}"/> <MenuItem Name="mnuProcessingRot270" Header="Rotate 270" Command="{x:Static custom:Window1.Rotate270Cmd}"/> </MenuItem> </Menu>
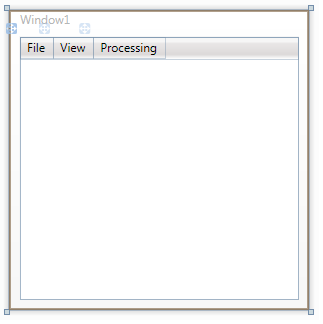
You should now see something like this in your Design panel: