
ImageGear .NET - Updated
The HTML5 Viewer Sample
The ASP.NET samples that ship with ImageGear .NET cannot be installed unless your system is configured for IIS prior to running the installer.
If your system has not already been properly configured for IIS, follow the steps under New to ASP.NET?
Upon successful installation on a machine pre-configured for IIS, the sample project should be located at
ImageGear.NET v24/Samples/Source Code/ASP.NET/CSharp/HTML5Viewer/
There are multiple ways to launch the viewer. Use the method that suits you best.
You can launch the HTML5 Viewer directly from IIS with the following steps:
Within the ImageGear .NET installation directory, there are two shortcuts which open the HTML5 Viewer page in your default web browser:
You can launch the HTML5 Viewer from Visual Studio 2010 or Visual Studio 2015 solutions installed in the Samples directory:
ImageGear.NET v24/Samples/Source Code/CSharp/HTML5Viewer
These are the steps when using Visual Studio 2015.
Open the HTML5 Viewer in your web browser. The sample viewer is divided into the Document Selection, Document Navigation, and Document Viewer sections:
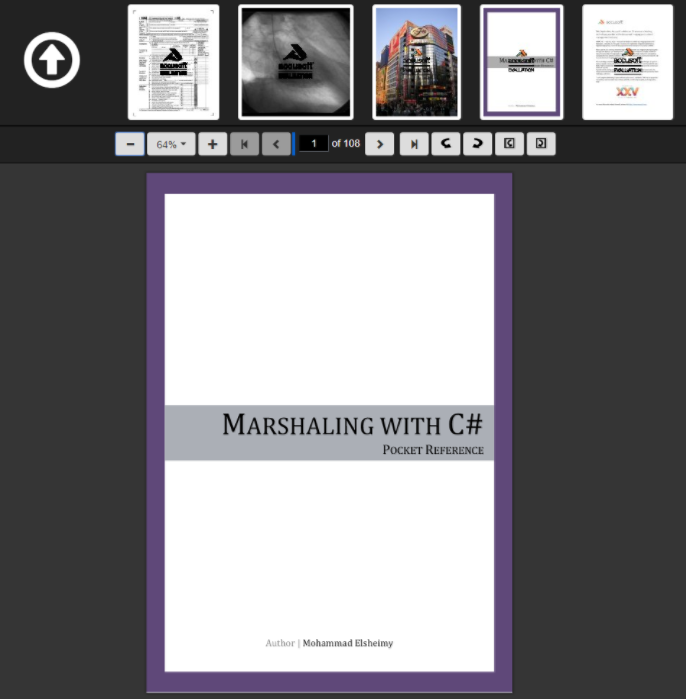
At the top of the page is a thumbnail list of the documents. Click a thumbnail to display the document in the viewer and navigate through it.
By default, these documents exist locally in the host website at "~/Documents". You can change this location in the Web.config file or by using the Web.Config Editor.
The thumbnail images are present locally within the Images subfolder:
ImageGear.NET v24/Samples/Source Code/CSharp/HTML5Viewer/Documents
The thumbnail images are created in the thumbnail list in the ‘sample.js’ file found in:
ImageGear.NET v24/Samples/Source Code/CSharp/HTML5Viewer/Assets/HTML5Viewer/js
In addition to the default sample files provided in the Documents folder, you can upload custom files.
Below the thumbnail list is a toolbar of buttons to navigate and orient the loaded document.

The above buttons control the current zoom level of the document. The larger the value, the closer the zoom, and thus the larger the document is displayed.

In a multi-page document, the above buttons may be used to navigate to the first/last page, previous/next page, or to a specific page number.

The above buttons apply a rotation to the entire document.

The above buttons apply a rotation to the currently viewed page.
The implementation of the above buttons can be found in the various JavaScript files found under:
ImageGear.NET v24/Samples/Source Code/CSharp/HTML5Viewer/Assets/Viewer/js
Below the navigation toolbar is the document viewer displaying the loaded document.
If the document consists of only a single page, then it will be displayed in its entirety. However, if the document consists of multiple pages you may scroll to view the other pages.
The viewer is responsive and automatically adjusts the page according to screen size changes and is mobile-friendly.